Pololu Blog »
Pololu Blog (Page 30)
Welcome to the Pololu Blog, where we provide updates about what we and our customers are doing and thinking about. This blog used to be Pololu president Jan Malášek’s Engage Your Brain blog; you can view just those posts here.
Popular tags: community projects new products raspberry pi arduino more…
FEETECH Ultra-High-Torque, High-Voltage Digital Giant Servo FT5335M
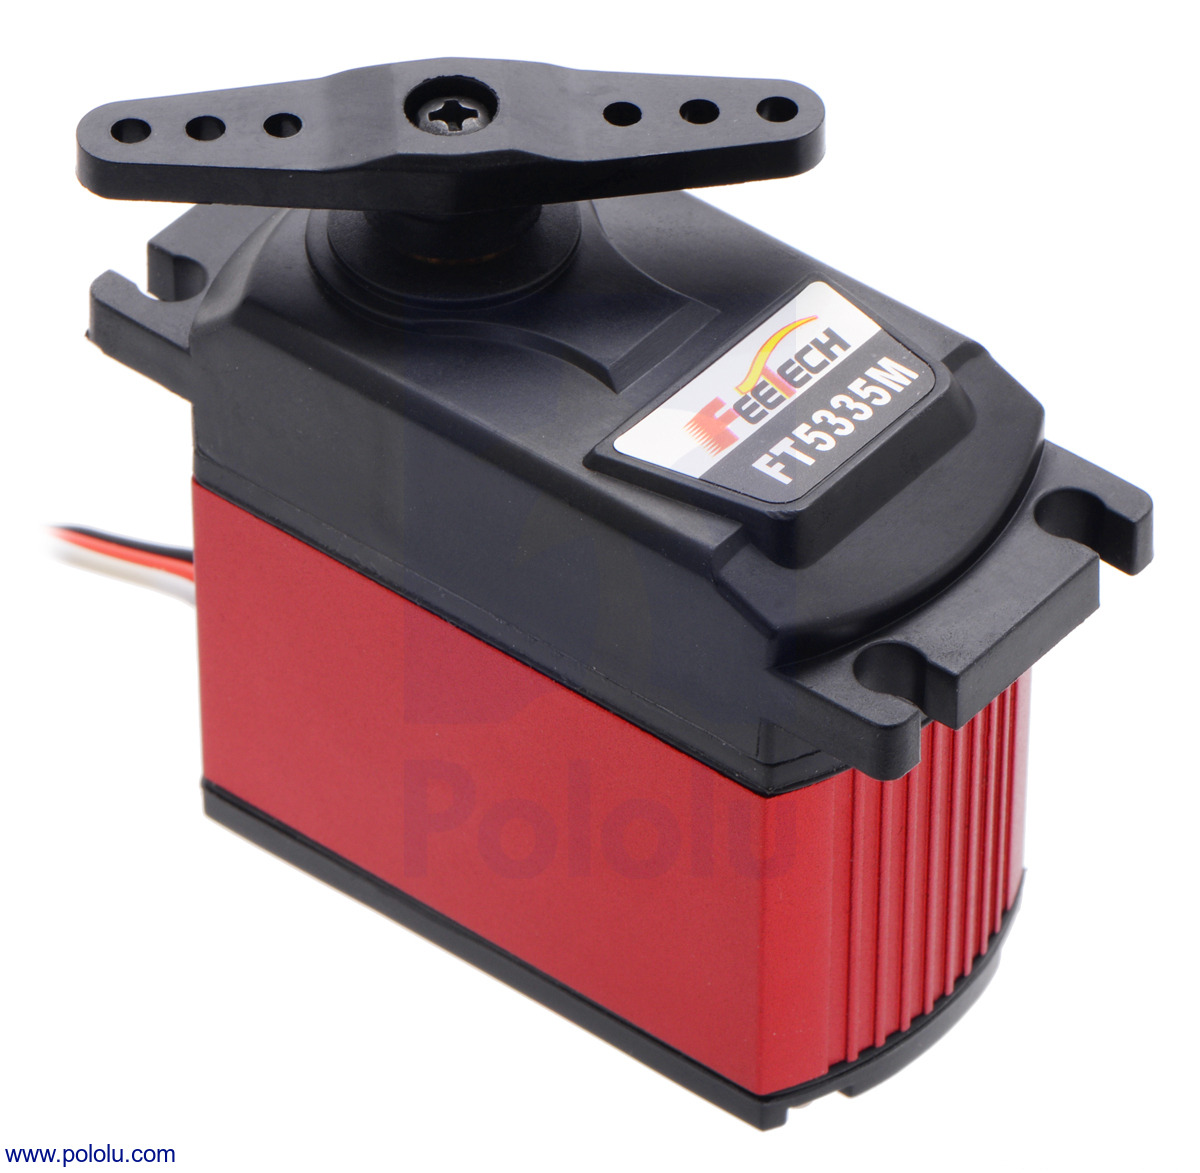 |
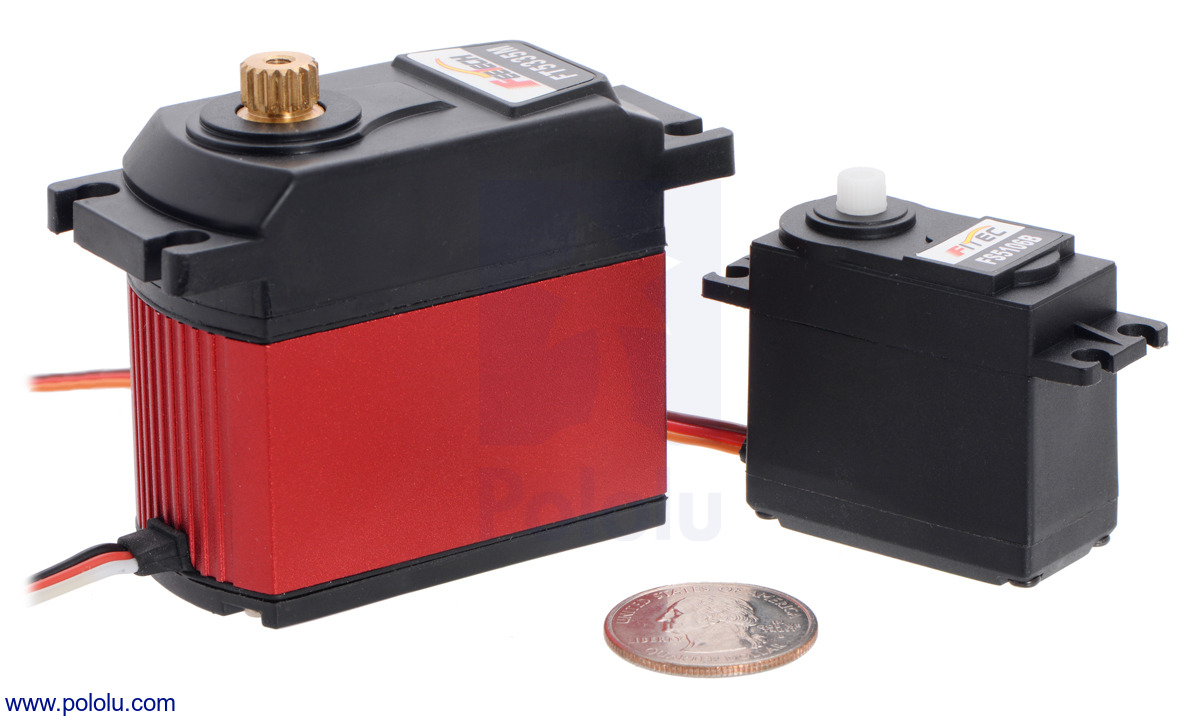
We added the FEETECH Ultra-High-Torque, High-Voltage Digital Giant Servo FT5335M to our expanding RC servo selection. This giant-scale digital servo can deliver twice the torque of our strongest standard-size servo, offering up to 550 oz-in at 7.4V or 480 oz-in at 6 V. This torque requires significant power: the FT5335M can draw bursts of current over 9 A at 7.4 V, and unlike typical hobby servos, has an operating voltage range of 6 V to 7.4 V.
|
|
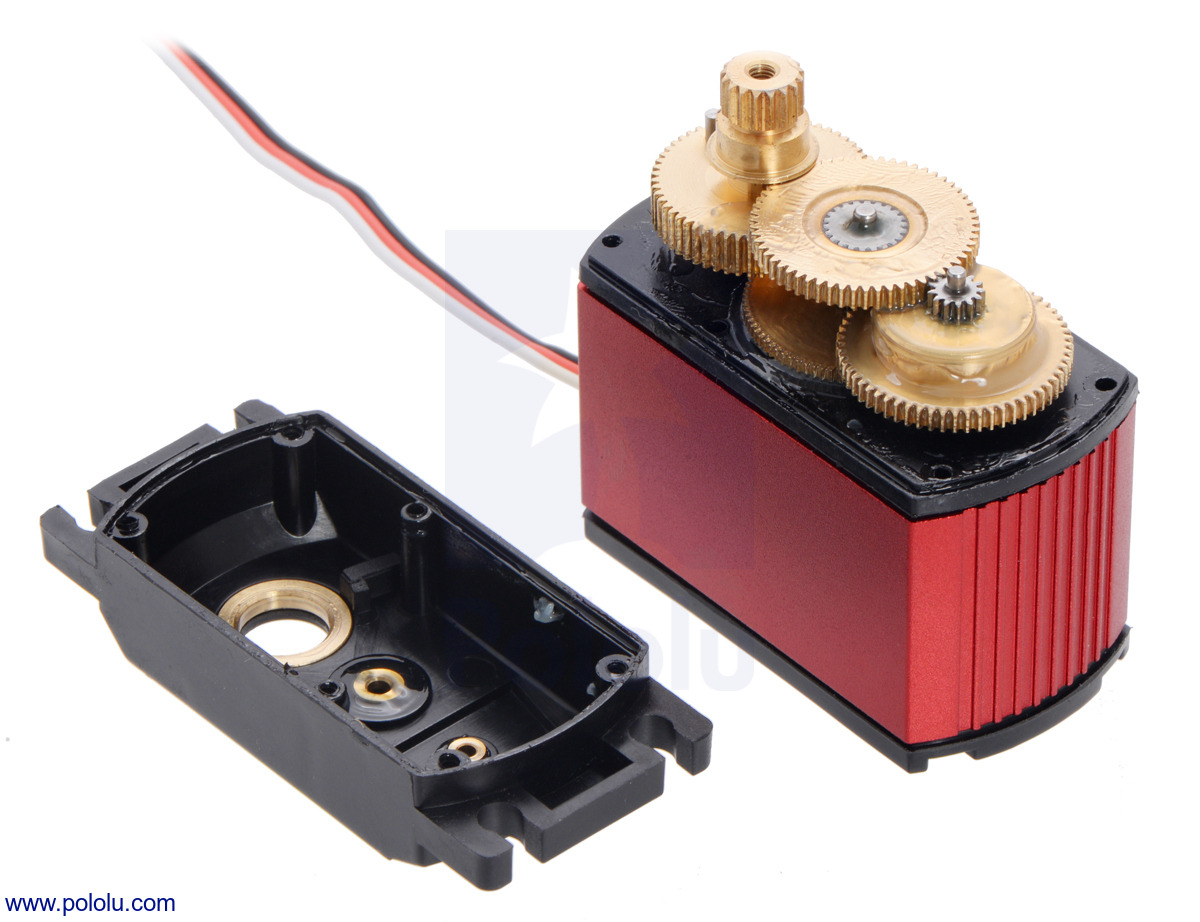
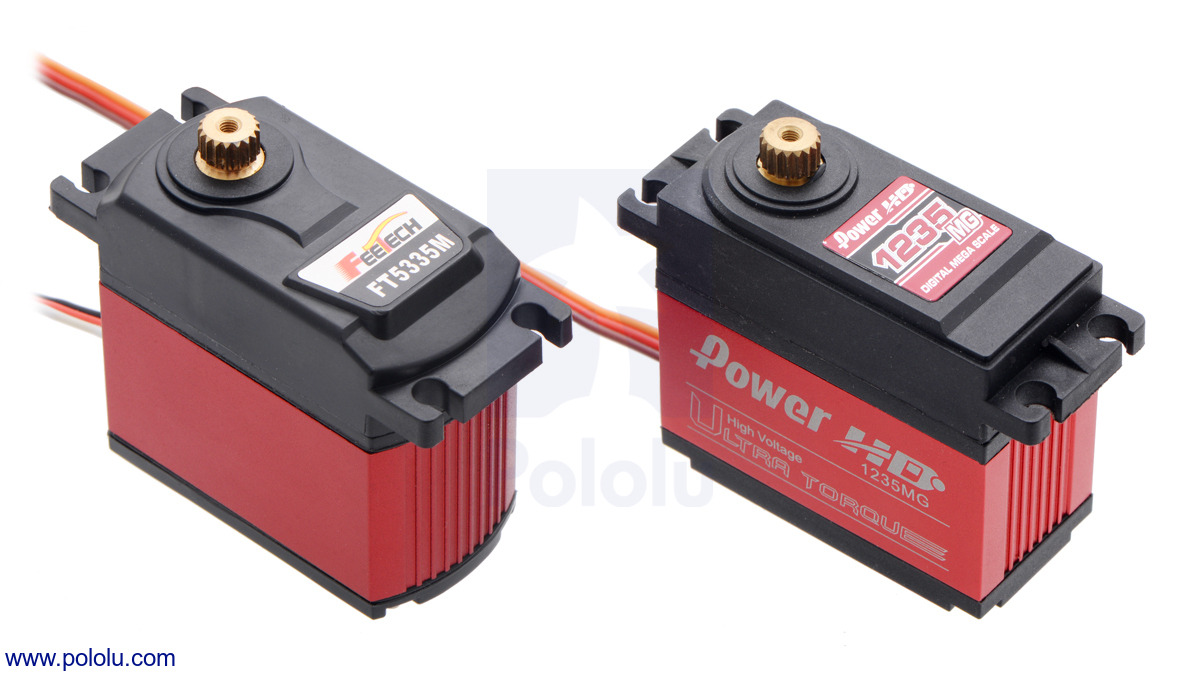
This servo is a lower-cost alternative to the very similar 1235MG from Power HD. The two servos are approximately the same size, though the mounting hole spacing differs between the two, and they have almost identical performance specifications. The output shaft of the 1235MG is supported by two ball bearings while the output shaft of the FT5335M is supported by bushings. The picture below shows both the FT5335M and the 1235MG side-by-side:
 |
Expect more new FEETECH servos in the coming weeks!
Related products


Aluminum standoff for Raspberry Pi
 |
We are now carrying the Aluminum Standoff for Raspberry Pi: 11mm Length, 4mm M2.5 Thread, M-F. The 11 mm body length is just right for mounting expansion PCBs or HATs with standard-size female headers on a Raspberry Pi. The male M2.5 threads extend another 4 mm past the standoff body, and the female M2.5 threads extend at least 6.35 mm into the body. We carry M2.5 nuts and 6 mm M2.5 screws separately.
Two of these standoffs are needed to mount a Raspberry Pi on a Balboa 32U4 robot:
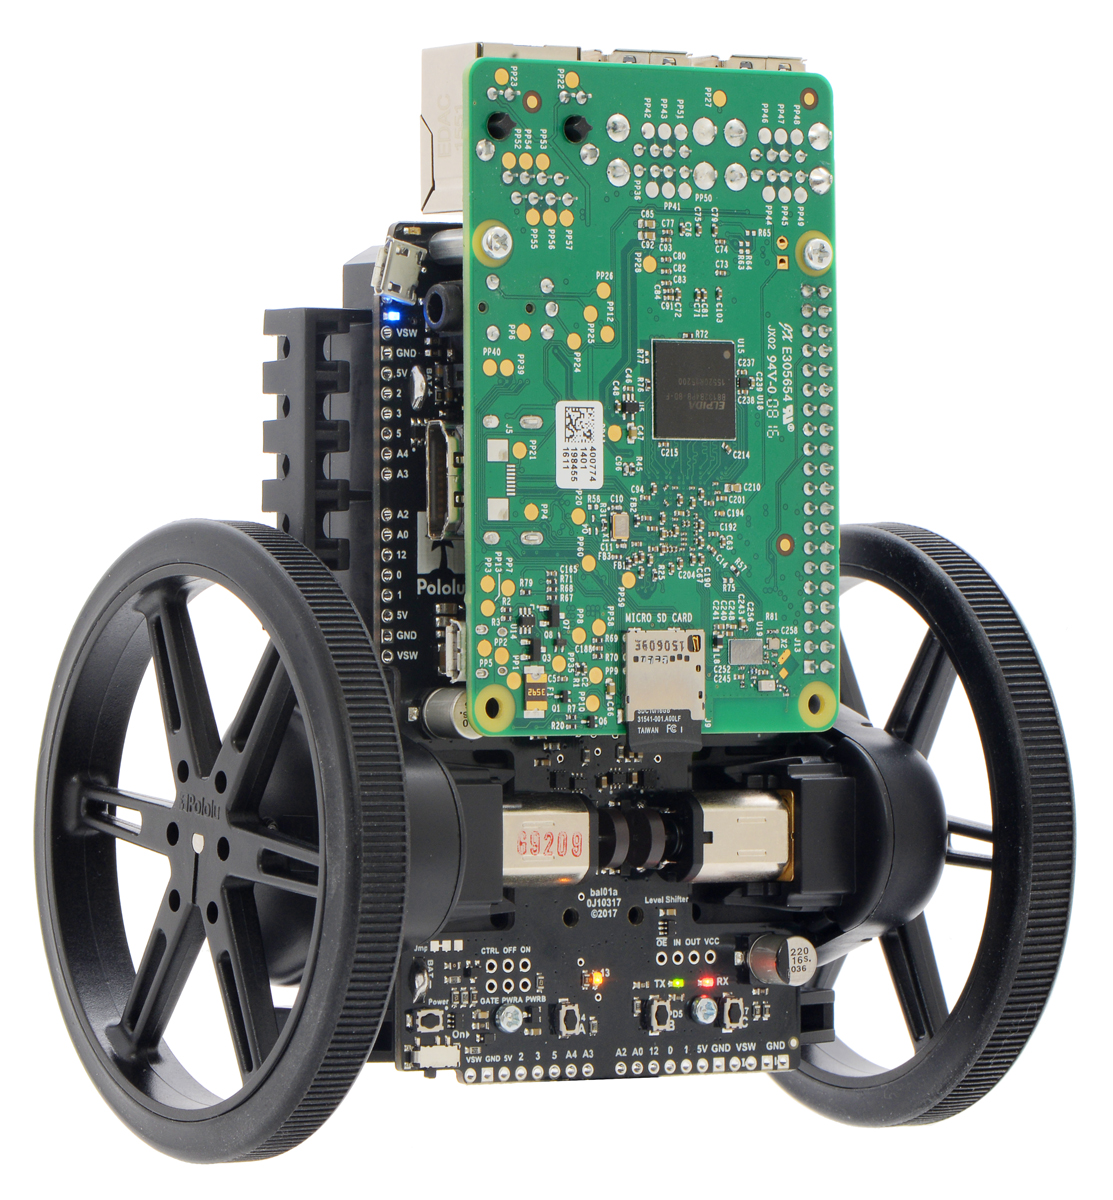 |
Balboa 32U4 Balancing Robot with 80×10mm wheels and a Raspberry Pi 3 Model B. |
|---|
We also carry a 11 mm standoff with longer, 6mm threads. (We do not recommend these for the Balboa because the threads hit the robot chassis.)
Related products


Romi and Raspberry Pi robot
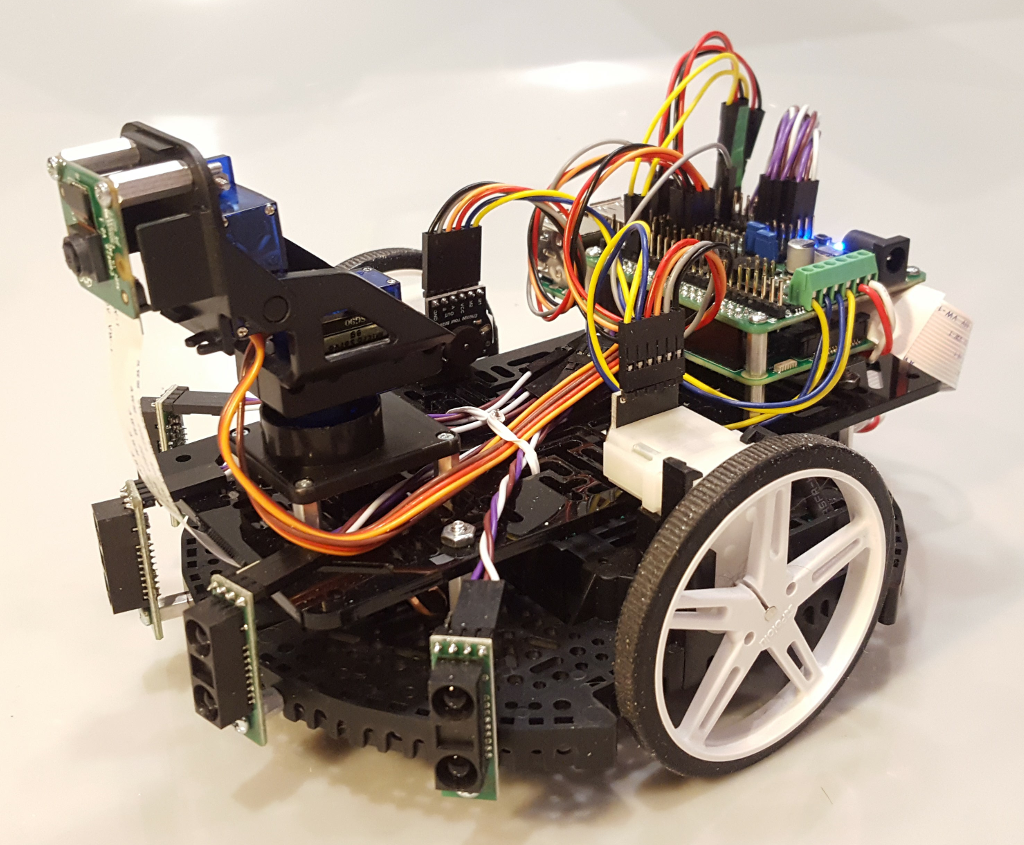
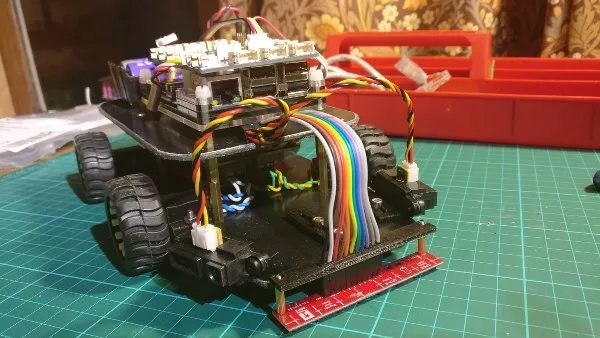
Forum user DrGFreeman has been busy making robots. I wrote earlier about his Custom Mini Sumo robot; now here is his Romi Chassis and Raspberry Pi robot. It solves mazes using a webcam to do line tracking and intersection identification. This robot is a great example of how a variety of Pololu robot parts can combine into an attractive and functional robot. A black Romi chassis kit provides the base for the robot, to which DrGFreeman added a encoder pair kit and ball caster kit. An A-Star 32U4 Robot Controller SV with Raspberry Pi Bridge drives the motors and monitors four Sharp GP2Y0A60SZLF analog distance sensors and the Romi encoders. The robot controller and the Raspberry Pi communicate via I²C and are elevated above the chassis on a narrow Pololu RP5/Rover 5 expansion plate.
DrGFreeman is also working on a mast for three VL53L0X time-of-flight distance sensor carriers that he plans to add for simultaneous localization and mapping (SLAM).
 |
For more videos, pictures, and details, see the forum thread. The robot’s Raspberry Pi (Python) and Arduino code is available on GitHub.
Related products


New 5V step-up/step-down voltage regulator S9V11F5
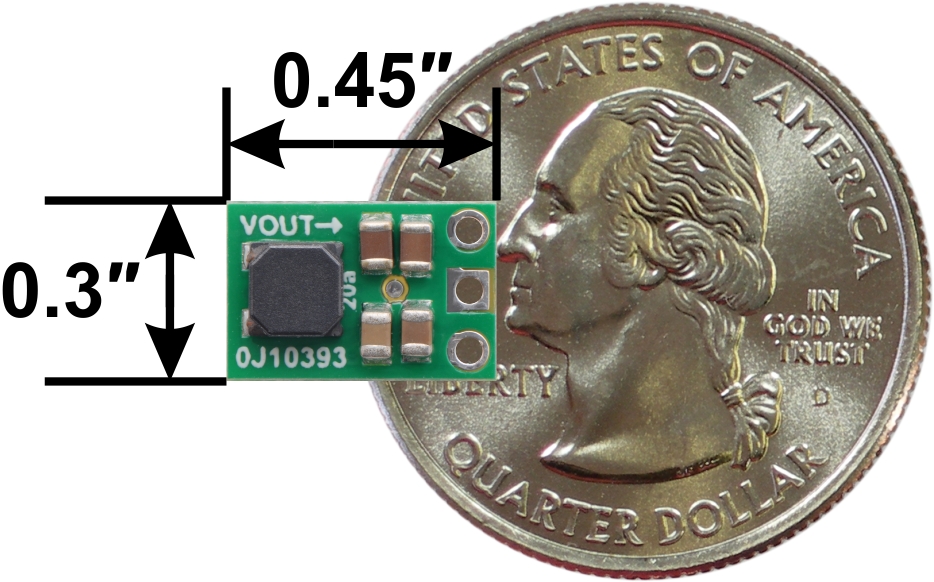 |
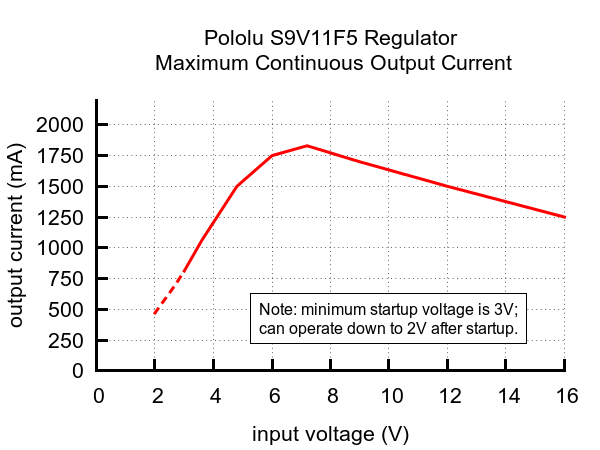
Our newest step-up/step-down voltage regulator, the S9V11F5, takes input voltages between 2 V and 16 V and increases or decreases that voltage as necessary to produce a fixed 5 V output with a typical efficiency of over 90%. (Note that it requires a minimum of 3 V to start up, but it can operate down to 2 V once it is running.) It can temporarily deliver peaks of around 2 A, and the maximum continuous output current depends on the input voltage as shown in the graph below:
 |
The ability to raise or lower the input voltage makes this regulator especially well suited for battery-powered applications where the nominal battery voltage is close 5 V, such as when using four NiMH cells, since the battery voltage transitions from above 5V to below as the battery discharges. The wide input voltage range is also great for applications where you want a lot of flexibility in power supply choice or for systems powered by alternative energy sources like solar or wind, where the output voltage can vary a lot.
With a wider input voltage range and its ability to deliver more current, the S9V11F5 is a higher-performance alternative to our popular S7V7F5 buck-boost regulator, all while being even smaller in size thanks to its double-sided assembly.
For more information on this regulator, visit the S9V11F5 product page, and for other regulator options, you can take a look at our full selection of step-up/step-down regulators, step-up voltage regulators, and step-down voltage regulators.
Related products


Raspberry Pi, A-Star 32U4, and Wild Thumper robot
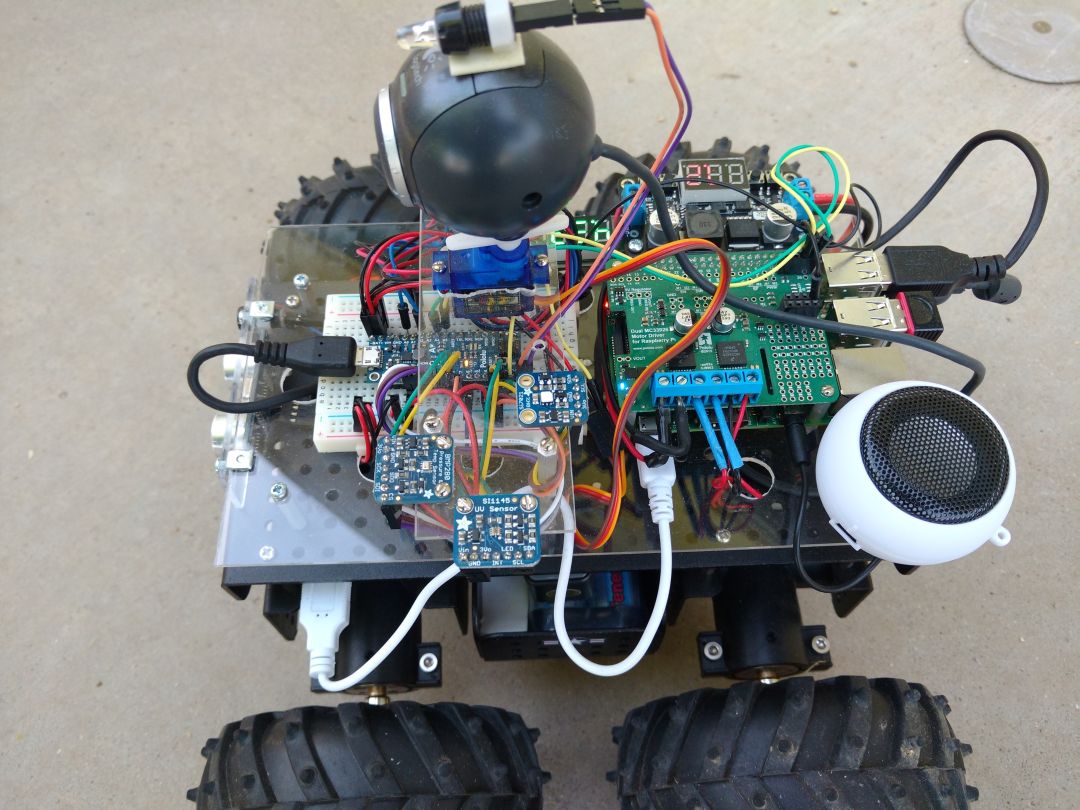 |
Forum user coyotlgw made this teleoperated Raspberry Pi robot. The robot is controlled remotely over SSH via the Raspberry Pi’s WiFi connection, and snapshots of the webcam feed are available via a Motion web server. The motors of the Dagu Wild Thumper 4WD chassis are driven by a Pololu Dual MC33926 Motor Driver for Raspberry Pi connected to a Raspberry Pi 2 Model B. A Pololu A-Star 32U4 Mini LV interfaces with and records readings from temperature, pressure, humidity, and UV/IR/visible light sensors.
It wasn’t available when they built the robot, but coyotlgw points out the A-Star 32U4 robot controller with Raspberry Pi bridge is an option to consider for similar builds. This robot connects the Raspberry Pi and A-Star Mini with USB; the robot controller would make I²C communication easier. You would still need external motor drivers, because the robot controller’s MAX14870 is not appropriate for the Wild Thumper motors.
For more pictures, details, and a discussion of the issues encountered during the build, see the forum post.
Related products


How to make a Balboa robot balance, part 2: inertial sensors
This is the second post in a series about how to make a Balboa 32U4 robot balance. Last week I talked about selecting mechanical components. In this post I will cover the inertial sensors included on the Balboa’s control board and how to use them in your code.
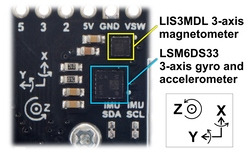
The key to Balboa’s balancing ability is the built-in ST LSM6DS33 IMU chip, which combines a 3D gyroscope and a 3D accelerometer. The Balboa also includes an ST LIS3MDL 3-axis magnetometer. Both sensors are connected to the AVR via I²C, giving it access to a total of nine sensor channels. These nine channels can be used in software to make an AHRS (attitude and heading reference system), a system that gives the robot a sense of its orientation in three dimensions. AHRS software is particularly important in aviation/drone applications, but for basic balancing, you don’t need anything that complicated. In fact, a single gyro channel is enough to determine the robot’s angle of rotation relative to vertical. The gyroscope’s y-axis channel measures the Balboa’s forward/backward rate of rotation; that is the channel we will be looking at here. Continued…
Beefy arms for Balboa balancing robot
 |
If you’re following Paul’s blog series about getting your Balboa robot balancing, you’ll probably want something to protect it when it falls. When I was working with my Balboa, I got a set of prototype arms that our mechanical engineers have been developing, but I felt they were missing a little something. So instead, I took a Beefy Arm Starter Kit from Thingiverse and used OpenSCAD to add adjustable mounting hubs to the arms. I printed two sets of arms with our RigidBot 3D printer and mounted them to the side rails on the Balboa chassis using 25 mm M3 screws and M3 nuts. They’ve been great for keeping obstacles and the floor at arm’s length from my electronics while I drove the robot around with an RC transmitter or through a Raspberry Pi web interface (example code coming soon!).
You can find these beefy arms for the Balboa on Thingiverse if you want to try 3D printing your own. The OpenSCAD script is also available there in case you want to customize your arms.
Related products
Bionic hand
Customer Elise Pham made a bionic hand: a two-fingered gripper triggered with biofeedback. A Pololu Maestro servo controller monitors the trigger source and signals the servo to close the gripper. In this video, she uses a mechanical sensor for biofeedback, and she is exploring using a MyoWare Muscle Sensor as a future enhancement. Her earlier video shows using a MyoWare Muscle Sensor to control a servo like in our demonstration video.
April 10 update: Elise’s project won 1st Award for the 2017 Synopsys Science Fair and was also nominated to advance and compete in the 2017 National Broadcom MASTERS. Additionally, Elise was selected by the Santa Clara County Office of Education to participate in Steve Wozniak’s Silicon Valley Comic Con Science Fair.


Raspberry Pi line following with QTR-8RC and WiringPi
Customer Thomas Broughton made a line follower robot controlled by a Raspberry Pi that directly connects to a Pololu QTR-8RC reflectance sensor array. A Raspberry Pi is not typically good for a timing-sensitive application because it runs a regular computer operating system, so it’s nice to see Thomas was able to get it to reliably read the sensor array. The robot also uses four 42×19mm pololu wheels, a Pololu 5V Step-Up/Step-Down Voltage Regulator S18V20F5, and two Sharp distance sensors.
 |
His Python code and more discussion are in his blog post.
Related products


Packaging changes for better electrostatic discharge protection
Most of the products we manufacture are small electronics subassemblies, which we have been packaging in these pink antistatic bags that are probably familiar to everyone who has worked with electronics:
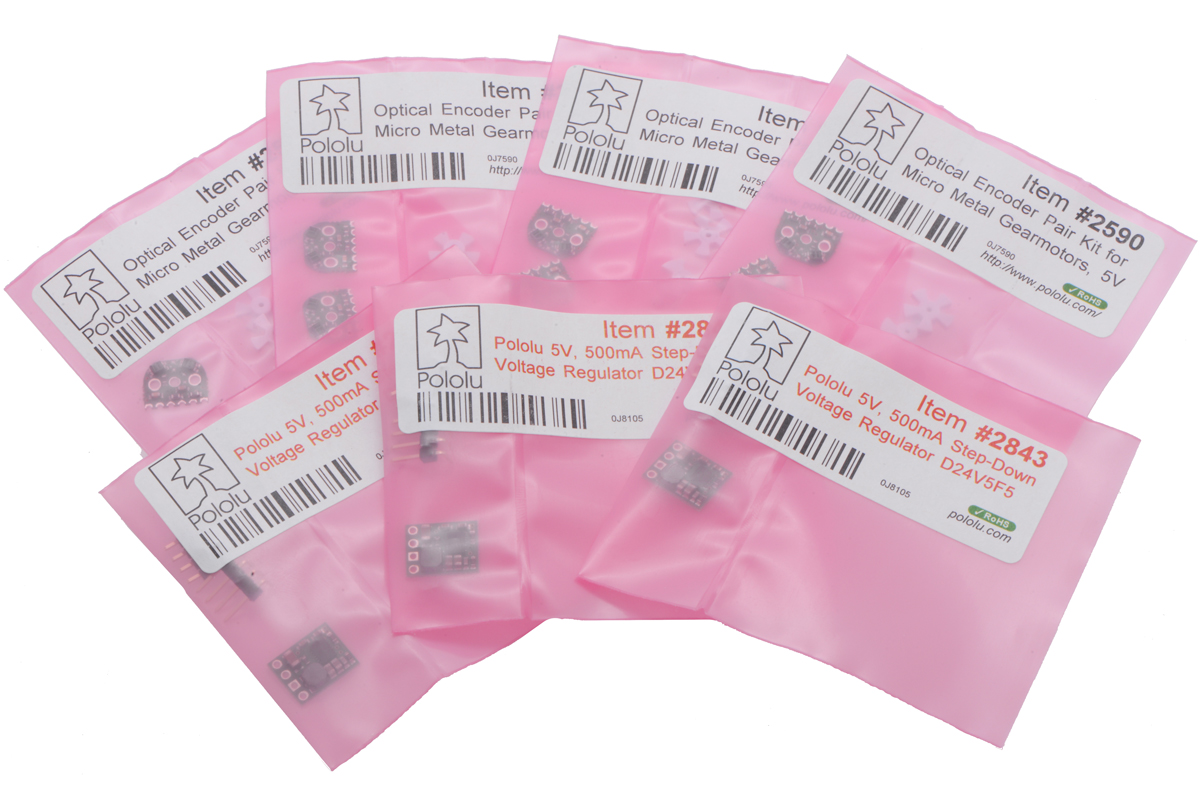 |
These bags are supposed to help prevent charge buildup and therefore help prevent the sensitive components inside from getting damaged just from the bags being shuffled around. But, if you charge yourself up and then grab the bag, you can still zap the electronics inside through the bag.
This year, we began transitioning our packaging to metalized shielding bags, like this:
 |
These bags have the charge buildup prevention of the pink bags but also have a metal layer that prevent the spark from getting from your finger to the electronics parts in the bag. Most bags I have seen have some plastic coating outside the metal layer so that you don’t have zero resistance along the surface of the bag, but I have heard of people shorting things out by powering them up while sitting on some types of metallic bags.
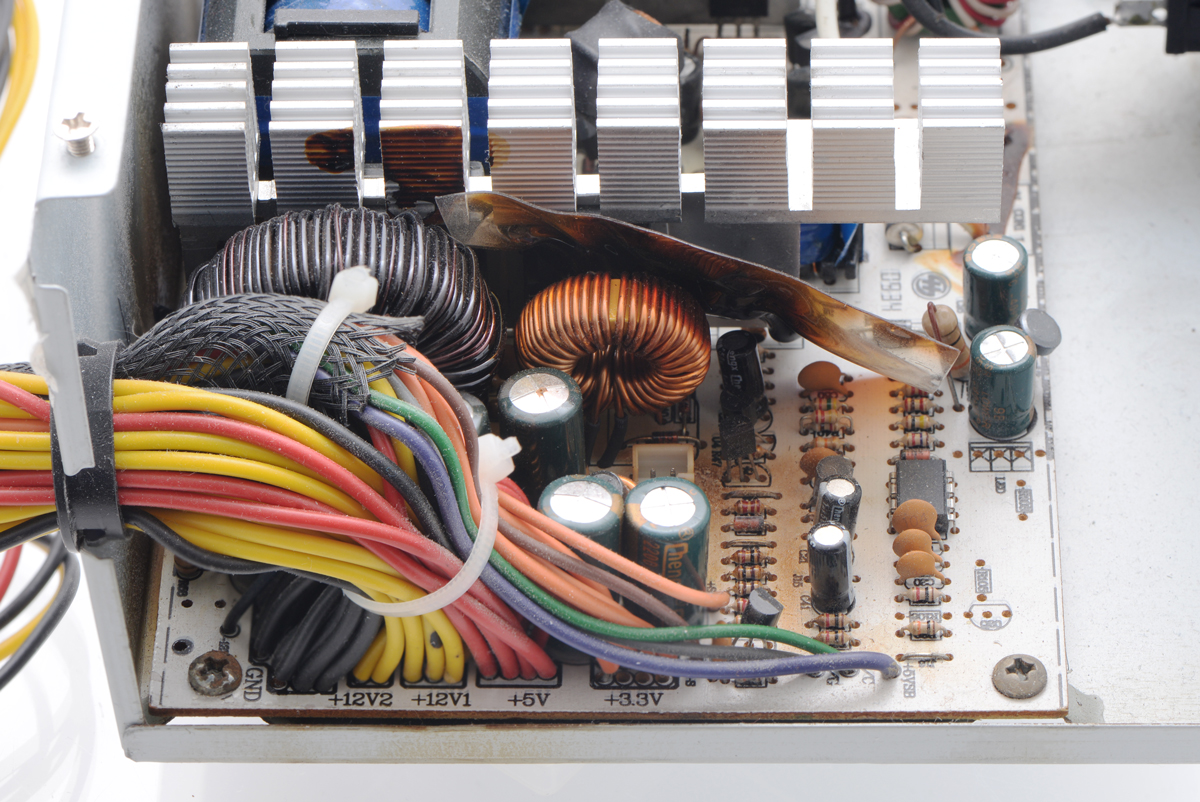 |
Did a static discharge into a USB port cause this power supply to go up in smoke? |
|---|
I once got a huge static shock when I plugged a flash drive into my USB port, and right after that, a bunch of sparks and smoke came out of my computer’s power supply. I’m pretty sure that wasn’t a coincidence, but I still can’t be sure it was a case of electrostatic discharge (ESD) destroying my computer. And usually, ESD damage is much more subtle and basically impossible for us to confirm. So, changing the packaging is one of those things where it will be very difficult to tell if it’s really doing anything. But we go through a lot of effort to inspect and test each item we make so that we can be confident it worked when we made it, so this packaging change should give us still more confidence that the part is in good condition when you receive it. It will take a while before all of our products get changed over, so don’t be shocked if your order arrives with a mix of packaging types.


Home | Forum | Blog | Support | Ordering Information | Lists | Distributors | BIG Order Form | About | Contact
© 2001–2025 Pololu Corporation


