Pololu Blog »
Pololu Blog (Page 33)
Welcome to the Pololu Blog, where we provide updates about what we and our customers are doing and thinking about. This blog used to be Pololu president Jan Malášek’s Engage Your Brain blog; you can view just those posts here.
Popular tags: community projects new products raspberry pi arduino more…
Rainbow baby Eve
It’s been more than two years since my last post. I thought I would post an update a year ago, when Eve was born, but that didn’t go very well, and the uncertainty about how things would turn out with her made it difficult to rally around her birth as some celebratory point from which to start moving on. I feel at once as if I have lost two years of my life, making no progress, and yet that my life has completely transformed in that time. But I know things have gotten better because I am usually free of the sadness and fear that still filled me a year ago, around Dez’s first birthday. Continued…
Custom Mini Sumo robot
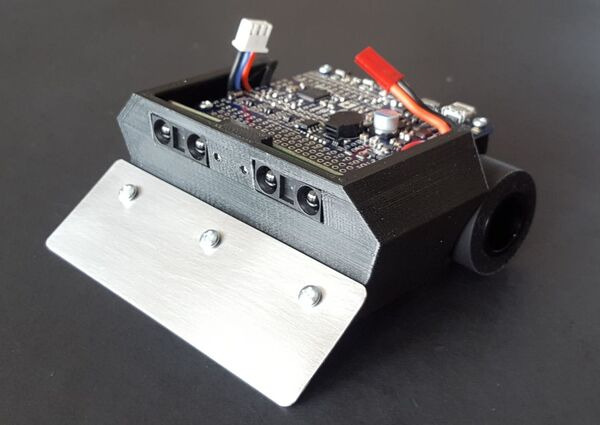
Forum user DrGFreeman has been posting about his custom Mini Sumo robot. He designed the chassis in CAD and 3D printed it; the model is available on Thingiverse. An A-Star 32U4 robot controller reads the QTR-1RC reflectance and Sharp GP2Y0A60SZLF analog distance sensors while powering the motors with its dual onboard motor drivers. DrGFreeman plans to build two copies of the robot: one with 75:1 micro metal gearmotors and one with 50:1 micro metal gearmotors so he can pit them against each other and figure out whether more speed or torque does better. This video shows the behavior he’s programmed so far:
The whole build log along with more pictures and discussion is in the forum post.
Continuous testing for Arduino libraries using PlatformIO and Travis CI
At Pololu we maintain around thirty open-source Arduino libraries, and we keep adding new ones whenever we make a new carrier board or Arduino shield. People typically use these libraries with Arduino-compatible boards, such as our A-Star programmable controllers or Arduinos. We also have Arduino libraries for our user-programmable robot kits like the Romi 32U4 robot, Balboa 32U4 robot and Zumo 32U4 robot.
Sometimes we need to make changes to a lot of libraries at once, like when we wanted to add all of our libraries to the Arduino Library Manager. For us, library manager compatibility requires changing the directory layout, but doesn’t require changing the library or example code. With this many libraries to change, there is a risk of potentially breaking a working library by misspelling or moving a file incorrectly. Fortunately, customer Walt Sorensen introduced us to PlatformIO and Travis CI, which let us test compiling Arduino libraries every time they are pushed to GitHub.
Setting this up is easy enough that we encourage you to do it on your Arduino libraries! First, sign up for Travis CI (a testing service, free for open-source projects) and enable it for the GitHub repository you want to test. Now, every time you push new code to your repository, Travis CI will try to see if there is a .travis.yml file in the top level with instructions for running tests.
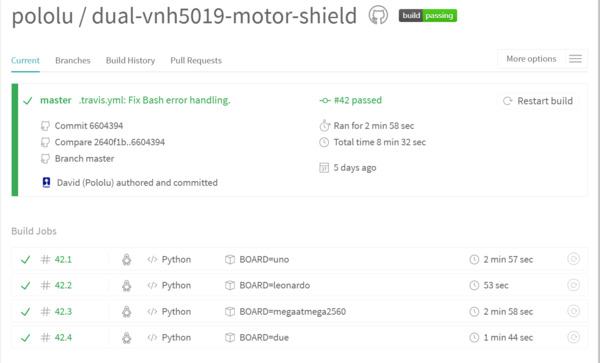
If your project has the structure of an Arduino Library Manager project and you have at least one example sketch, our short .travis.yml file should work. This file instructs Travis CI to compile the library and its examples against all the supported Arduino boards (specified in the “env” list of the .travis.yml file). The results can be seen on Travis CI’s website (for example, here is Pololu’s Travis CI page). The Arduino compiler is provided by PlatformIO, an open source ecosystem for internet-of-things development, which supports a long list of Arduino-compatible boards.
You can share your Travis CI build status by embedding a badge into your GitHub readme page:
 |
Of course, for most library changes, we still have to test on actual hardware, but now every time we update our libraries (or a contributor submits a pull request), we can be sure they will at least compile on every supported board.
Bohlebots win West German Robocup soccer 2017
Congratulations to the Bohlebots teams for winning all four open categories of the West German Robocup soccer 2017! Robocup soccer is a competition where two autonomous robots on each side play soccer in a walled arena. We covered them winning multiple times in the past on this blog. Their robots use Pololu 20D mm metal gearmotors and VNH5019 motor driver carriers.
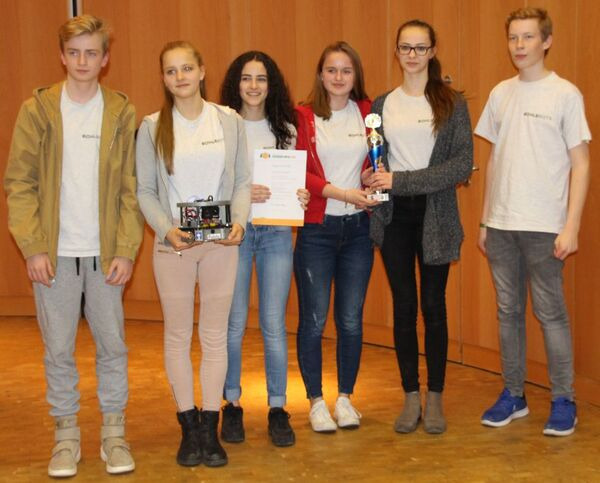 |
Bohlebots junior team winning West German Robocup 2017 soccer open 1v1. |
|---|
ZumoMotors library for Netduino
|
|
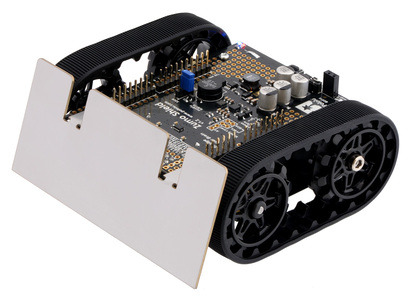
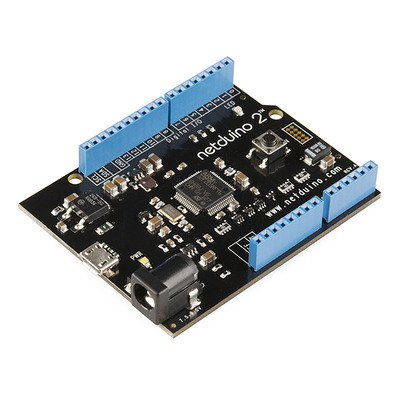
The Pololu Zumo Robot for Arduino is designed to be essentially a shield for the A-Star 32U4 Prime, Arduino Uno or Arduino Leonardo. Other Arduino boards that conform to the Arduino interface might work too. For example, customer Omar Elabd ported the ZumoMotors library to his Netduino 2! The Netduino is a 32-bit microcontroller board similar to Arduino that runs the .NET Micro Framework instead of using the Arduino environment.
He posted his code on GitHub and announced it on his blog. He is thinking of expanding his library to include ZumoBuzzer and ZumoReflectanceSensorArray libraries. The library is written in C#, which is exciting since I’m a C# programmer myself! If others would like to expand on these libraries, Omar is open to code contributions.
Ball-balancing robot
One of our customers, Jochen Alt, built a robot that balances on top of a ball by driving around on it with omni-wheels. Even better, he very thoroughly documented the project on GitHub! The robot uses a number of parts from Pololu including 37D mm metal gearmotors with encoders, stamped aluminum L-brackets for 37D mm metal gearmotors, and three VNH2SP30 motor driver carriers.
A good overview of the robot and the control system are on his Hackaday project page.
New distributors in Asia and Australia
Last week, I wrote about our new distributors in the Americas. We’ve also added three new distributors in Asia and Australia since our last round of new distributor introductions:
 |
ToolParts is an online store in Seoul, South Korea, bringing our total number of distributors in Korea to five! They carry a selection of Pololu products including voltage regulators, motor drivers, and sensors.
 |
Tronixlabs Australia is an online store located near Melbourne. They offer $5 flat rate shipping for all of Australia, and they do same-day shipping (a service we are also proud to offer at Pololu). They join our six other Australian distributors. Visit their Pololu products category to see what they carry.
 |
See the full list of over 200 distributors to find one in your area.
Cedarville University Solar Boat Team
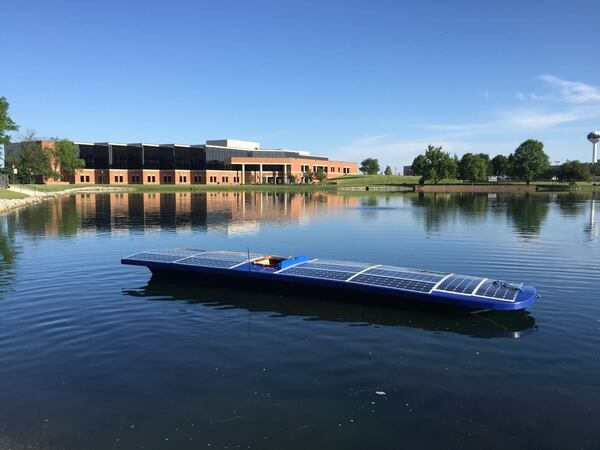
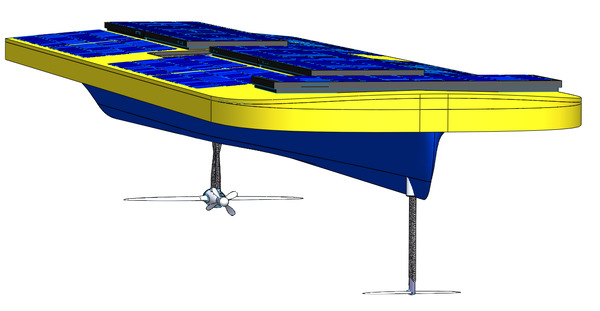
A technical paper about hydrofoil design by members of the Cedarville University Solar Boat Team won a $1,000 Honorable Mention in the 2016 Mandles Prize for Hydrofoil Excellence from the International Hydrofoil Society. The boat they’ve been building uses a few Pololu Jrk 12v12 USB motor controllers to drive linear actuators that control the hydrofoil angle of attack which controls the boat’s flight. (Yes, flight: a hydrofoil boat uses wing-like hydrofoils that lift up the hull as they “fly” through the water.) They plan to enter this boat in the “Top Class” of the Dutch Solar Challenge. The “Top Class” provides entrants the opportunity to design every aspect of their solar-powered boat, which they will use in a series of sprint and endurance races over the course of five days. They also plan on racing in the Solar1 Solar Boat World Championship at the Yacht Club de Monaco.
 |
Science Olympiad 2017 robot arm competition
Congratulations to Matthew Siracusa and William Rule who placed first in the Robot Arm competition of the Science Olympiad SE PA Regional Tournament last Wednesday! They used our custom laser cutting service to cut the base and structural components of the robot arm out of black ABS. We wrote about another one of Matthew’s projects on this blog when he made a 6-string banjo (that has a frame we also laser cut) as part of the 2014 Science Olympiad.
The Science Olympiad website has more information about the Robot Arm competition.
Steel custom laser cutting available
 |
We’ve been offering quick-turn custom laser cutting service ever since “we” were just Candice and Jan operating a tabletop Epilog out of their home. Since then we’ve cut a wide assortment of customer designs including jewelry, engraved control panels, robot chassis, Christmas ornaments, and wedding invitations.
We started out mostly cutting acrylic, gradually moving into cutting a wider variety of plastics and wood. All along we’ve been improving our processes and increasing our capabilities by buying machines with bigger beds, better control systems, and more power. Without announcing it officially, we’ve been cutting metal for customers and ourselves over the past few years. For example, we cut our Basic Sumo Blade for the Zumo Chassis and the SMT stencils for our in-house electronics assembly. We’ve been refining our metal cutting processes and finding the best cut settings to minimize the chance of burring and dross, so most parts come out relatively clean and smooth to the touch.
The process quality has gotten to the level where we are comfortable announcing that metal laser cutting is generally available to customers!
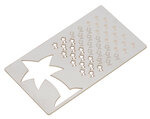
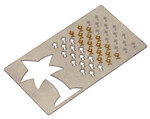
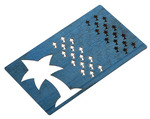
You can see in the pictures above that laser-cut steel parts have a slight discoloration along the laser-cut edges caused by the chemical reaction that takes place when cutting. Depending on the steel type and whether the cuts are through the material, vector-etched line art, or raster-engraved filled-in areas, the discoloration is different (some tend to be brownish while others are a dark gray). We do not guarantee that parts will be free of blemishes; we ship the parts without any post processing, and we currently do not offer additional services such as deburring, tumbling, or bending.
As stocked materials (shown on our quote request page), we carry #304-2B stainless steel in 0.024″, 0.030″, 0.036″, 0.048″, 0.060", and mild steel in 0.030″ and 0.060″. We can arrange to use material you ship to us, but keep in mind that steel is the only metal we can cut. We cannot cut copper, brass, titanium, aluminum, or precious metals.
To get started on having your laser-cut steel parts cut, submit a quote request here.

