Pololu Blog »
Pololu Blog (Page 60)
Welcome to the Pololu Blog, where we provide updates about what we and our customers are doing and thinking about. This blog used to be Pololu president Jan Malášek’s Engage Your Brain blog; you can view just those posts here.
Popular tags: community projects new products raspberry pi arduino more…
New product: AltIMU-10 v4 gyro, accelerometer, compass, and altimeter
 |
Two weeks ago, we announced a big price reduction of our MEMS-based sensors and explained a little about why we release new versions of these boards so frequently. If you looked closely at the diagram showing the evolution of our ST MEMS sensor boards, you might have noticed that we’ve used each IC on a carrier board for that chip by itself, as well as on an IMU board combined with other sensors, with one exception: the LPS25H pressure sensor. When that post was written, we had recently released our LPS25H carrier, but we did not yet offer an IMU featuring this new barometer IC. The AltIMU-10 v3, which uses the older LPS331AP pressure sensor, was the newest AltIMU available from us at the time.
With the release of the AltIMU-10 v4 this week, that updated IMU is now available. Like the v3 version, the AltIMU-10 v4 contains an LSM303D three-axis magnetometer and accelerometer and an L3GD20H three-axis gyro, and it replaces the LPS331AP pressure sensor on the older board with the improved LPS25H, enabling pressure and altitude measurements with higher accuracy and lower noise.
We think the AltIMU-10 v4 combines the state of the art in ST’s MEMS sensors into one compact module at a great price. However, we’ve also put the AltIMU-10 v3 on clearance and lowered its price; if you don’t absolutely need ST’s newest pressure sensor on your IMU, the v3 is still a very good sensor board to consider.
Here’s an updated version of our diagram showing where the new AltIMU-10 fits in:
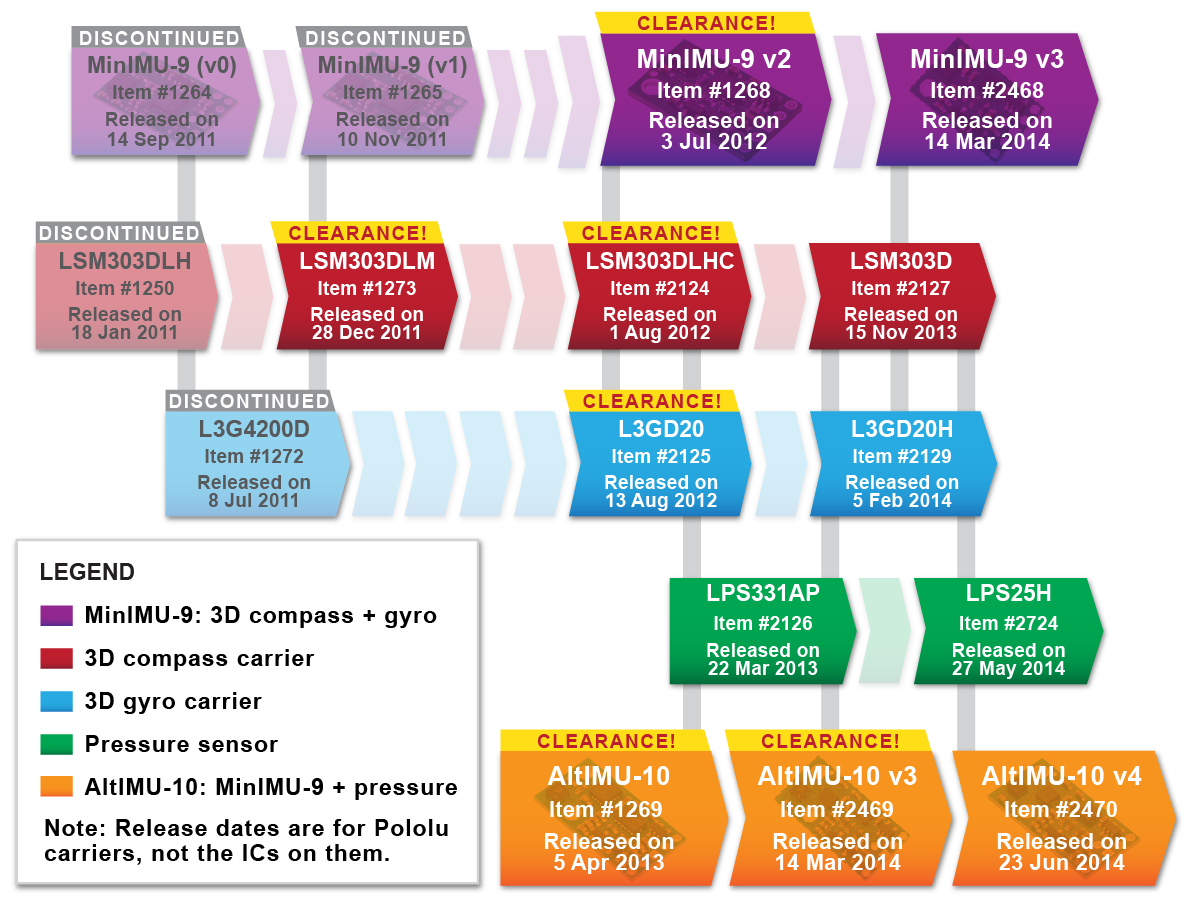 |
Evolution and release dates of Pololu carriers for ST’s MEMS sensors through June 2014. |
|---|
Related products


Math on the Pololu website!
Tomorrow is Tau Day! To celebrate, I thought I should write something about how we use math on our website.
Mathematics is essential to engineering, so we often need to use math when presenting a product or discussing some point about robotics and electronics. In the past, we have struggled to come up with our own ways of getting math online, such as using HTML code (e.g. a 1×2 table with an internal border can look like a fraction) or finding some engineer here who knows how to type up equations in LaTeX and export images.
Over the past month, we have quietly switched to MathJax, which is the technology used on the very popular site MathOverflow. We are using MathJax, for example, to explain current and voltage settings for our new TPS2113A carrier and to show how to compute the exact gear ratios of some of our Micro Metal Gearmotors – the 1000:1 Micro Metal Gearmotor being a particularly good example since it has so many gears.
MathJax allows us to type math directly into web pages using simple text codes, and it uses modern features of your web browser to format the math for you as the page is loaded. If you reload this page and watch the equation below carefully, you will briefly see the raw code before MathJax redraws it:
``int_0^oo e^(-x^2) dx = sqrt pi / 2``
(The integral of a Gaussian has long been one of my favorite mathematical exercises.)
Try it yourself
Instead of using the LaTeX syntax used on MathOverflow, we chose a simpler input format called ASCIIMath. You can read documentation on the ASCIIMathML page. The way it works is that you type ASCIIMath code within double back-quotes, like this:
``int_0^oo e^(-x^2) dx = sqrt pi / 2``
We have enabled MathJax throughout the site, including blog comments, so that you can participate fully in discussions here, starting with this little Tau Day celebration. So, what is your favorite equation? Try out MathJax and share it with us in the comment section below!
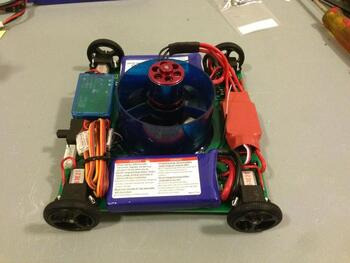
Troubled Child, a full-size autonomous vehicle
The folks from SHARC have converted a Jeep into an autonomous robot for SparkFun’s annual Autonomous Vehicle Competition that took place last weekend. Their robot, Troubled Child, won first place in its class and the “Crowd Favorite” award.
 |
Long-time customer Michael Shimniok (our first blog post — from before we called it a blog — was about a tutorial he wrote for programming AVRs from a Mac) used his 1986 Jeep Grand Wagoneer to explore the back roads of Colorado and Utah before converting it into an autonomous vehicle. The autonomous Jeep uses our D15V35F5S3 switching step-down voltage regulator for powering the on-board electronics, and our dual relay board for running the warning horn and deactivating the pneumatic brake failsafe.
 |
You can check out their final run from inside the vehicle in the video below.
For more information on Troubled Child and the team behind the build, check out their build page or forum post.
Related products


Wi-Fi controlled Zumo Chassis with DRV8835 and GoPro
 |
Forum user Pablo shared his Wi-Fi controlled robot with pictures and videos from his Instagram. In Pablo’s forum post, he summarizes his project, which consists of a custom PCB that he designed himself to interface a PIC18F26K20 with a MRF24WB0MA Wi-Fi module. His custom board also carries a DRV8835 motor driver and is mounted on a Zumo Chassis. The robot is controlled through Wi-Fi using a custom Android app and has a GoPro camera mounted on the Zumo blade. Finally, to top it all off, he placed a 6" Domo plush doll on top.
The picture below shows his fully assembled PCB, and Pablo posted a sped up video of its assembly.
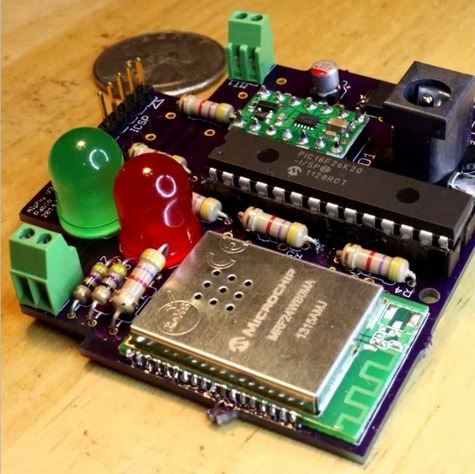 |
For more details, including links to more of Pablo’s Instagram videos of his project like this one, please see Pablo’s original post.
Related products


New product: CH Robotics UM7-LT orientation sensor
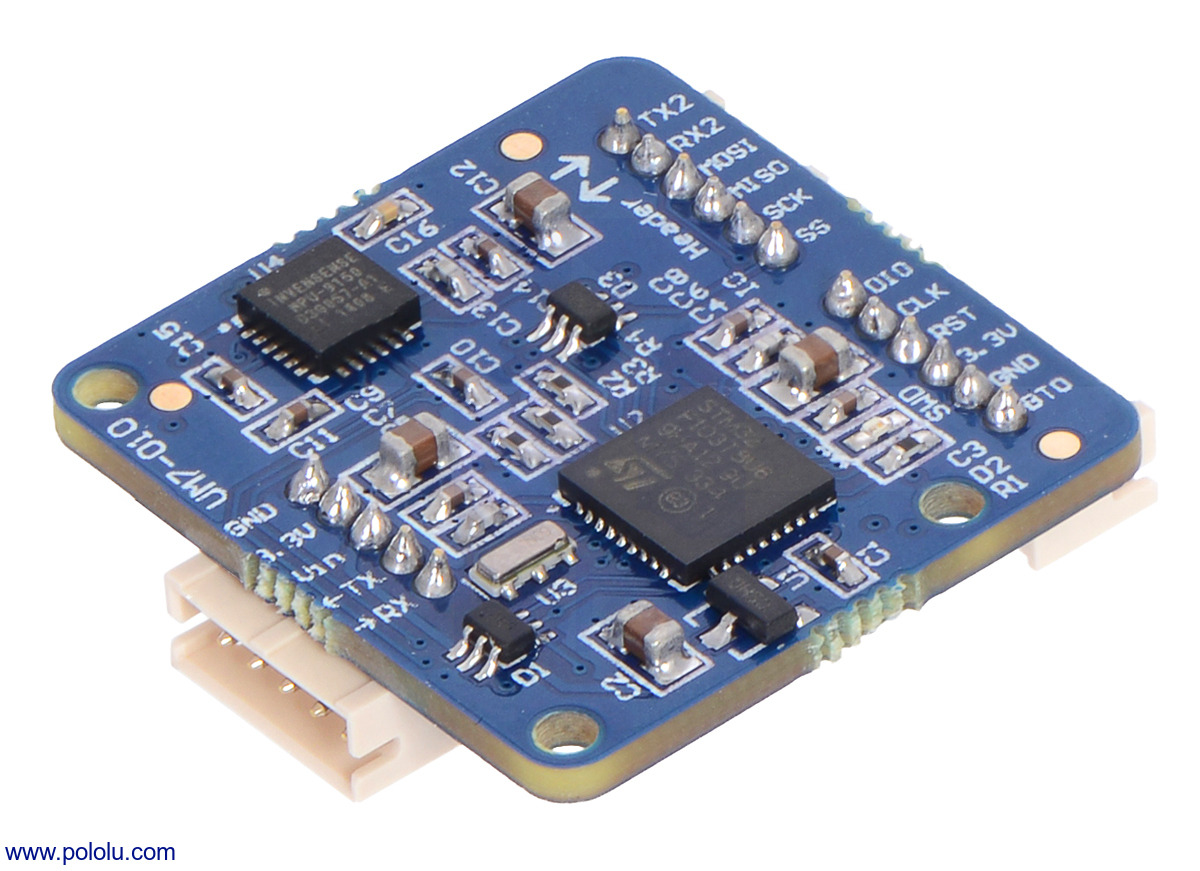 |
We’re now selling the UM7-LT orientation sensor, the latest Attitude and Heading Reference System (AHRS) from CH Robotics. The UM7 takes advantage of newer sensor technology to offer improved performance compared to its predecessor, the UM6, despite its reduced cost.
Like earlier CH Robotics AHRS modules, the UM7 contains an onboard microcontroller that combines data from its three-axis accelerometer, gyro, and magnetometer to produce orientation estimates 500 times a second. The attitude and heading information, available in the form of Euler angles or quaternions, can either be streamed automatically or provided upon request through a TTL serial interface.
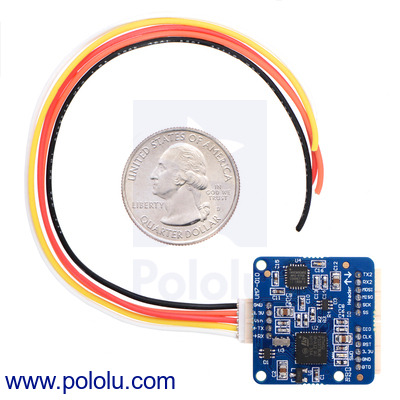 |
Power and serial connections can be made to the UM7-LT through a five-pin connector and an included matching cable, and expansion headers provide additional interfaces like SPI and a secondary UART that can be connected to an external GPS module. The free CHR Serial Interface software makes it easy to visualize data from the UM7 and configure its settings.
For more information about the UM7-LT, see its product page. A version of the UM7 with an enclosure, similar to the enclosed UM6, is expected to be available in the next few months.
Related products


Geiger counter using A-Star
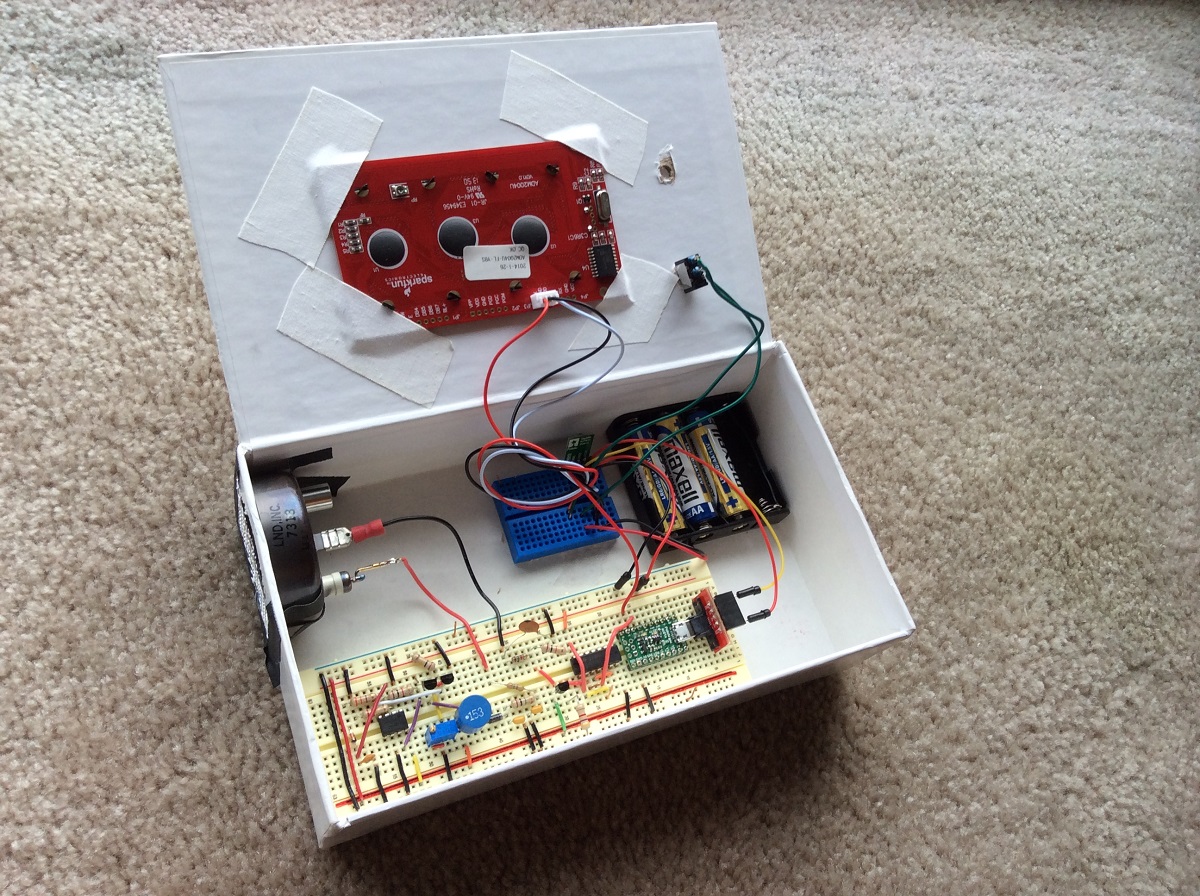 |
The inside of the Geiger counter. |
|---|
The home-made Geiger counter featured in this post by forum user bob_day uses an A-Star 32U4 Micro, LND 7313 Geiger tube, and LCD to measure and display Geiger tube counts. The LCD displays the counts detected during the last minute, the average counts per minute, and the maximum counts in a minute. The project was originally designed for the Arduino Micro, but the program was able to run on the A-Star without any software modifications. The entire project is powered from one S7V8A adjustable step-up/step-down voltage regulator, and the conditioning part of the circuit, which shapes the output into narrow pulses, was designed by bob_day . Schematics and code for the project are included in the forum post.
 |
The case and display of the Geiger counter. |
|---|
Related products


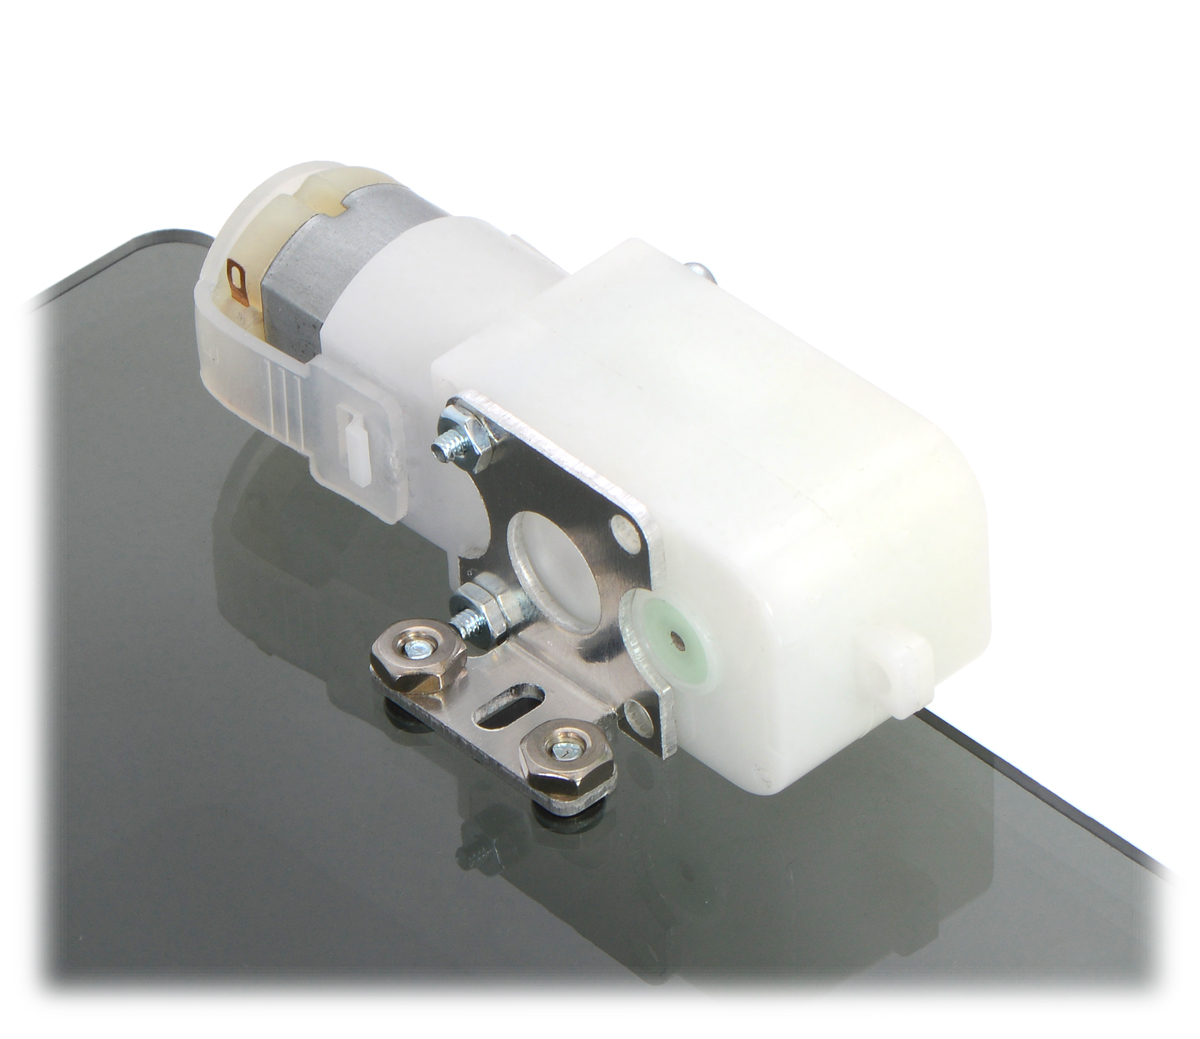
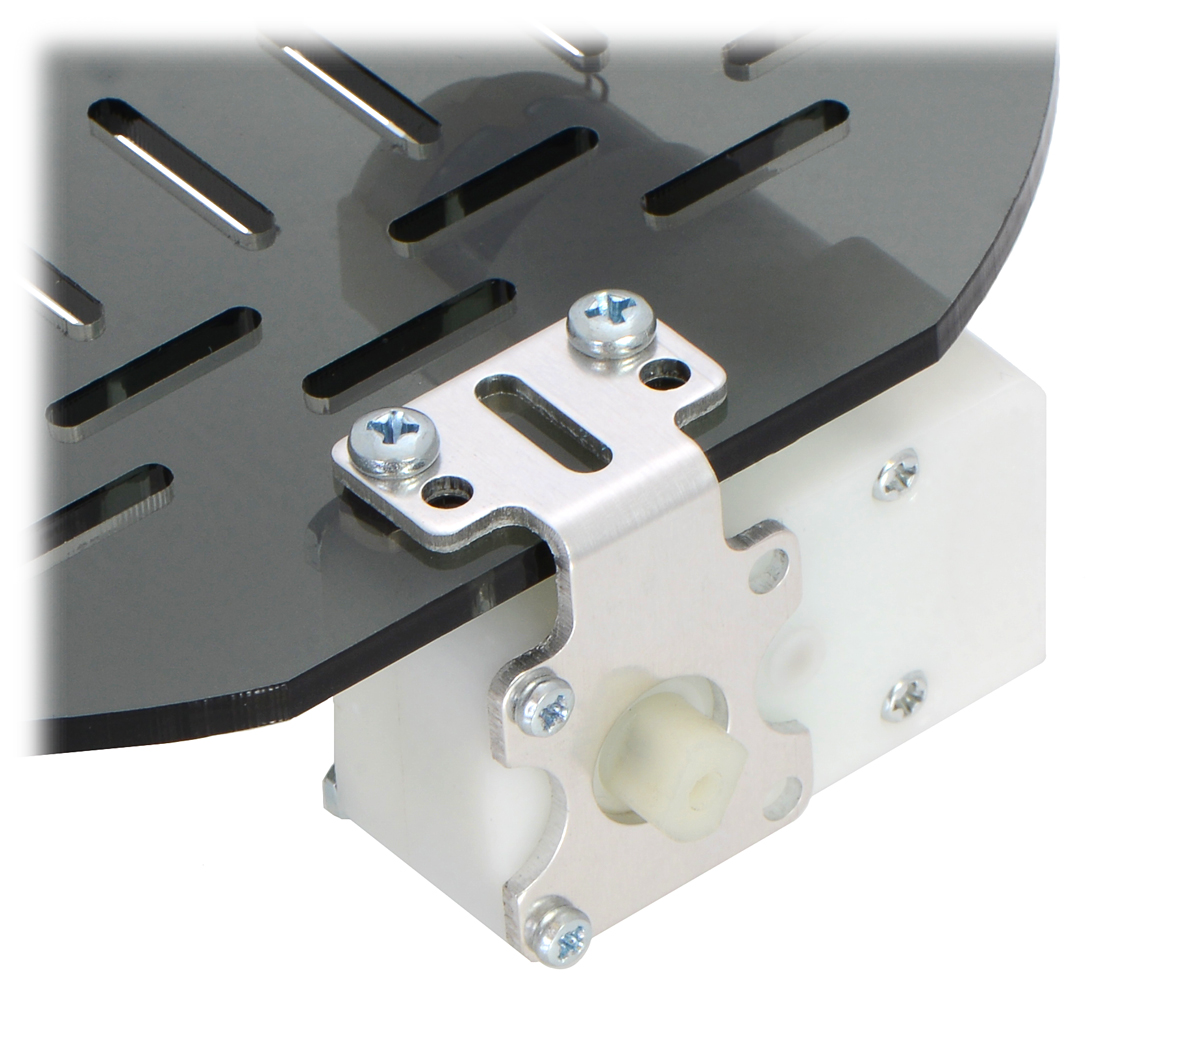
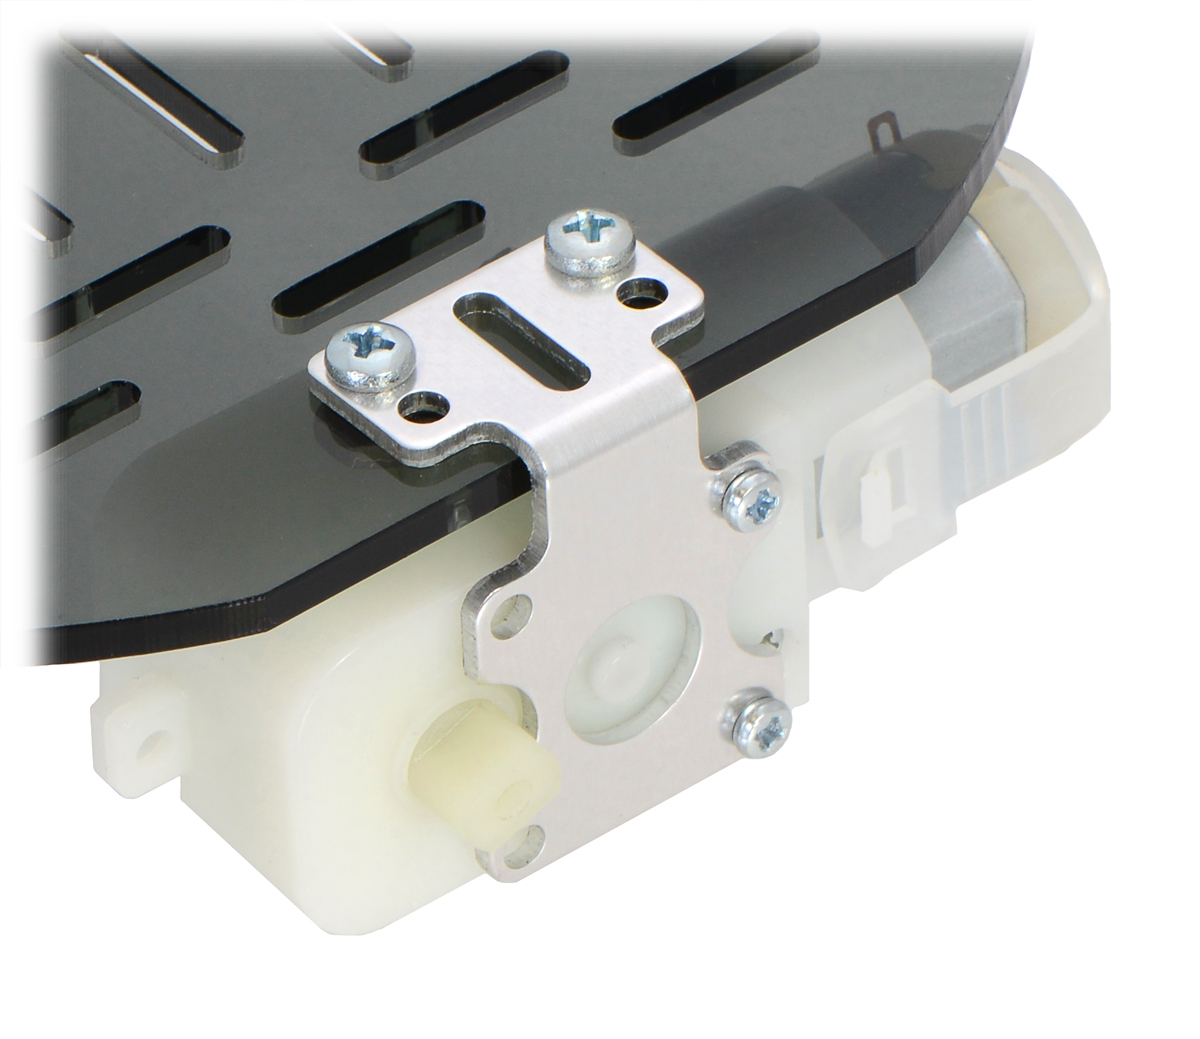
New products: Aluminum mounting brackets for Pololu Plastic Gearmotors
|
|
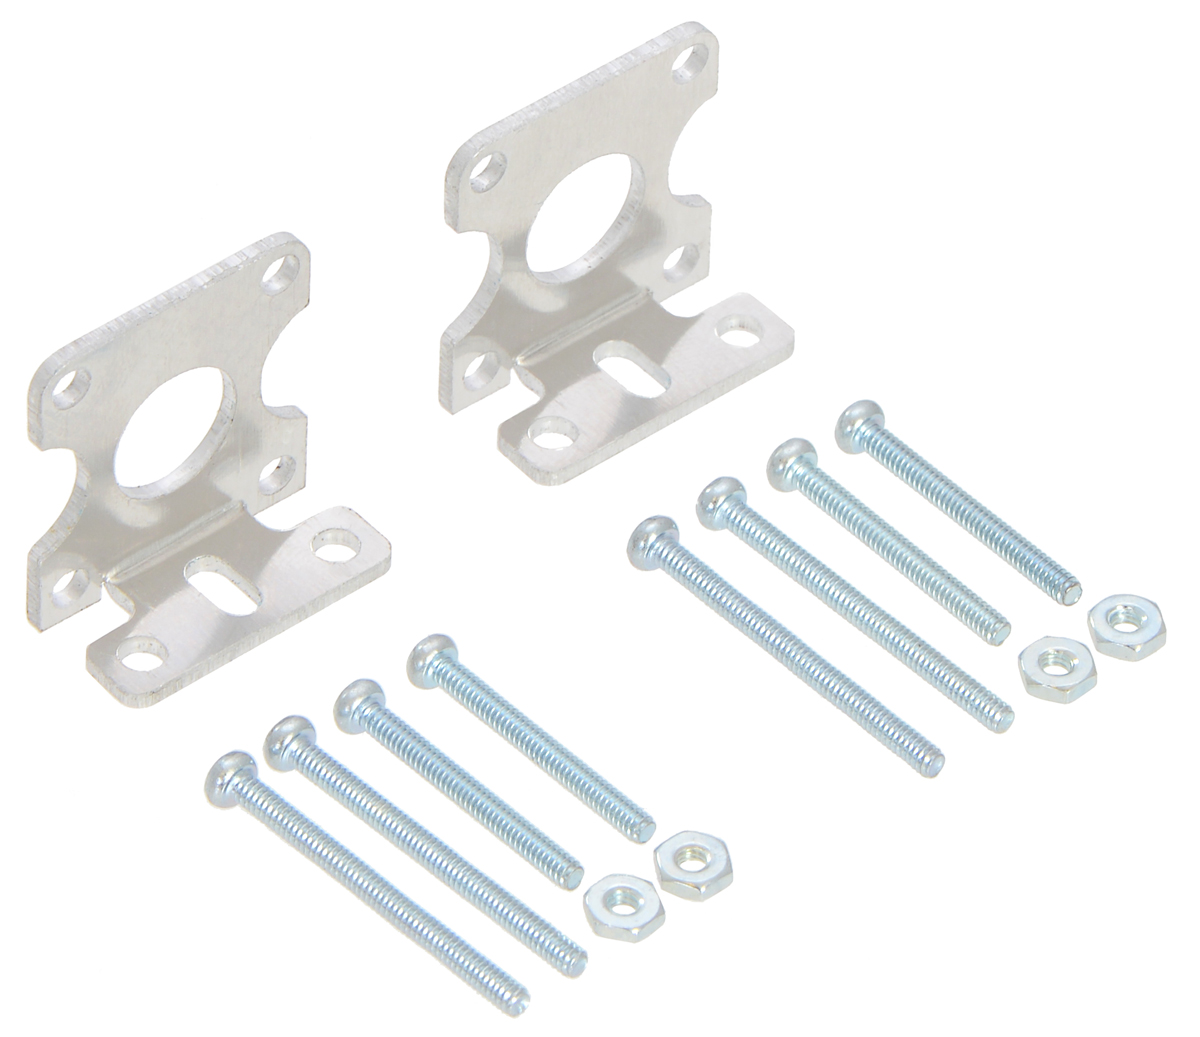
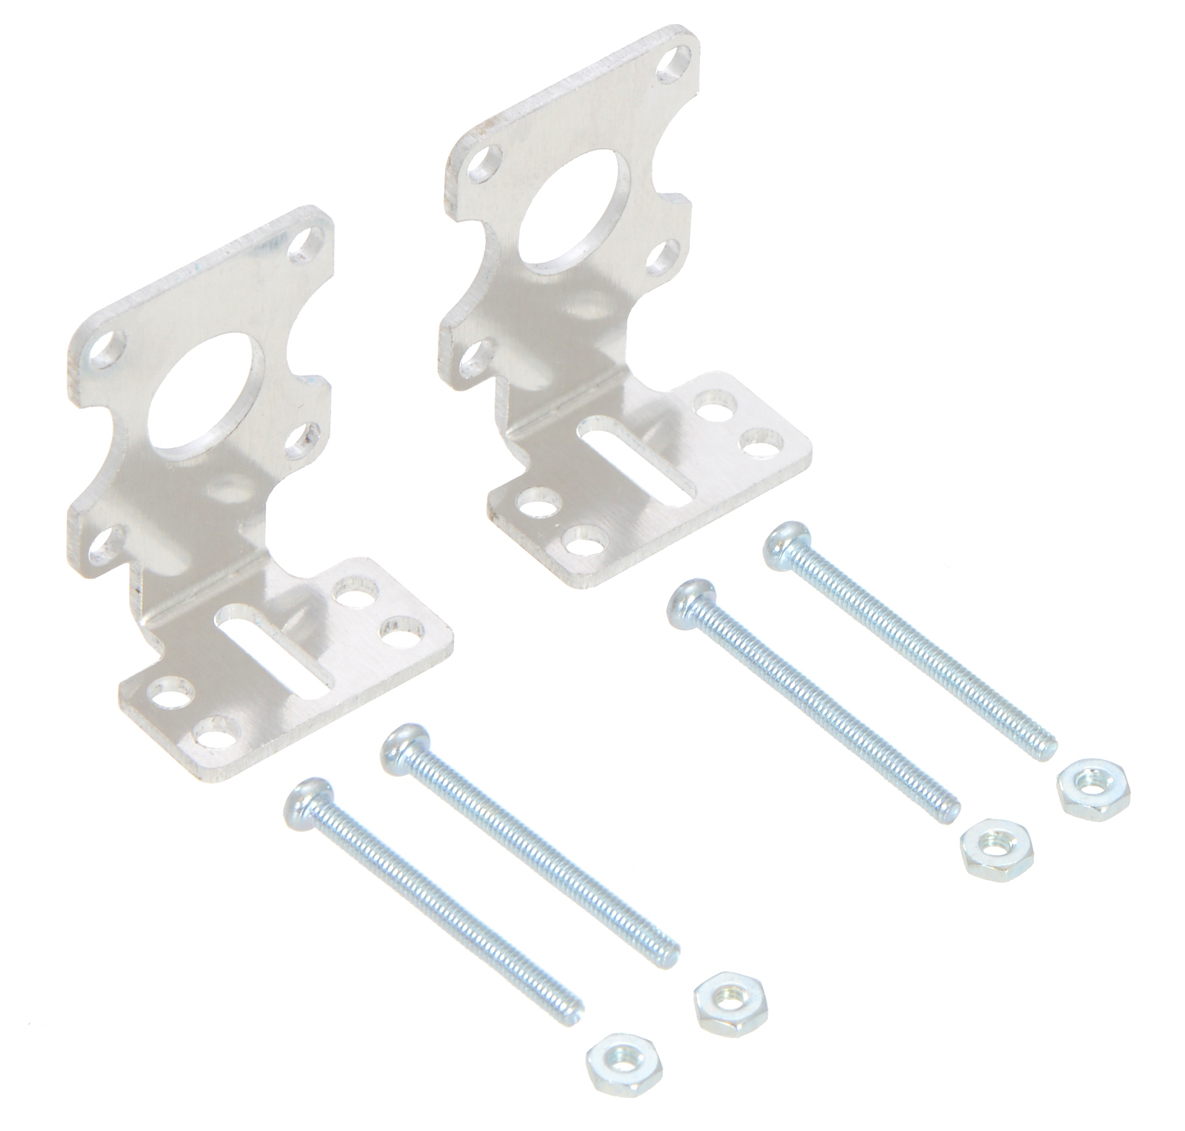
We designed these new stamped aluminum L-brackets specifically for our larger Pololu plastic gearmotors (228:1 offset, 120:1 offset, 200:1 90-degree, and 120:1 90-degree). There are two versions of this L-bracket to choose from – a compact version and an extended version, which allows for a wider variety of mounting options. The brackets are sold in pairs and come with the hardware required to secure a motor to each bracket. As a bonus, they are also compatible with the Solarbotics plastic gearmotors (GM2, GM3, GM8, and GM9) and make great alternatives to the GMB39 and GMB28 brackets.
|
|
||
|
|
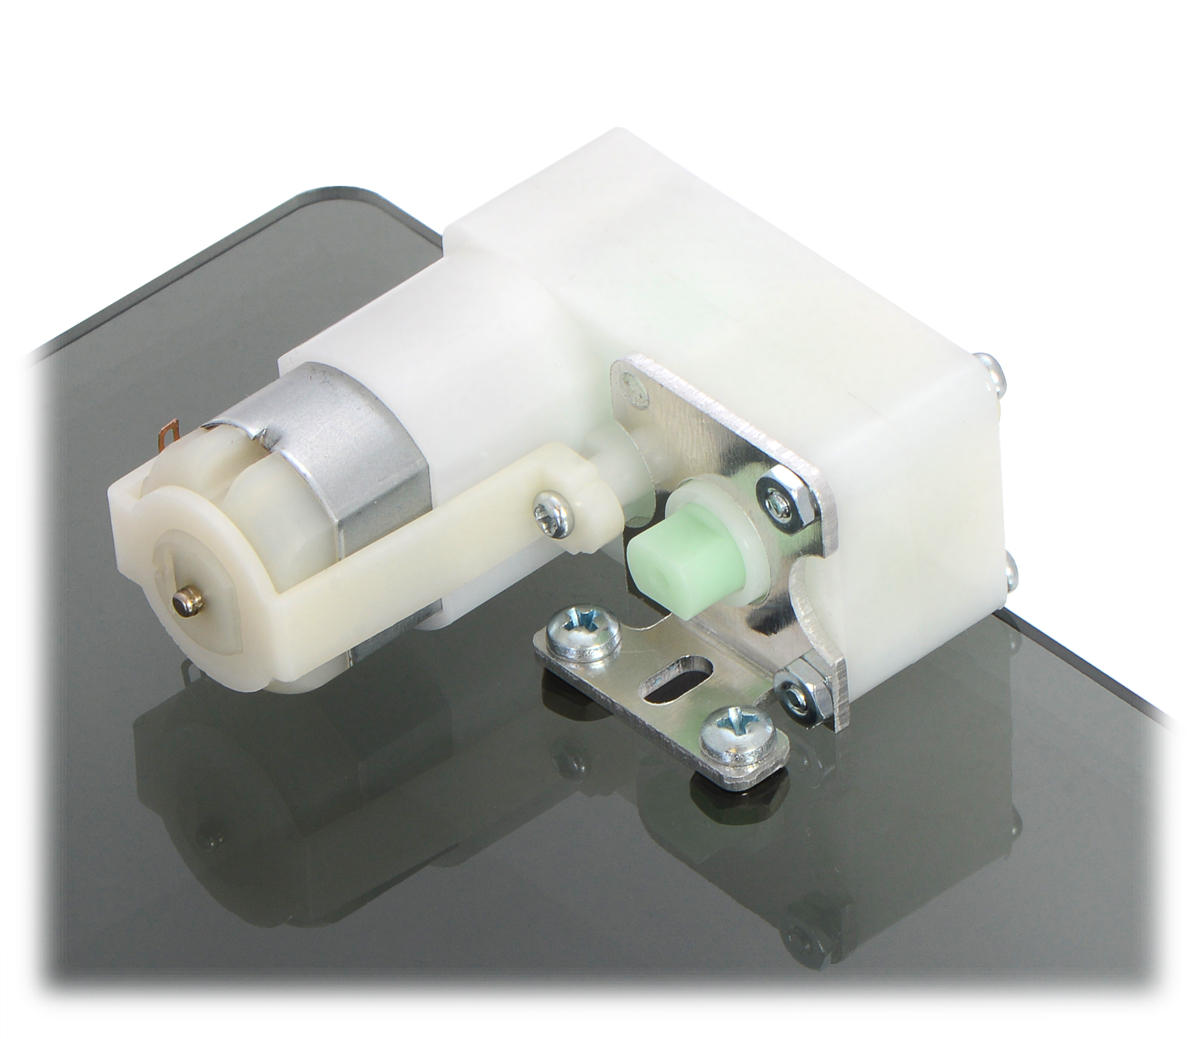
See the product pages for additional information:
- Pololu Stamped Aluminum L-Bracket Pair for Plastic Gearmotors
- Pololu Extended Stamped Aluminum L-Bracket Pair for Plastic Gearmotors
Related products


New distributors in Spain and Slovakia
Our distributor list continues to grow, with two new Pololu distributors in Europe:
 |
Complubot is an educational robotics organization in Madrid, Spain, that you might have heard of through their work on the Arduino Robot. In May, Complubot opened a robotics store, and they are carrying everything from LEGO Mindstorms kits to our 3pi and Zumo. We are also happy to see that they continue to host educational robotics workshops and post lots of updates and pictures on their Twitter feed.
 |
RLX Components is a distributor of electronic components, development tools, test equipment, and software in Bratislava, Slovakia. Founded in 1994, they carry products from numerous brands familiar to the maker community, and we are proud to see our products (such as the 3pi Robot) listed there, now, too.
See our list of almost 200 distributors to find one in your area.
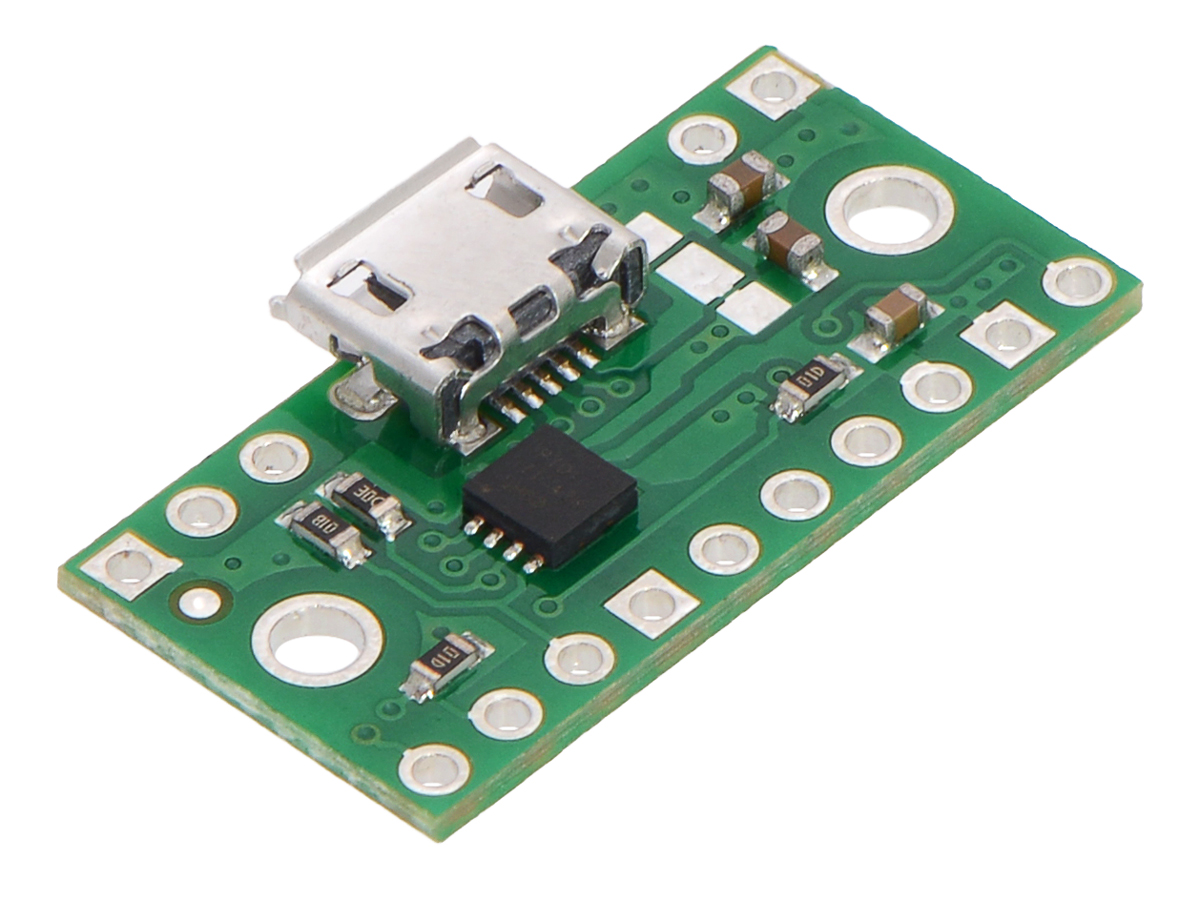
New product: TPS2113A Power Multiplexer Carrier with USB Micro-B Connector
 |
Earlier this year we released a carrier for the Fairchild FPF1320, a power multiplexer that can switch between two separate power supplies, such as USB and a battery-powered 5 V regulator. The FPF1320 is great for transitioning between power sources based on an external selection signal, but by itself, it is not ideal for applications like a USB-powered microcontroller: it lacks a voltage sensor that would enable the switching to be both seamless and automatic. (By default, our carrier allows the output voltage to drop below 1.5 V whenever it switches from its preferred to alternate power source.)
That’s why we’re excited about Texas Instruments’s TPS2113A, a power multiplexer with built-in voltage sensing that supports automatic seamless switching, and today we are happy to announce the release of our TPS2113A Power Multiplexer Carrier with USB Micro-B Connector.
The switching behavior of the TPS2113A depends on the state of its VSNS input. Our carrier pulls VSNS low through an on-board pull-down resistor, which causes the multiplexer to simply select the higher of the two input sources to pass to the output. However, adding another resistor between VSNS and the primary input source creates a voltage divider that allows you to set a precise threshold voltage at which the multiplexer will switch to the secondary source.
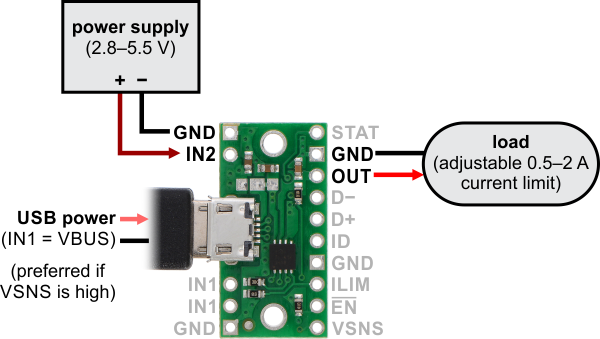 |
For example, the TPS2113A could be used to build a device that is primarily powered by USB, but switches to a secondary 5 V supply as soon as the USB voltage falls below 4.8 V. Since the multiplexer can prevent its output from falling below 4.8 V during the transition, it enables the system to be seamlessly connected to and disconnected from USB without noticeable power interruptions.
The TPS2113A offers additional features that can be useful in a power supply circuit, including an adjustable current limit and a status output that indicates which power source is currently selected. Our carrier board breaks out all of the chip’s pins, making it easy to connect additional components and customize the multiplexer’s behavior for a range of applications.
We think the TPS2113A is a great power switching solution for USB devices, and we look forward to using it in upcoming designs; keep an eye out for it in our future products!
Related products

Ibex: a wall-climbing robot by Operative RC
Forum user Lukeness made a detailed post about the design of his wall-climbing robot, Ibex, which is now available for purchase on his website, Operative RC.
 |
The lightweight and compact RC-controlled wall-climbing robot uses a brushless DC motor for suction, and features a drive solution that uses four of our micro metal gearmotors, each driving a 32mm Pololu wheel and mounted with our micro metal gearmotor brackets.
The post includes pictures and videos of various iterations of Ibex and includes Luke’s reflection on the disheartening results of one of Ibex’s iterations. We’re glad to hear that Luke “stuck” with it, and now has a robot he is happy enough to market! We look forward to hearing more about Operative RC when more products become available.
Related products


Home | Forum | Blog | Support | Ordering Information | Lists | Distributors | BIG Order Form | About | Contact
© 2001–2025 Pololu Corporation


