Pololu Blog »
Pololu Blog (Page 58)
Welcome to the Pololu Blog, where we provide updates about what we and our customers are doing and thinking about. This blog used to be Pololu president Jan Malášek’s Engage Your Brain blog; you can view just those posts here.
Popular tags: community projects new products raspberry pi arduino more…
Two new motor driver shields for Arduino
We are excited to announce the addition of two new motor drivers to our selection of Arduino shields: the Pololu DRV8835 Dual Motor Driver Shield for Arduino and the Pololu A4990 Dual Motor Driver Shield for Arduino. These miniature shields are low-cost, basic dual motor drivers for your Arduino or Arduino-compatible board. When connected to an Arduino, each provides two channels of bidirectional PWM motor control suitable for driving small brushed DC motors. The boards include various handy features like reverse protection, multiple power and motor connection options, and the ability to customize some of the pin mappings. Our open-source libraries provide a convenient way to get started controlling these motors with an Arduino.
Selecting a motor driver shield
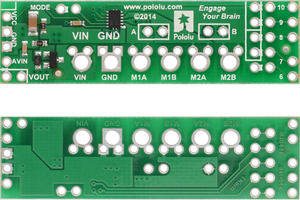 |
Pololu DRV8835 Dual Motor Driver Shield for Arduino, top and bottom sides. |
|---|
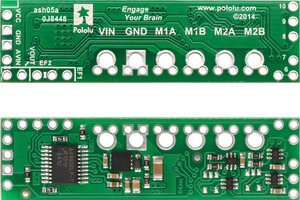 |
Pololu A4990 Dual Motor Driver Shield for Arduino, top and bottom sides. |
|---|
The main practical difference between the shields is their input voltage range, so most people should probably select a shield based on their desired power supply. Here are some details:
Our DRV8835 shield, based on the DRV8835 motor driver from Texas Instruments, has an input voltage range of 2 V to 11 V and can deliver a continuous 1.2 A (1.5 A peak) on each channel. It is suitable, for example, for battery-powered robots similar to the 3pi or Zumo. As a bonus feature of our shield, you can parallel the motor outputs to get a single channel with twice the current capability.
Our A4990 shield uses the Allegro A4990 and is specifically intended for higher-voltage applications, such as projects powered by a 12 V or 24 V battery. It has an input voltage range of 6 V to 32 V and can deliver a continuous 0.65 A (0.9 A peak) per channel. The A4990 can detect and signal a variety of errors like over-temperature and short-circuit, allowing more sophisticated control and monitoring.
We also carry higher-power shields based on the MC33926 and VNH5019.
Basic breakout boards available
For applications where an Arduino shield does not make sense, we also offer basic breakout boards for the DRV8835 and A4990 that provide access to all of the features of these great chips.
Congratulations to our summer interns!
If you carefully inspect the back of the boards, you will notice “TKern” and “izzyg” etched in copper. These inscriptions commemorate the internships of Ted Kern and Ismael “Izzy” Gomez, Las Vegas natives who were indoctrinated in Pololu design philosophies this summer while creating these new products. We wish Ted and Izzy good luck as they head/return to college at CMU and MIT!
Roboceratops - Robot Dinosaur
Robert Stephenson (blobbington) posted about his robot dinosaur, Roboceratops, on the Trossen Robotics forums. Roboceratops is a small robotic dinosaur built to resemble a member of the Ceratopsian group. It uses a total of 14 servos for movement that are commanded through two of our Mini Maestro 12-Channel Servo Controllers, which are controlled by serial commands from his custom hand held controller. The controller is directly wired to Roboceratops and uses an Arduino Mega 2560, an LCD screen and two 3-axis joysticks. Robert wants to improve his design by making it wirelessly controlled and battery powered, and he plans to eventually make Roboceratops autonomous.
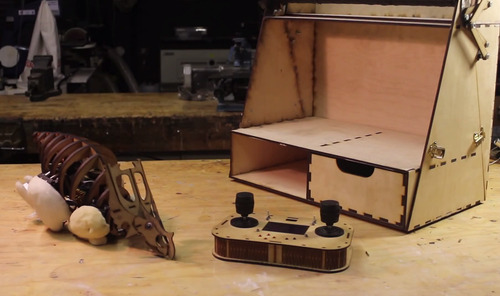 |
Roboceratops is mainly constructed out of laser cut MDF, but the legs are made from aluminum square bar. Upholstery foam was added to the legs to make them look more like real legs. The case of the controller and the neat carrying case at the end of the video also appear to be laser cut.
Modding the Zumo: encoders, WiFi, GPS, USB, 120 MHz, and joystick control
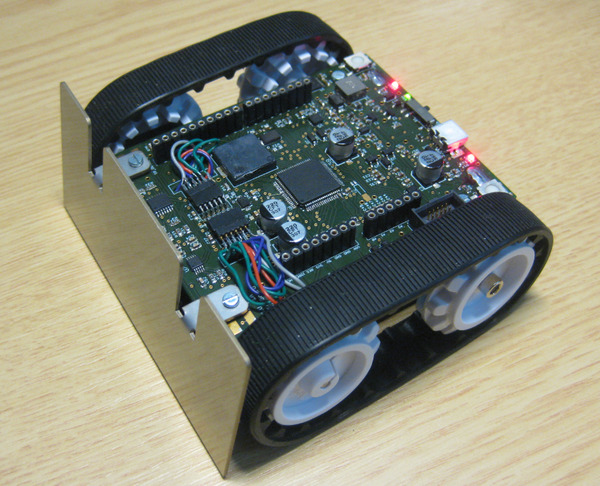 |
Forum user Erich uses our Zumo chassis as a platform for teaching robotics, but instead of using the Zumo shield, he has been making his own custom electronics that let it do many more things. One of his most recent projects, which he describes in this forum post, involves a control board he designed that uses a Freescale ARM Cortex-M4F running at 120 MHz. He says it is capable of running WiFi, USB, GPS, and processing encoder signals in real-time.
His robot also uses a mini-sumo blade, Zumo reflectance sensor array, and a pair of 75:1 micro metal gearmotors with extended shafts connected to a pair of optical encoder boards.
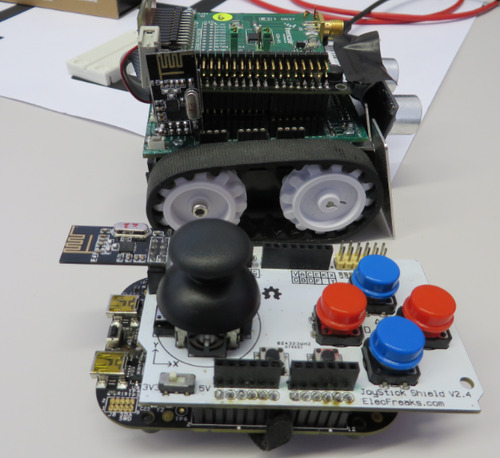 |
Erich also used the ElecFreaks’ joystick shield to run his modified Zumo, which sounds like a lot of fun! For more information on this project, including some of the problems he had to overcome to get it all working, see this forum post or visit Erich’s website.
Erich has posted to our forum about his projects before; you can find a list of the forum posts he made that we blogged about below:
March 2013: Zumo Robot with FRDM-KL25Z Board
September 2013: Zumo Robot with Pololu Plug-in Modules
October 2013: Zumo Robot with Pololu Plug-in Modules, assembled
December 2013: Zumo Tournament Videos
May 2014: Optical Motor Shaft Encoder in Zumo with Signal Processing
Free magazine: August 2014 Circuit Cellar
 |
Get a FREE copy of Circuit Cellar magazine’s August issue with your order, while supplies last. To get your free issues, enter the coupon code CIRCUIT0814 into your shopping cart. The Circuit Cellar magazine will add 6 ounces to the package weight when calculating your shipping options.
For back issues and more information, see our free Circuit Cellar magazine offers.
And don’t forget that free copies Elektor magazine’s double-sized July/August issue are still available.
New product: Aluminum mounting bracket for NEMA 17 stepper motors
|
|
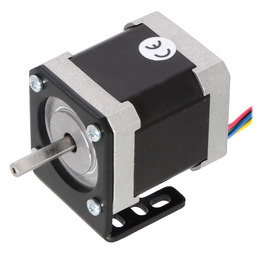
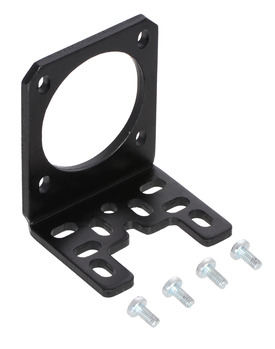
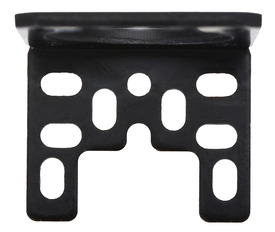
Our new stepper motor bracket is designed to work with typical NEMA 17-size stepper motors like our 42×48mm and 42×38mm units (including our 42×38mm stepper motor with 28cm lead screw). It is made from 3mm-thick black anodized aluminum, which makes it both light and strong, and slot cutouts allow for plenty of mounting flexibility.
|
|
For more information, see the product page.
New products: Perma-Proto breadboard PCBs from Adafruit
Securely connecting and mounting the electronics for your robot or other project is a key step in taking it from a prototype to a finished design. These perma-proto boards from Adafruit use the same basic through-hole layout as standard solderless breadboards while allowing for permanent solder connections, which makes it easy to transfer your electronics from one to the other.
We are now carrying four types of perma-proto boards:
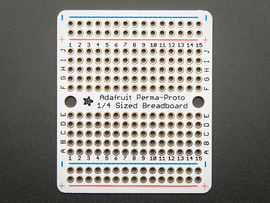
The quarter-size perma-proto board, at 1.7″ × 2.0″, is slightly larger than a 170-point breadboard and has labels, 15 rows of pins, and two mounting holes.
|
|
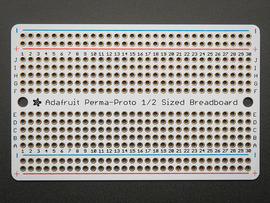
The half-size perma-proto board is 3.2″ × 2.0″, which is about the same size as our 400-point beardboard, and has labels, 30 rows of pins, and two mounting holes.
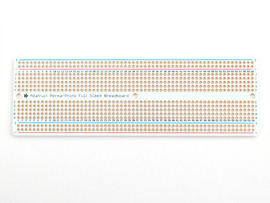
The full-size perma-proto board is similar in size to our 830-point breadboard. It measures 6.2″ × 2.0″ and has labels, 60 rows of pins, and three mounting holes.
|
|
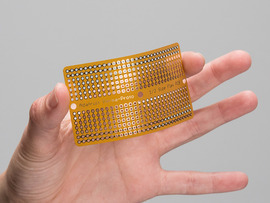
The flexible perma-proto board is made of a thin polyamide film that allows it to be bent, flexed, and cut to fit your project. This version is 3.1″ × 1.7″ (similar in size to the half-size board) and only 0.005″ thick. It contains 30 rows of pins and three mounting holes.
Each board uses 47 mil (1.2 mm) diameter through holes to accommodate parts with thick leads and is through-plated for strength, which means that the pads are less likely to be ripped of during soldering or rework.
Get any A-Star for only $8 with orders over $100!
 |
We are having a summer promotion to celebrate the introduction of the A-Star Minis: on orders over $100, get any A-Star for only $8 with coupon code ASTAR. Our previous free A-Star Micro promotion will still be available through Sunday, so if you act now you can stack the coupons and get a great deal on two of these compact Arduino-compatible controllers.
Click here to add the coupon to your cart, then go to the A-Star category to select your $8 A-Star.
Firetail UAV System
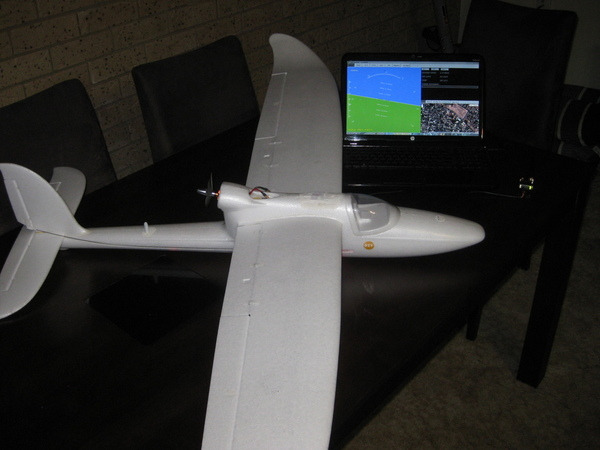
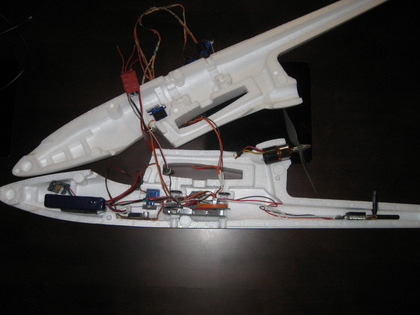
We mentioned it in passing in an earlier post, but we think that the Firetail UAV System deserves its own post. Since then, Firetail’s creator, Samuel Cowen, has continued to develop this open-source UAV autopilot system, posting regular updates on his blog and sharing his project on the Pololu forum.
Firetail is designed to be installed in any fixed-wing RC airframe and autonomously fly up to 512 waypoints. The system includes software for a ground control station, which allows users to see the location, speed, altitude, and orientation of the aircraft. Users at the station can also upload and download autopilot settings and plan flights using Google Maps.
To test Firetail, he built his own RC aircraft, which uses an Arduino Due to process signals from an RC receiver, and reads data from an AltIMU-10. Depending on how the user sets up the autopilot mode, the Firetail system either flies the craft, or simply allows the user to fly the craft while streaming telemetry data to the ground control station.
You can learn more about the Firetail system on its website.
 |
New product: Raspberry Pi Model B+
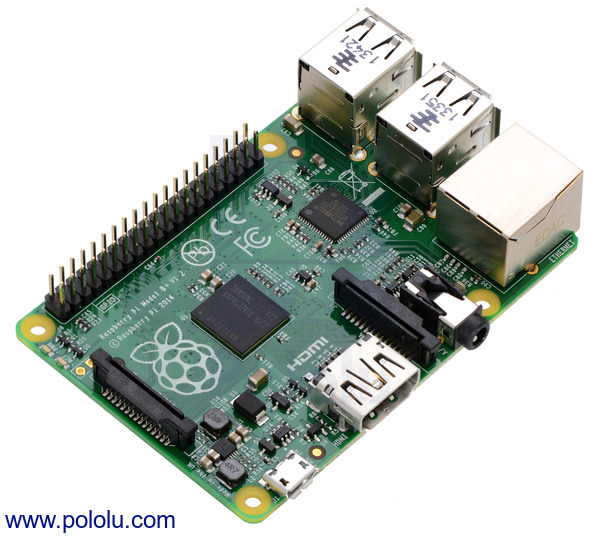
The Raspberry Pi single-board computer has been around for a little over two years in its original Model A and Model B versions, and in that time, it’s become a very popular platform for electronics experimentation. With many of the same capabilities as a regular desktop or laptop PC, but at a small fraction of the size and cost, the Raspberry Pi offers features like network connectivity and significant processing power for robots and other electronics projects.
|
|
We’re now selling the new Raspberry Pi Model B+, which improves on the Model B in a number of ways:
- More GPIO pins are available on a 40-pin header; the Model B has a 26-pin GPIO header.
- The number of USB host ports has been doubled to four.
- Switching regulators lower the power consumption of the Model B+ by 0.5 W to 1 W compared to the Model B (which uses linear regulators), while audio is improved by a dedicated low-noise power supply.
- A much smaller microSD card socket replaces the previous full-size SD card socket.
- Audio and composite video output are combined on the 3.5 mm jack, and many of the connectors extend much less past the edge of the board (as does the inserted microSD card).
- Four mounting holes provide more flexibility in mounting the Model B+.
We’ve seen our customers build lots of cool projects with the Raspberry Pi, including a wirelessly-controlled Zumo robot with a video camera and a robotic ping-pong ball collector. We look forward to seeing what you’ll do with the Model B+!
Free magazines: July 2014 Circuit Cellar and July/August 2014 Elektor
|
|
Get FREE copies of Circuit Cellar magazine’s July issue and Elektor magazine’s July/August issue with your order, while supplies last. To get your free issues, enter the coupon codes CIRCUIT0714 and ELEKTOR0714 into your shopping cart. The Circuit Cellar magazine will add 6 ounces and the Elektor magazine will add 9 ounces to the package weight when calculating your shipping options.
For back issues and more information, see our free Circuit Cellar magazine offers and free Elektor magazine offers.
