Pololu Blog »
Pololu Blog (Page 57)
Welcome to the Pololu Blog, where we provide updates about what we and our customers are doing and thinking about. This blog used to be Pololu president Jan Malášek’s Engage Your Brain blog; you can view just those posts here.
Popular tags: community projects new products raspberry pi arduino more…
Leviathan: an autonomous Raspberry Pi-controlled electric boat
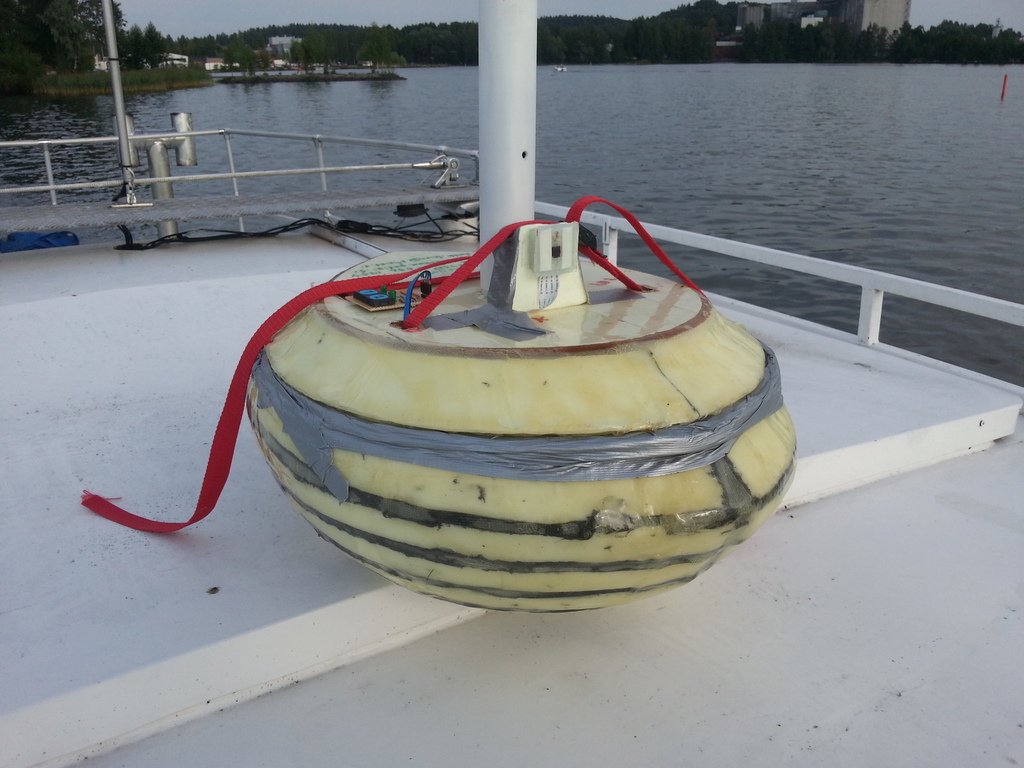 |
Heikki Leivo and Matti Koljonen are currently working together to develop a miniature autonomous electric boat, which they are calling Leviathan. The boat is made of polystyrene foam, uses brushed DC motors and servos for movement, and is controlled by a Raspberry Pi, which reads data from GPS and a MinIMU-9 inertial measurement unit for navigation. Leviathan is equipped with a camera and also features a D24V6ALV step-down regulator for powering servos and other electronics. The boat is also controllable over WiFi.
 |
The electronics inside Leviathan. |
|---|
Matti and Heikki plan for their vehicle to be able to run pre-defined routes, capture photos, and record video, among other things. You can learn more about Leviathan on its website.
Related products


New product: Breakout Board for microSD Card
 |
Last week, Jon mentioned how several of the mechanical engineers here at Pololu were assigned a simple board to develop. Well, our new Breakout Board for microSD Card is the first board that I designed!
Electrically, this board is pretty basic. It breaks out all of the connections available on a microSD card into two rows of 0.1″-spaced pins for easy prototyping use with standard perfboards, solderless breadboards, and 0.1″ connectors. We tried to arrange the pins in a convenient order by placing all of the pins needed for SPI mode on one side of the board (along with the card detect pin). What makes this board interesting mechanically is that it is the first of our products to use a connector for a microSD card. The push-push type connector is positioned so that when a microSD card is fully inserted, it protrudes slightly beyond the edge of the board to allow easy access to the card. The integration of our electrical and mechanical procedures allows us to make 3D models such as the one below to help support our products. We currently use models like this in the dimension diagrams we publish for our boards, but we hope to eventually make the models themselves available too.
 |
Breakout Board for microSD Card rendered in Solidworks. |
|---|
Integration with 5 V systems
There are no other components on the board aside from the microSD card connector. Since standard microSD cards use 3.3 V logic, no extra considerations need to be taken to use it with a 3.3 V microcontroller, but signal conditioning is required for use with 5 V microcontrollers. We did some tests using our 4-channel level shifter and an Arduino Uno to read and write from a microSD card using the Arduino SD library, and we had successful results; however upon closer inspection, we noticed the level shifter did not have time to shift the 3.3 V signals all the way up to 5 V, so this setup only worked because the Arduino Uno registered 3.3 V as a high signal. With a 5 V microcontroller that accepts a 3.3 V signal as high, the microSD card outputs can be connected directly to the microcontroller, and the microcontroller’s 5 V outputs can be shifted to 3.3 V using a simple voltage divider. We found the resistor values needed to be fairly low – we settled on 500 Ω and 1 kΩ resistors. Since we used the standard Arduino SD library, our tests were done at SPI speeds of 4 MHz. In systems operating at higher speeds or with more stringent logic voltage requirements, it might be necessary to use a buffer IC or other high-speed level-shifting solutions.
For more information about this breakout board, see its product page.
Related products

Pololu engineers win at AT&T Car and Home Hackathon
 |
Last weekend, Pololu engineers Brian, Jeremy, Kevin, and Ryan participated in the AT&T Car and Home Hackathon. They competed against around 300 people who came to The Cosmopolitan hotel in Las Vegas to participate in the event. The sponsors provided hardware, development boards, supplies, and APIs for the teams to work with, and they had 26 hours from Saturday to Sunday to make a home automation or “connected car” project.
Team Car Bon, which also included local programmer Dylan Simpson of the Las Vegas Ruby Group, hacked together a carbon monoxide sensor that would be installed in a car or garage and connected to the internet. The idea was for their system to monitor carbon monoxide levels, and if the levels became dangerous, to shut off the car engine, open the garage door, and alert your phone.
|
|
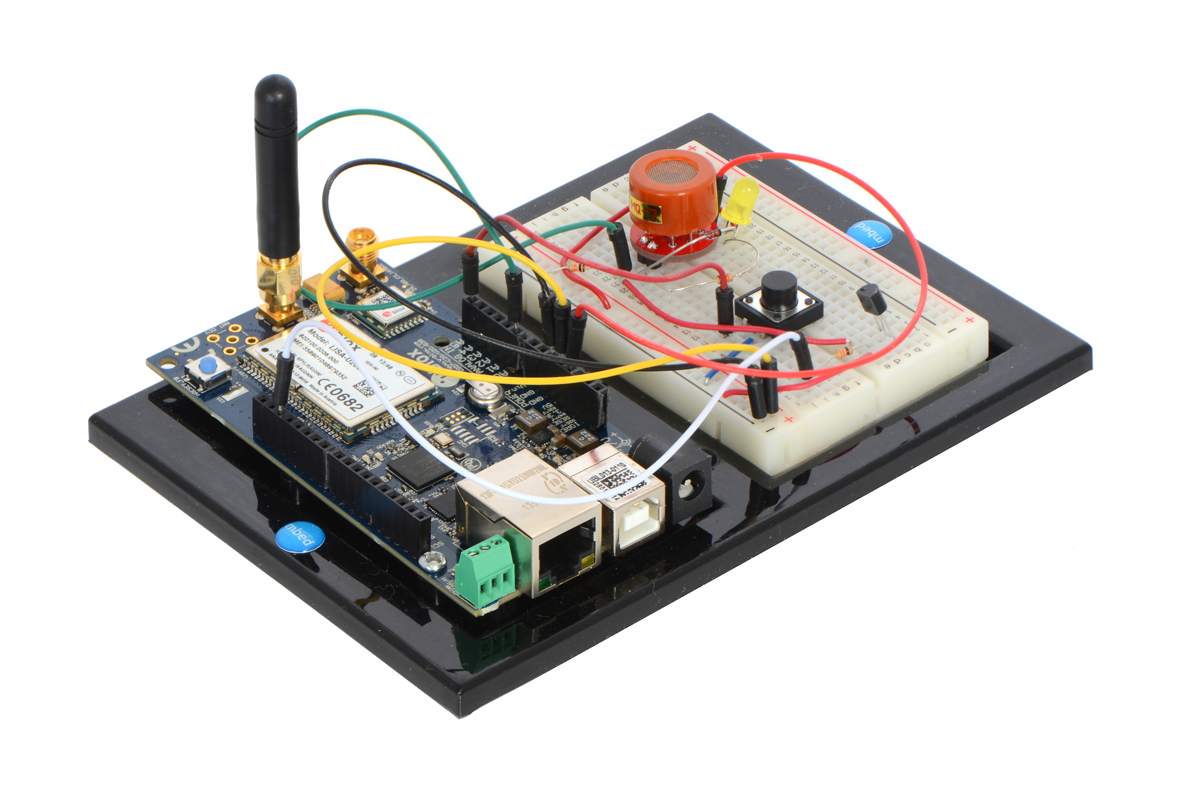
The project won the best use of mbed award and took 1st place in the Home Automation Challenge. Here is Nixie Pixel (Nicole Allen)’s coverage of the project:
You can find out more about the project on the team Car Bon GitHub page and find out more about the event on AT&T’s blog post of the event.
Our engineers also took first place (in one of many categories) at another AT&T hackathon earlier this year, which sets a high bar for future Pololu participants. Come out here to compete in the next AT&T hackathon and help put the pressure on our next team!
Related products


New product: DRV8838 motor driver carrier
 |
If you’ve checked out my company profile, you might have noticed that my focus at Pololu is on developing mechanical parts. So, I am particularly excited to reveal this basic board I designed! (Don’t worry, like Jan mentioned in this blog post, we have support structures for checking all of the work we do, so other experienced electrical engineers here assessed and contributed to my work.)
The DRV8838 motor driver carrier is the smallest motor driver we’ve made yet. With a motor supply range from 0 V to 11 V and the ability to deliver a continuous 1.7 A (1.8 A peak) to a single brushed DC motor, the DRV8838 is an exciting option for controlling any one of our plastic or micro metal gearmotors. (That includes the high power versions.)
For more information about this carrier, see its product page.
But Jon, why are mechanical engineers designing PCBs?
As our products get more sophisticated, we find ourselves wanting to integrate mechanical and electrical aspects of our design process. To give the mechanical engineers better perspective on what goes into designing electronics, we were each assigned a simple board to develop. We expect this to improve our all-around engineering abilities and also to lead to additional benefits for our customers, like better documentation and support.
Related products

Thoughts on journalists checking drafts with sources
I received a phone call yesterday from a writer for a local community-oriented, general-interest publication. Pololu is one of a dozen or so companies she was covering in an article about technology-related companies in southern Nevada, and she asked some basic questions about Pololu and how we might be relevant to Las Vegas-area locals. She then asked if there was anything else I would like to add or have mentioned about us. I answered that since I wasn’t really clear on what this article was going to be or what the intended audience was, I did not know what would be appropriate or interesting. I suggested that she could send me a draft of her article so that I might have a better context for giving her additional info. Continued…
Video: Race around the Pololu building
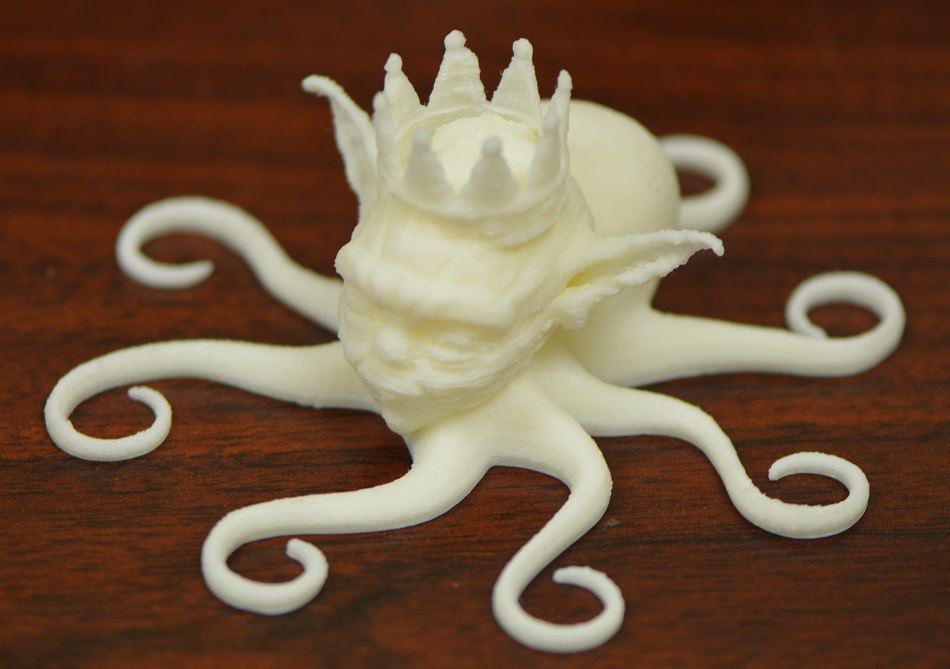 |
Yodapus Rex. |
|---|
A few of us are at work late having our Palm Tree League fantasy football draft after a week of qualifying events to determine draft order, including guessing how long it would take to print a 5cm-tall Yodapus Rex with a 3D printer we assembled recently. (Answer: 5.25 hours.) By far the most entertaining event was the race we ran yesterday around the outside of the Pololu building. The race was a little over 300 meters long, and many people from Pololu participated. Congratulations to Jon for winning for the second year in a row (although much of the margin he beat me by was from his false start). And Candice might want me to point out that she is pregnant so she has a decent excuse for finishing last.
 |
Palm Tree League 2014 fantasy football draft at Pololu. |
|---|
Pololu Labor Day weekend sale
 |
In the United States, the first Monday of September is Labor Day, a holiday celebrating the contributions of workers. As a robotics company, we appreciate all the physical and creative work that goes into the creation of “labor-saving” devices, and we hope you will join us in celebrating these efforts, perhaps by spending the long weekend working on your own robotic creations.
We are having a big Labor Day sale throughout the weekend, with 15% discounts on over 400 products when you use the coupon code LABORDAY14. Note that we will be closed on Monday, so orders placed after 2 PM Pacific Time on Friday, August 29 will be shipped on Tuesday, September 2.
New product: Pololu DRV8835 Dual Motor Driver Kit for Raspberry Pi B+
 |
When the Raspberry Pi Model B+ was released last month, one of the most exciting features for us was the availability of a second hardware PWM output that can be used for motor control (previously, only a single hardware PWM output was available on the Model A and Model B). Two is a really useful number for robot builders, since that’s what you need for a basic robot platform, so we thought it would be a great time to make a dual motor driver kit for the Raspberry Pi.
The new Pololu DRV8835 Dual Motor Driver Kit for Raspberry Pi B+ is a minimal, low-cost motor driver expansion board based on the Texas Instruments DRV8835 dual motor driver, one of our favorite motor driver chips for small robots like the Zumo because of its excellent combination of size, cost, and performance. We carry a basic breakout board for this chip and just released an Arduino shield based on the DRV8835 last week.
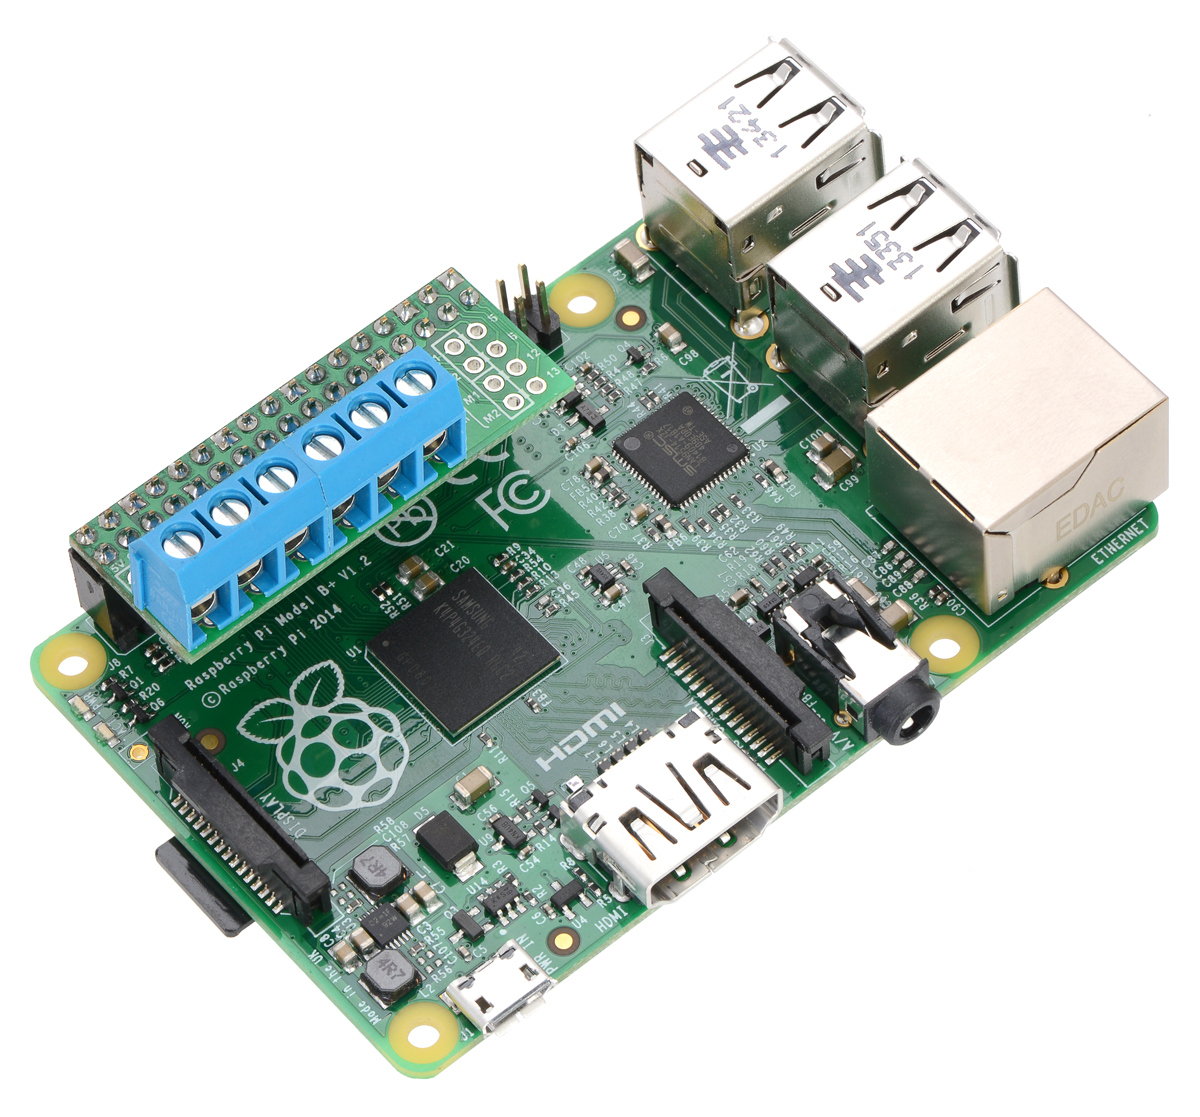 |
Pololu DRV8835 dual motor driver kit (assembled) on a Raspberry Pi Model B+. |
|---|
When assembled, the board plugs into a 2×17 block of pins on the Raspberry Pi GPIO header. Power and motors are connected to a separate block of pins, and you can use the included terminal blocks for easier wiring. The board takes an input voltage of 2 V to 11 V and provides two bidirectional motor channels capable of 1.2 A continuous or 1.5 A peak. You can also reconfigure the board for a single channel with twice the current.
Bonus feature – power your Raspberry Pi from your motor supply!
The Raspberry Pi requires a regulated 5 V supply, which is usually provided via the Micro-B USB power port. This is fine for a stationary setup, since you can just use a USB wall power adapter. On a battery powered Raspberry Pi-based robot, however, you need to somehow incorporate your own 5 V regulator capable of supplying about 500 mA. To help simplify your project, the motor driver kit includes a connection point for a three-pin regulator with the standard VIN-GND-VOUT pinout.
In the picture below you can see a complete setup using the motor driver board and our Step-Up/Step-Down Voltage Regulator S7V7F5 to drive two Pololu plastic gearmotors and power the Raspberry Pi from a set of four AA NiMH cells. This regulator is a good match for the range of input voltages of the DRV8835, though below about 4 V you might need something with higher current capability.
 |
Driving motors with an assembled Pololu DRV8835 Dual Motor Driver Kit on a Raspberry Pi B+. A step-up/step-down regulator provides 5 V to the Raspberry Pi. |
|---|
For more information, including schematics, pinout diagrams, and example Python code, see the product page.
Related products


Video: LVBots August 2014 looped maze solving competition
LVBots held a looped maze solving competition at Pololu on August 7th. It worked a lot like the maze solving competition we held in May, except we advanced to a maze that had loops. Adding loops might not seem like much, but it makes solving mazes fundamentally more challenging. Instead of being able to follow a simple strategy like always turning left, the robots need to keep track of where they are in the maze in order to find an efficient path through it. The video shows the robot runs superimposed, making them easy to compare.
Robots based on the 3pi once again dominated. Ben’s 3pi: Ghost has an especially fun provenance: it is serial number 0J17, which is a very early production unit that David gave to Kevin for his birthday back before Kevin worked at Pololu. Ben’s ridiculously optimized/calibrated code from many years ago somehow worked only on our earliest 3pis, which had motor brackets that we painstakingly injection molded by hand and 3D printed wheels and ball casters. Now that he has kids, Ben doesn’t have as much time for hours of fine tuning, so his era of dominance will likely come to an end as soon as he runs out of access to ancient 3pis.
Are you in the Las Vegas area? Check out the LVBots Meetup page to get involved.
Related products

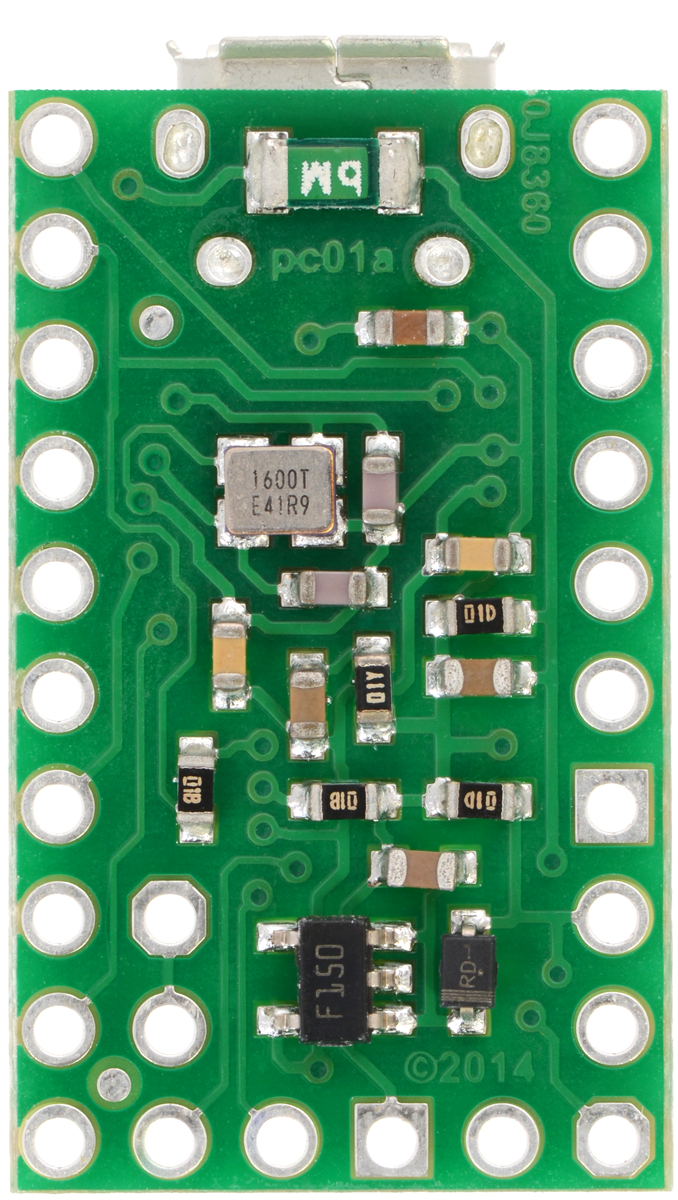
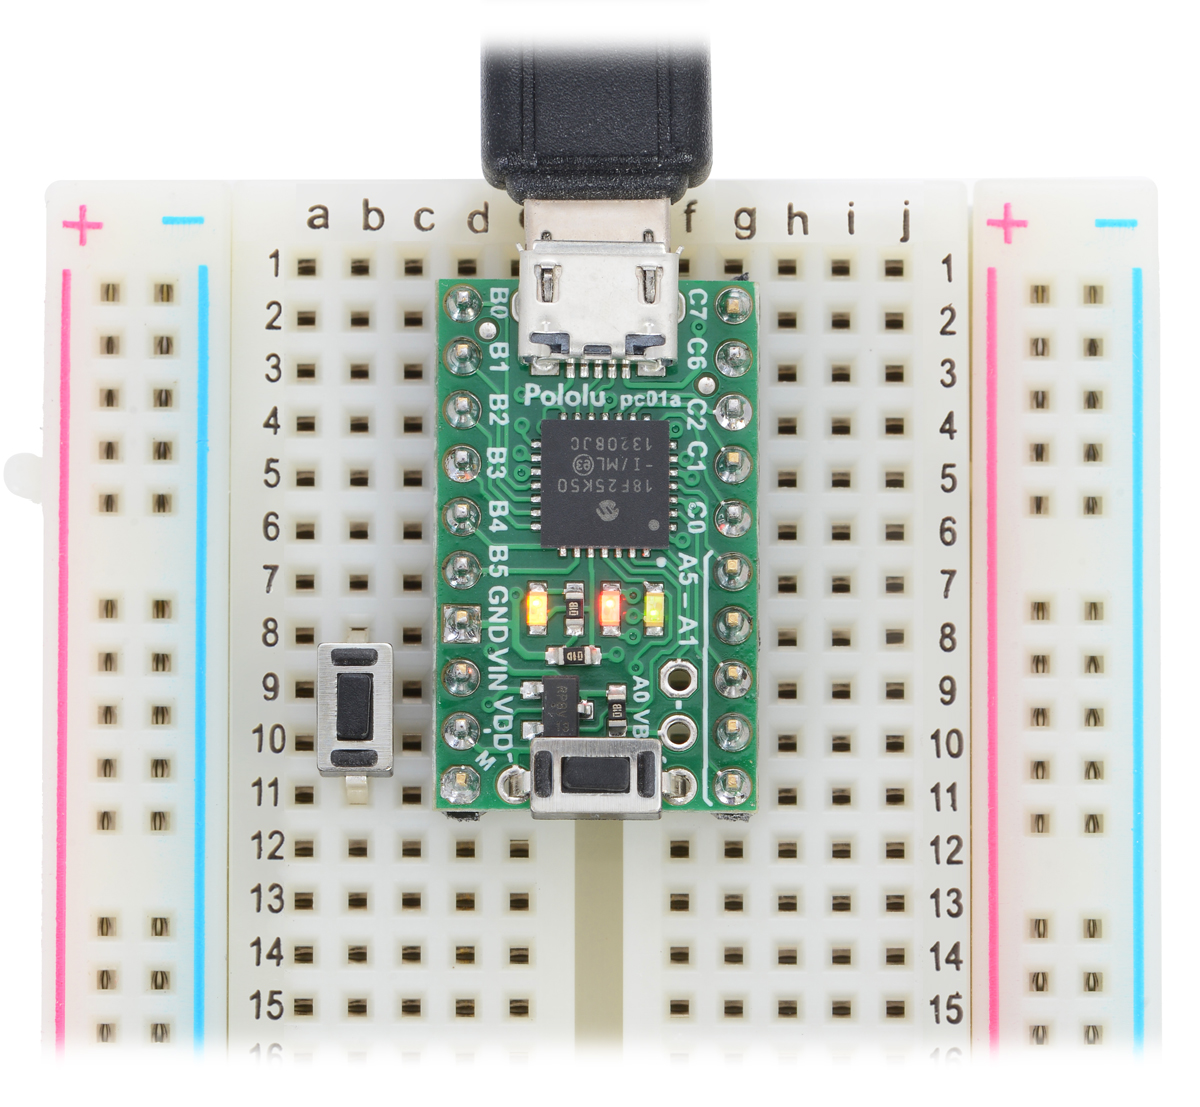
New product: P-Star 25K50 Micro
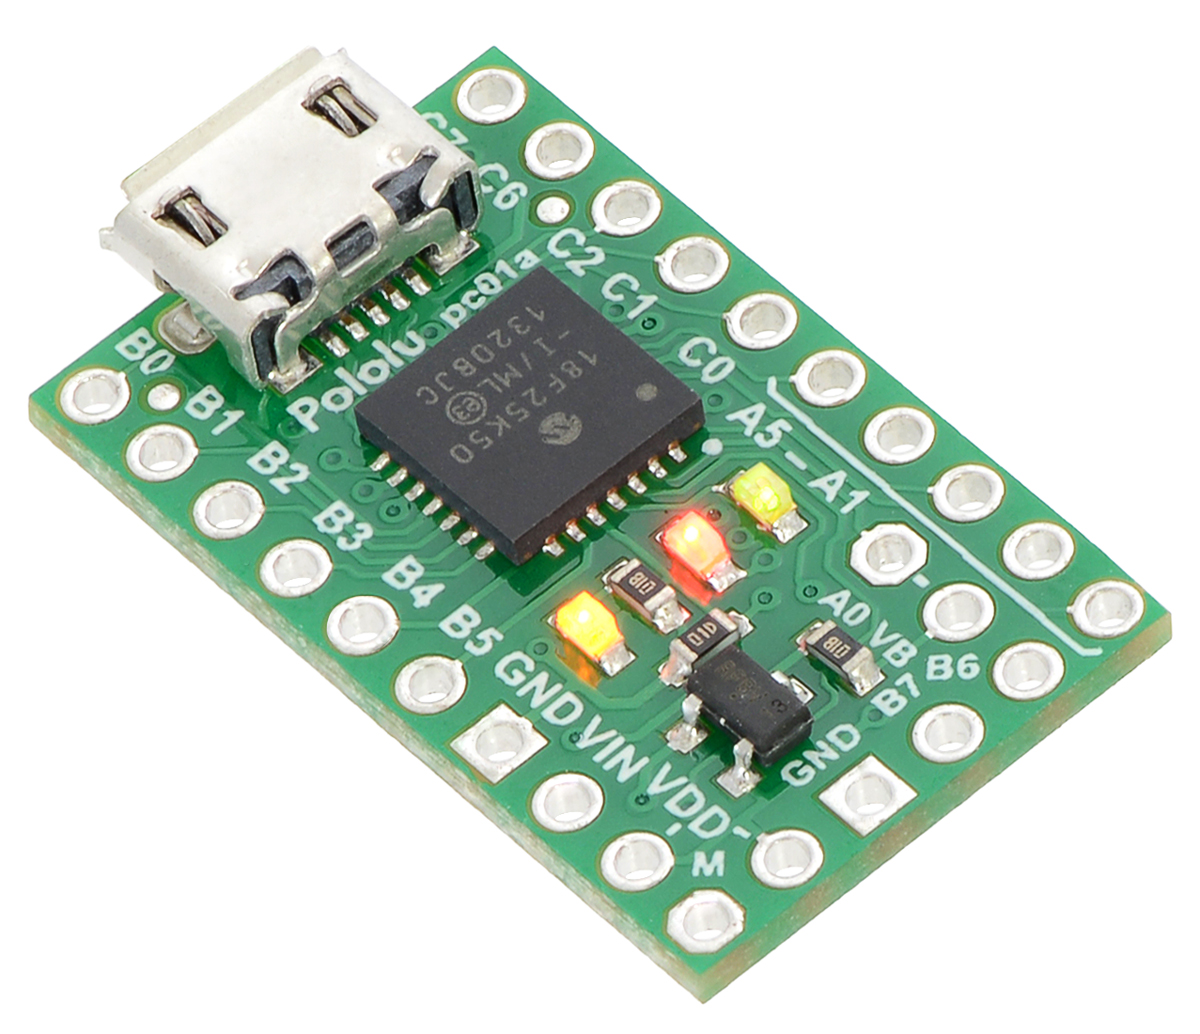 |
We just released the P-Star 25K50 Micro, a programmable breakout board for Microchip’s PIC18F25K50 microcontroller. Although we have been using PIC microcontrollers since our very first product, the P-Star 25K50 Micro (abbreviated P*) is our first product where the PIC microcontroller can be programmed by the user. The P-Star 25K50 Micro is the same size as our AVR-based A-Star 32U4 Micro, and we designed it with the hope that it would be small and cheap enough to go into (and stay in) almost any project.
The PIC18F25K50 has 32 KB of flash program memory, 2 KB of RAM, and built-in full-speed USB functionality. Applications can be developed using standard Microchip PIC compilers and development tools (such as MPLAB X and XC8).
The P-Star 25K50 Micro can be programmed via its proprietary USB bootloader using our open source software that is available for Windows, Linux, and Mac. The bootloader uses 8 KB of flash memory, leaving 24 KB for the user. Alternatively, an ICSP programmer can be used to erase the bootloader and access the full 32 KB of program memory. (Since the bootloader cannot be recovered, we recommend this option only for those who are comfortable programming exclusively with an external programmer.)
The P-Star 25K50 Micro features a precision 16 MHz crystal, a USB Micro-B connector, and three user-controllable LEDs. A voltage regulator and power selection circuit allow the board to be powered from either USB or an external 5.5 V to 15 V source, while a resettable PTC fuse on the USB VBUS supply and reverse protection on VIN help protect it from accidental damage.
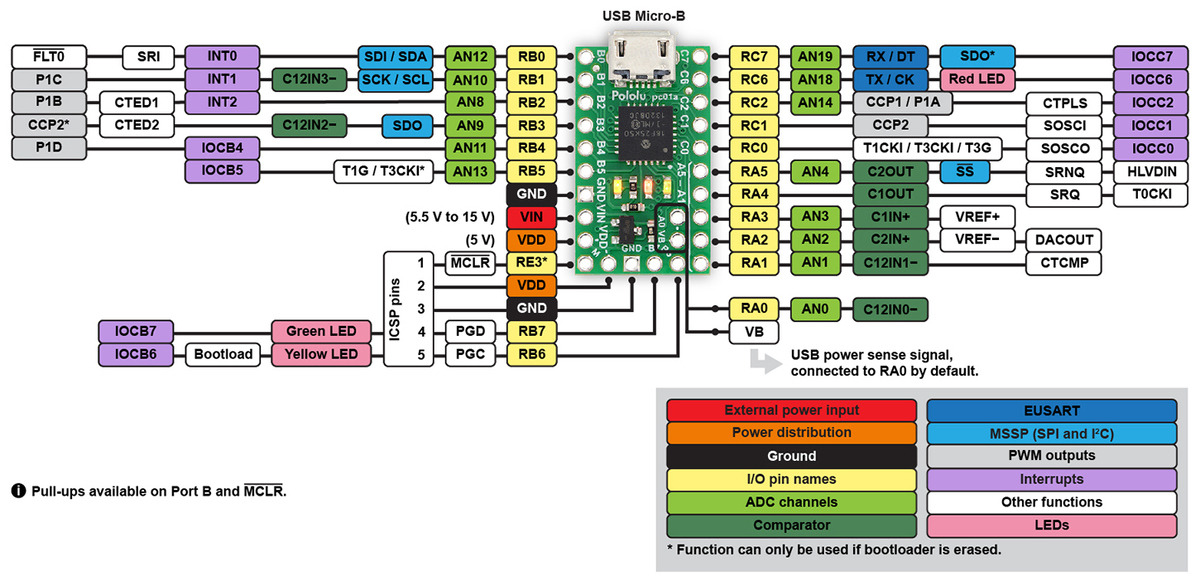 |
P-Star 25K50 Micro pinout diagram. |
|---|
Compared to the popular ATmega32U4 microcontroller, the PIC18F25K50 has nearly the same performance and memory capacity, but it also has some compelling features that are missing on the AVR. For example, the PIC18F25K50 uses the PIC18 architecture, which has two interrupt priority levels: interrupts can be assigned to either level, and a high-priority interrupt routine can run in the middle of a low-priority one. This powerful feature is what enables our Maestro servo controllers to generate precise servo signals while still using low-priority interrupts to assist with serial communication and other tasks. Unlike the ATmega32U4, the PIC18F25K50 can operate at full speed down to 2.7 V (though the brown-out reset on the P-Star is activated at 2.85 V by default).
|
|
The PIC18F25K50 also has a 5-bit digital-to-analog converter (DAC), which is a fun feature not available on many 8-bit microcontrollers.
 |
A 3 kHz triangle wave generated by the 5-bit digital-to-analog converter (DAC) on the P-Star 25K50 Micro. |
|---|
For more information, check out the P-Star 25K50 Micro page, and let us know what you think in the comments.
Related products


Home | Forum | Blog | Support | Ordering Information | Lists | Distributors | BIG Order Form | About | Contact
© 2001–2025 Pololu Corporation


