Pololu Blog »
Pololu Blog (Page 42)
Welcome to the Pololu Blog, where we provide updates about what we and our customers are doing and thinking about. This blog used to be Pololu president Jan Malášek’s Engage Your Brain blog; you can view just those posts here.
Popular tags: community projects new products raspberry pi arduino more…
Black Friday/Cyber Monday deals revealed!
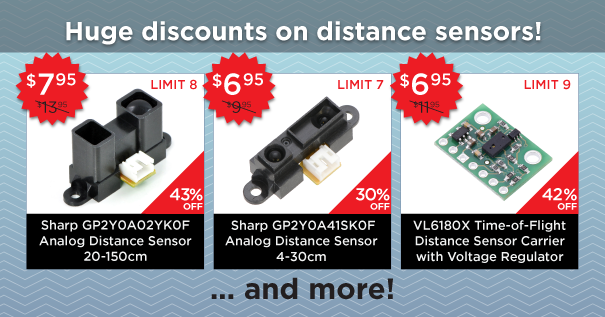
All of the sale details are now listed on our Black Friday/Cyber Monday sale page. Check them out and get your carts ready because the sale starts in less than six hours! Here are just some of the deals:
Our Black Friday/Cyber Monday sale is almost here!
Our biggest sale of the year is less than two days away! As in previous years, we are offering huge discounts on hundreds of products, but we’re also introducing a new feature this time around: upgrades to the next best price break on the rest of the products we carry. You will also be able to select free bonus items with orders over $100. We have put up some of the special offers on the Black Friday/Cyber Monday sale page; stay tuned for more details, including the full list of discounted products and coupon codes.
New Pololu Zumo T-Shirts
 |
Robot enthusiasts: if you want to show your Pololu pride but covering yourself with Pololu stickers just doesn’t seem fashionable, we’ve got good news for you! Our new Zumo T-shirts are here, featuring a Zumo 32U4 robot within a sprocket-inspired border, accompanied by our call to “Engage Your Brain”. These pre-shrunk cotton shirts are available in several colors (royal blue, cardinal red, or charcoal gray) and a range of sizes.
 |
New big MOSFET-based power switches
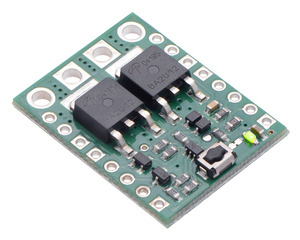
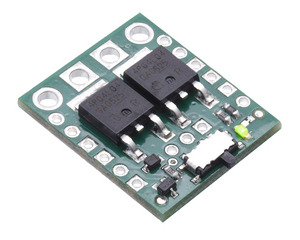
Our mini MOSFET-based power switches now have a set of companion versions with larger MOSFETs:
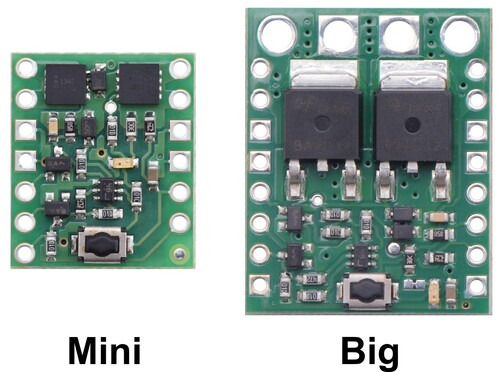 |
As I mentioned when announcing the Mini switches in September, they have many advantages over our older pushbutton power switches, including a much larger input voltage range and reverse protection, but the current limits were lower. With the new big switches, we can now support applications well beyond what the older products could handle. We are offering two versions with different MOSFETS: the MP unit can handle about 8 A, and the HP version is good for about 16 A. Both operate over the same 4.5 V to 32 V range as the Mini SV switches.
Like the mini power switches, these big switches are available with our patented push-on/push-off latching circuit or with a simple slide switch:
|
|
For more information, see the links below or check out our power switch category.
Kevin's mini-sumo robot: Roku
My robot, Roku, was the champion of LVBots’ August mini-sumo competition. While I didn’t have the time or inspiration to make it look like anything more interesting (like a Star Wars droid) or make use of especially innovative tactics, I think I managed to build a robot that not only is effective but also looks fairly clean and well put together. In addition, it’s a good demonstration of how the Pololu A-Star 32U4 Robot Controller can be used as a standalone main board for a small robot. Continued…
New products: Scooter/Skate Wheels
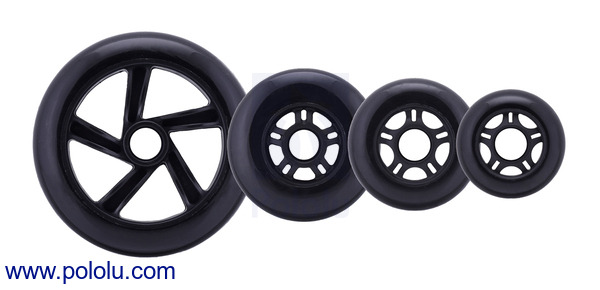
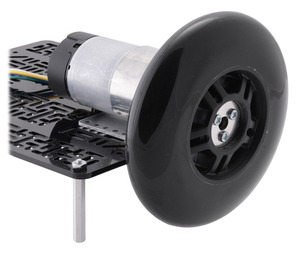
We are rolling out another set of new products here at Pololu: Scooter/Skate Wheels. They are available in 144×29 mm, 100×24 mm, 84×24 mm, and 70×25 mm sizes, offering larger alternatives to our line of Pololu Wheels. They are compatible with standard 608 bearings, so they also work with our Aluminum Scooter Wheel Adapters, which make it easy to connect these wheels directly to an assortment of motors for use in robot drive systems:
|
|
You can find more information about these wheels on their product pages:
New product: G2 High-Power Motor Driver 24v13
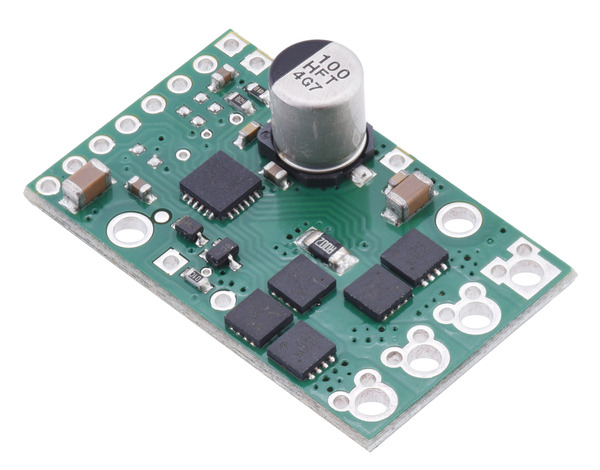
We are excited to announce the release of the Pololu G2 High-Power Motor Driver 24v13. Like our original high-power motor drivers, this board is a discrete MOSFET H-bridge that is designed to drive large DC brushed motors. As the first of our second-generation high-power motor drivers, the 24v13 can supply a motor with a continuous current as high as 13 A at voltages between 6.5 V and 40 V (absolute maximum).
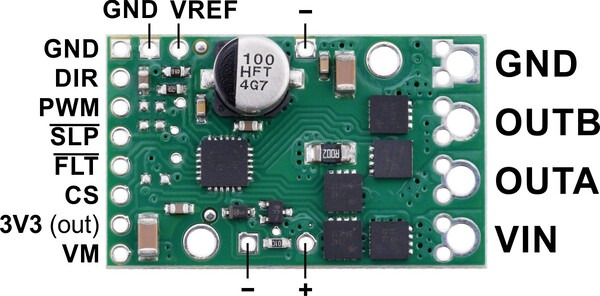 |
The G2 driver is designed to be a near drop-in replacement for its predecessor, with an identical form factor and a similar pinout, but it offers a number of new features and improvements over the older version. Reverse-voltage protection on the power supply inputs helps prevent instant destruction if a battery is connected backwards, while basic current sensing and limiting functionality help the driver handle large loads more gracefully. The G2 driver is also compatible with systems running at 3.3 V (and lower), unlike our original high-power motor drivers.
To learn more about the motor driver’s features and capabilities, see its product page.
Video: MyoWare Muscle Sensor demonstration with Maestro servo controller
 |
I got your torque right here ;) |
|---|
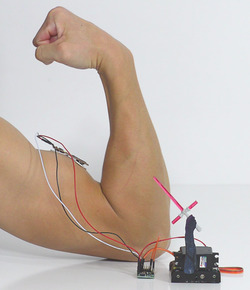
Now that we are carrying Advancer Technologies’ MyoWare Muscle Sensor, it is time to update our demonstration video! I’ve had two whole years to add some mass to my biceps (during which time I continuously worked on those bad boys for a grand total of four weeks), and now I can proudly present to you these sick gains.
The demonstration is basically a redo of the original muscle sensor demo with the new sensor, except for a few small differences (honestly, my biceps are not that much bigger). In this setup, a 6-channel Maestro reads the muscle sensor’s analog voltage output and commands the position of a Power HD servo. The Maestro’s +5 V (out) pin supplies power to the MyoWare Muscle Sensor, and the servo and Maestro are powered by 4 rechargeable AA batteries. On a personal note, I found it really satisfying to use a single power source for this demonstration, which is not something you can do with the previous version of this muscle sensor, as it requires two supplies. (Be sure to check out the MyoWare Muscle Sensor’s product page to read about more ways the new muscle sensor improves upon the older version!)
This Maestro script is slightly more interesting than the script in the last demo, since the servo’s default direction of rotation was the opposite of the motion for a bicep curl (and we were already quite happy with the servo’s orientation with respect to my arm for the planned video footage). To get around this, and make the servo arm movement match the position of my arm during a bicep curl, I did some basic math and came up with an equation that you can see in the code below:
# Sets servo 1 to a position based on the analog input of the MyoWare Muscle Sensor.
begin
  8000            # put this value on the stack (for why, see line 5)
  0 get_position   # get the value of the muscle sensor's signal connected to channel 0
  4 times minus    # y = -4x + 8000 , which is an equation we use to deal with the servo's
                   # default direction of rotation and scale the Maestro's Target
                   # value to roughly 4000-8000 (approximately 1-2 ms)
                   # which is the range of servo pulses that corresponds
                   # to the motion we want.
  1 servo          # set servo 1 accordingly
repeat
You can, of course, use other devices to read the analog voltages from the MyoWare Muscle Sensor. If you have not already, you might try using one of our A-Stars!
If you have a project that uses the MyoWare Muscle Sensor, we would be pumped to hear about it!
One-sixth scale Mark 1 British Heavy Tank by Helen Lawson
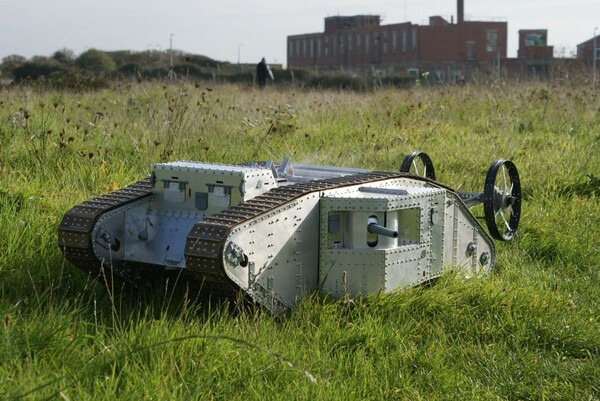
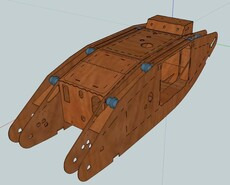
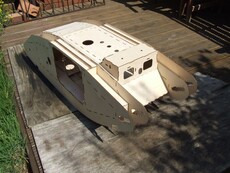
Helen Lawson designed and built a one-sixth scale Mark 1 British Heavy Tank replica that is a functional, radio controlled robot. The replica has been a work in progress for around three years and is now reaching completion. Helen designed the main chassis out of laser-cut wood and made other aspects of the chassis from aluminum and 3D printed parts.
|
|
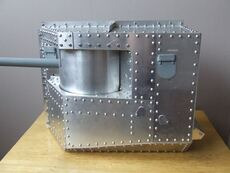
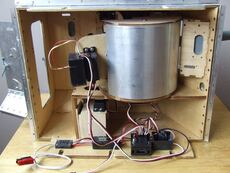
One distinguishing feature of a MK 1 British Heavy Tank is the lack of a central turret. Instead, it has a sponson on each side. This proved challenging for Helen’s build since most electronics made for RC tanks only allow for a single gun and turret. To make the sponsons functional, Helen used a combination of an RC receiver, an RC switch with digital output, an RC switch with relay, a Micro Maestro servo controller, a few servos, and a Taigen gun flash unit. You can find more detailed information about this part of the system (including a wiring diagram and Maestro script) in her post on our forum. The images below show each side of one of the completed sponsons:
|
|
She also made a 3D-printed case for the Maestro (shown in the photo on the right) and a few of the other electronic components, which she made available on her Thingiverse page.
You can see a video of the robot in action on this Portsmouth Model Boat Display Team Armoured Division Facebook page, and even more information on her build, including many more pictures, in Helen’s forum thread at landships.net.
37D mm metal gearmotors with encoders and end caps
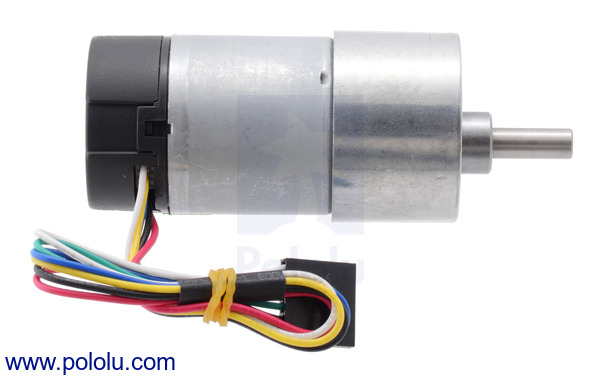
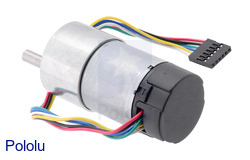
Our 37D mm metal gearmotors now have fitted plastic end caps over their encoders that neatly protect the assembly and keep stray objects clear of the magnetic disc. The pictures below show the previous version (without end cap) next to one of the new ones:
|
|
The end cap is easily removable if you need to access the encoder or want a few more millimeters of clearance for your gearmotor, but there is a little bit of base plastic that will remain (as shown in the picture below), so removing the end cap does not quite make these new ones identical to the previous versions.
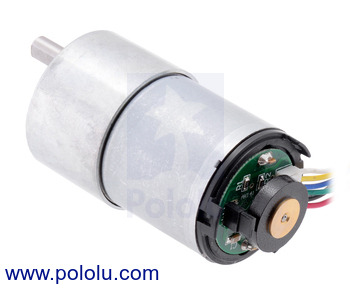 |
37D mm metal gearmotor with 64 CPR encoder (with end cap removed). |
|---|
These gearmotors are available in six different gear ratios and with or without encoders, and we also carry the motor and encoder assembly by itself with no gearbox. The following table shows all of our 37D mm metal gearmotor options:
| Gear Ratio | No-Load Speed @ 12 V |
Stall Torque @ 12 V |
Stall Current @ 12 V |
 With Encoder |
 Without Encoder |
|---|---|---|---|---|---|
| 1:1 | 11,000 RPM | 5 oz-in | 5 A | motor without gearbox | |
| 19:1 | 500 RPM | 84 oz-in | 5 A | 37Dx52L mm | 37Dx52L mm |
| 30:1 | 350 RPM | 110 oz-in | 5 A | 37Dx52L mm | 37Dx52L mm |
| 50:1 | 200 RPM | 170 oz-in | 5 A | 37Dx54L mm | 37Dx54L mm |
| 70:1 | 150 RPM | 200 oz-in | 5 A | 37Dx54L mm | 37Dx54L mm |
| 100:1 | 100 RPM | 220 oz-in | 5 A | 37Dx57L mm | 37Dx57L mm |
| 131:1 | 80 RPM | 250 oz-in | 5 A | 37Dx57L mm | 37Dx57L mm |

