Support » Pololu Balboa 32U4 Balancing Robot User’s Guide » 1. Overview »
1.2. What you will need
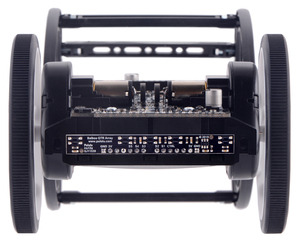
You will need a number of additional components and tools to complete your Balboa robot, the most important of which are motors and wheels. Since the Balboa 32U4 robot kit works with a variety of motors and wheels, motors and wheels are not included; this means you can choose your own to personalize your robot.
Motor selection
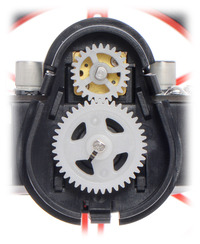 |
A look inside the external gearbox on the Balboa 32U4 Balancing Robot. |
|---|
The Balboa uses two micro metal gearmotors to drive external 2-gear gearboxes that further increase the gear ratio and support the weight of the robot with ball bearings rather than the motor shafts themselves. The Balboa kit gives you five reduction options to choose from when assembling your robot (ranging from 1.64:1 to 2.88:1), and you can further customize the gear ratio based on which micro metal gearmotor you choose for your robot. The integrated quadrature encoders require gearmotors with extended motor shafts, and we specifically recommend the 30:1 HPCB, 50:1 HPCB, or 75:1 HPCB versions. Note that torque is approximately proportional to the gear ratio and speed is inversely proportional, so as the gear ratio gets bigger, the torque increases while the speed decreases.
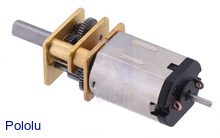 |
Micro Metal Gearmotor HPCB with extended motor shaft. |
|---|
The kit includes magnetic encoder discs, and the encoder sensors are built into the Balboa 32U4 control board, so you do not need to order encoders with your motors.
Wheel selection
We recommend using the Balboa with 80×10mm Pololu wheels, which are available in five colors — black, red, yellow, blue, and white — but our larger 90×10mm wheels and smaller 70×8mm wheels are also options if you know what you are doing (note that the 70×8mm wheels only offer a few millimeters of clearance when the robot is balancing).
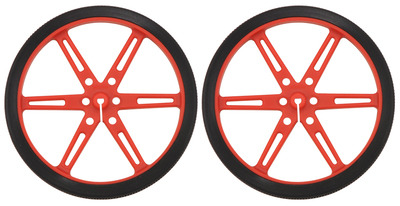 |
Pololu Wheel 80×10mm Pair – Red. |
|---|
These additional items are also needed for using and assembling the Balboa 32U4 robot kit:
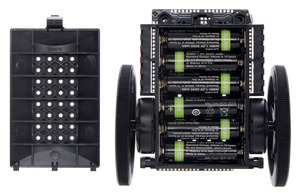 |
Balboa 32U4 Balancing Robot with battery cover removed. |
|---|
Other things you will need
- six AA batteries. The Balboa works with both alkaline and NiMH batteries, though we recommend rechargeable NiMH cells.
- USB A to Micro-B cable to connect the board to your computer for programming and debugging
- soldering iron and solder (we recommend one with adjustable temperature control like the Hakko FX-888D Digital Soldering Station)
- small Phillips screwdriver
- wire cutter for trimming leads
Optional tools
- small pair of pliers
- wire stripper, for adding wires for peripherals
- tape or small clamps (for holding parts together when soldering)
- small 2 mm slotted screwdriver for adjusting the LCD contrast
Optional accessories
You might also consider getting these for your Balboa:
- an 8×2 character LCD and low-profile 2×7 male header so you can connect it to the female LCD header on the Balboa
- a compatible Raspberry Pi (Model B+ or newer, including Pi 3 Model B and Model A+) and a 2×20 female header, standoffs, screws, and nuts for mounting it
- The Balboa is intended to be used with our standoffs with 4 mm threads. Our standoffs with longer (6 mm) threads will interfere with the chassis.
 |
Center-aligned mounting option for the 5-Channel reflectance sensor array for Balboa. |
|---|
- 5-Channel Reflectance Sensor Array for identifying changes in reflectance on the ground directly underneath the Balboa (like detecting or following a black line on a white background)
- other sensors, such as optical or sonar range finders
- connectors and jumper wires, for connecting additional sensors and components
- battery charger, if you are using rechargeable batteries; since the Balboa just uses ordinary AA batteries, we recommend basic AA chargers (into which you stick the individual cells) available at most general electronics stores, though we carry a much fancier iMAX-B6AC V2 balance charger/discharger that can be also used for this


