Pololu Blog » Posts tagged “new products” »
Posts tagged “new products” (Page 27)
You are currently viewing a selection of posts from the Pololu Blog. You can also view all the posts.
Popular tags: community projects new products raspberry pi arduino more…
New product: CH Robotics UM7-LT orientation sensor
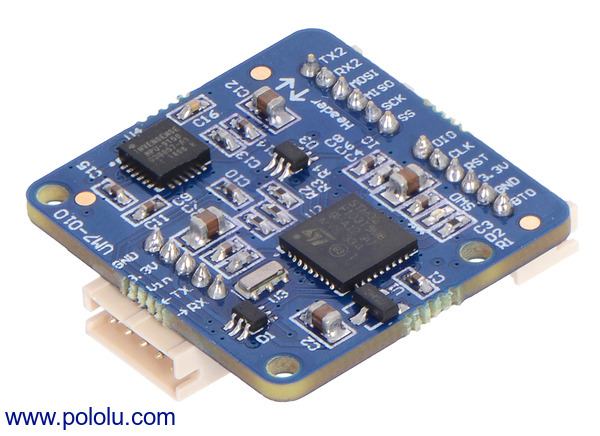
We’re now selling the UM7-LT orientation sensor, the latest Attitude and Heading Reference System (AHRS) from CH Robotics. The UM7 takes advantage of newer sensor technology to offer improved performance compared to its predecessor, the UM6, despite its reduced cost.
Like earlier CH Robotics AHRS modules, the UM7 contains an onboard microcontroller that combines data from its three-axis accelerometer, gyro, and magnetometer to produce orientation estimates 500 times a second. The attitude and heading information, available in the form of Euler angles or quaternions, can either be streamed automatically or provided upon request through a TTL serial interface.
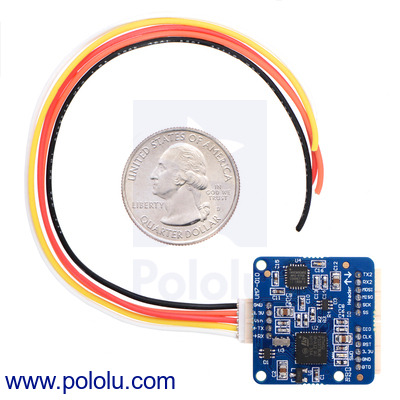 |
Power and serial connections can be made to the UM7-LT through a five-pin connector and an included matching cable, and expansion headers provide additional interfaces like SPI and a secondary UART that can be connected to an external GPS module. The free CHR Serial Interface software makes it easy to visualize data from the UM7 and configure its settings.
For more information about the UM7-LT, see its product page. A version of the UM7 with an enclosure, similar to the enclosed UM6, is expected to be available in the next few months.
New products: Aluminum mounting brackets for Pololu Plastic Gearmotors
|
|
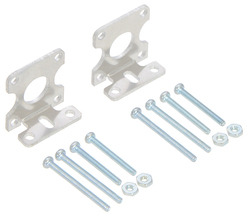
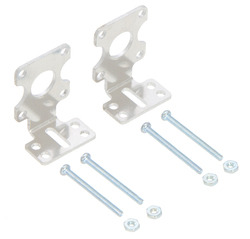
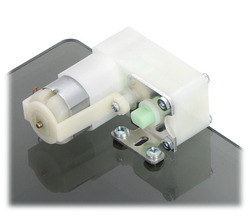
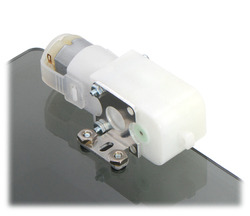
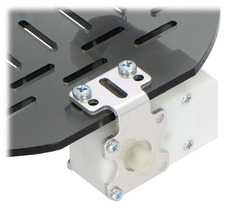
We designed these new stamped aluminum L-brackets specifically for our larger Pololu plastic gearmotors (228:1 offset, 120:1 offset, 200:1 90-degree, and 120:1 90-degree). There are two versions of this L-bracket to choose from – a compact version and an extended version, which allows for a wider variety of mounting options. The brackets are sold in pairs and come with the hardware required to secure a motor to each bracket. As a bonus, they are also compatible with the Solarbotics plastic gearmotors (GM2, GM3, GM8, and GM9) and make great alternatives to the GMB39 and GMB28 brackets.
|
|
||
|
|
See the product pages for additional information:
- Pololu Stamped Aluminum L-Bracket Pair for Plastic Gearmotors
- Pololu Extended Stamped Aluminum L-Bracket Pair for Plastic Gearmotors
New product: TPS2113A Power Multiplexer Carrier with USB Micro-B Connector
Earlier this year we released a carrier for the Fairchild FPF1320, a power multiplexer that can switch between two separate power supplies, such as USB and a battery-powered 5 V regulator. The FPF1320 is great for transitioning between power sources based on an external selection signal, but by itself, it is not ideal for applications like a USB-powered microcontroller: it lacks a voltage sensor that would enable the switching to be both seamless and automatic. (By default, our carrier allows the output voltage to drop below 1.5 V whenever it switches from its preferred to alternate power source.)
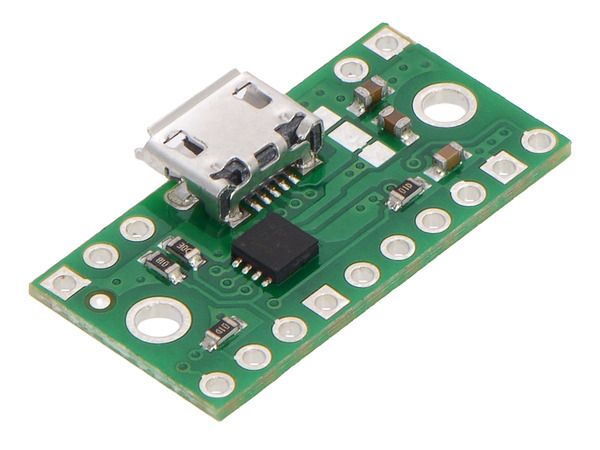
That’s why we’re excited about Texas Instruments’s TPS2113A, a power multiplexer with built-in voltage sensing that supports automatic seamless switching, and today we are happy to announce the release of our TPS2113A Power Multiplexer Carrier with USB Micro-B Connector.
The switching behavior of the TPS2113A depends on the state of its VSNS input. Our carrier pulls VSNS low through an on-board pull-down resistor, which causes the multiplexer to simply select the higher of the two input sources to pass to the output. However, adding another resistor between VSNS and the primary input source creates a voltage divider that allows you to set a precise threshold voltage at which the multiplexer will switch to the secondary source.
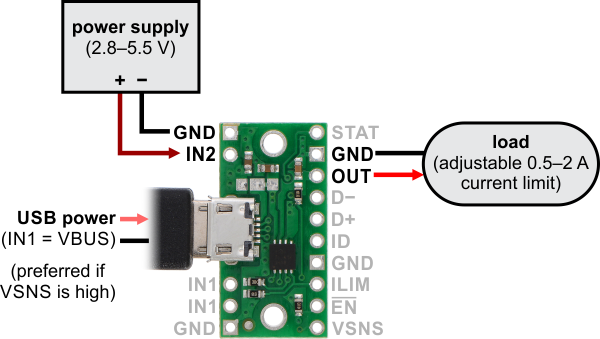 |
For example, the TPS2113A could be used to build a device that is primarily powered by USB, but switches to a secondary 5 V supply as soon as the USB voltage falls below 4.8 V. Since the multiplexer can prevent its output from falling below 4.8 V during the transition, it enables the system to be seamlessly connected to and disconnected from USB without noticeable power interruptions.
The TPS2113A offers additional features that can be useful in a power supply circuit, including an adjustable current limit and a status output that indicates which power source is currently selected. Our carrier board breaks out all of the chip’s pins, making it easy to connect additional components and customize the multiplexer’s behavior for a range of applications.
We think the TPS2113A is a great power switching solution for USB devices, and we look forward to using it in upcoming designs; keep an eye out for it in our future products!
New products: Adafruit NeoPixel rings
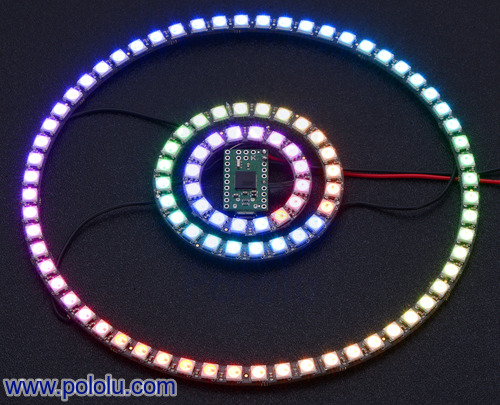 |
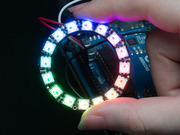
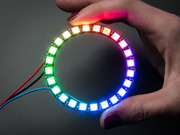
Continuing with our recent LED product line expansion, we now offer several of Adafruit’s NeoPixel rings. These addressable RGB LED rings are available in a 1.75″-diameter 16-LED ring, a slightly larger 24-LED ring, and as 15-LED quarter-rings that can be assembled into a large 60-LED ring.
|
|
|
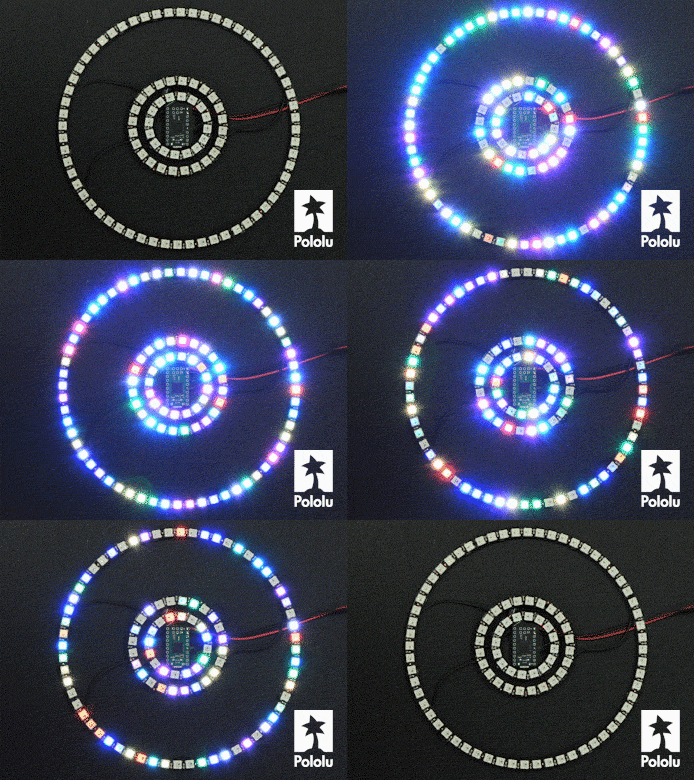
The NeoPixels are effectively WS2812B RGB LEDs that are individually addressable and controllable by a single digital pin from a microcontroller. Multiple rings can be chained together, and the rings can be chained with our other WS281x-based LED products. The animated picture below shows the three different sizes of rings we carry connected in a single chain and controlled by a single pin from an A-Star 32U4 Micro, which is small enough to fit completely within the smallest ring.
 |
New products: Discrete addressable through-hole RGB LEDs
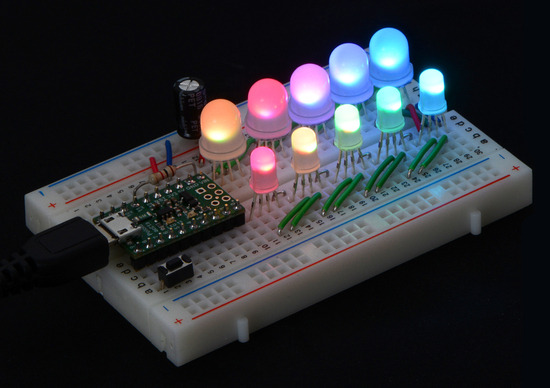 |
A chain of addressable RGB LEDs (#2535 and #2536) on a breadboard, controlled by an A-Star 32U4 Micro. |
|---|
At first glance, these new LEDs look like everyday through-hole RGB LEDs, but they are hiding something very special inside: a built-in WS2811 LED driver that lets you chain them together and individually control them all with a single digital output from a microcontroller. The communication protocol of these LEDs is very similar to that of our WS2812B-based LED strips and Adafruit’s NeoPixels (such as those on the Adafruit NeoPixel Shield, which we just started carrying last week), so there is a variety of sample code available for the Arduino, AVR, and mbed microcontroller platforms to help you make your project start blinking quickly.
We offer these LEDs in two different sizes: 5 mm and 8 mm.
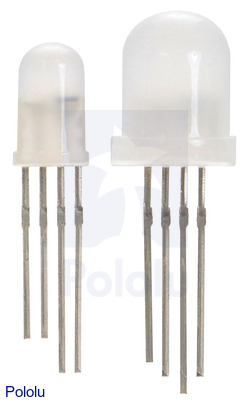 |
Two different sizes of addressable RGB LED. From left to right, their diameters are: 5 mm (#2535) and 8 mm (#2536). |
|---|
New product: Adafruit NeoPixel Shield for Arduino
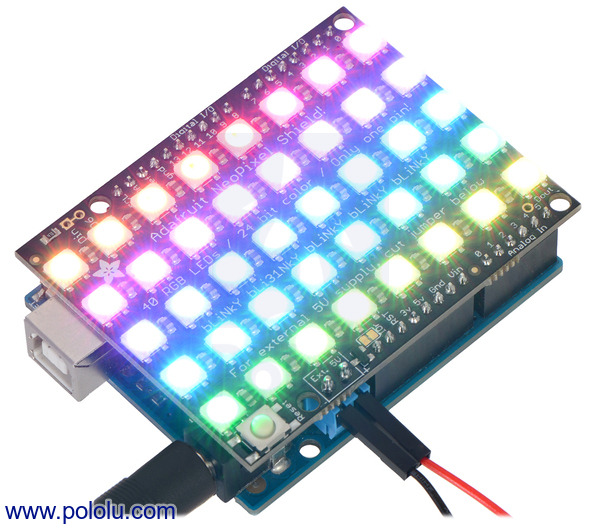
I love LEDs and all of the shiny, blinky, colorful things you can do with them (see what we did to my house last Christmas), so you can imagine how happy it makes me that we are now carrying Adafruit’s NeoPixel Shield for Arduino! With 40 individually addressable, WS2812B-based RGB LEDs all controlled by a single Arduino pin, this shield is effectively like a grid version of our addressable RGB LED strips. And just like our LED strips, multiple NeoPixel shields can be chained together into larger arrays. Controlling the LEDs is easy with the help of the compatible Arduino libraries, which include the Adafruit NeoPixel and NeoMatrix libraries, as well as our Arduino library for addressable RGB LED strips. This shield is a great way to add color, style, or functionality to your next Arduino project!
For more information on the NeoPixel shield, see the product page.
Free magazines: June 2014 Circuit Cellar and Elektor
|
|
Get FREE copies of Circuit Cellar magazine’s June issue and Elektor magazine’s June issue with your order, while supplies last. To get your free issues, enter the coupon codes CIRCUIT0614 and ELEKTOR0614 into your shopping cart. Each magazine will add 6 ounces to the package weight when calculating your shipping options.
For back issues and more information, see our free Circuit Cellar magazine offers and free Elektor magazine offers.
New product: FEETECH FS90R Micro Continuous Rotation Servo
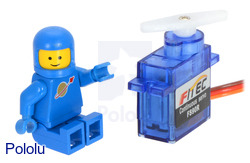 |
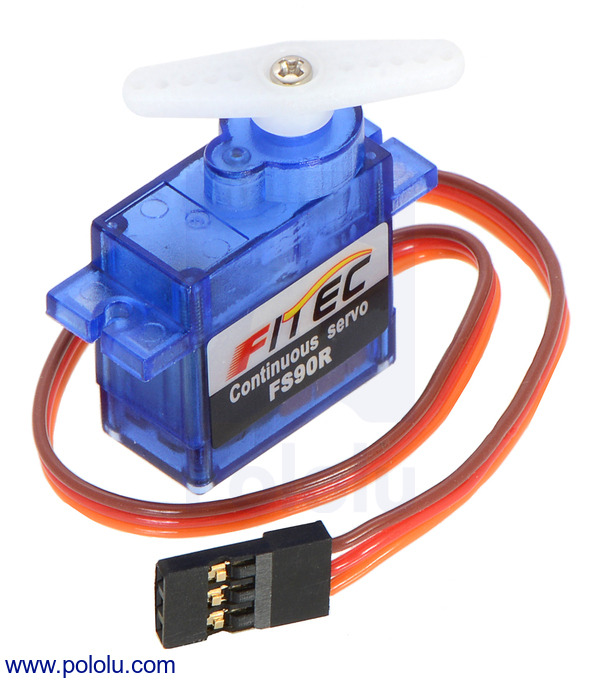
Continuing with our recent theme of tiny new actuators, we are now carrying FS90R micro continuous rotation servos from FEETECH. Continuous rotation servos are standard hobby RC servos that have been modified for open-loop speed control instead of their usual closed-loop position control, and they make convenient drive systems for robots because they are effectively a motor, gearbox, and motor controller/electronic speed control (ESC) in a single compact package. They are also very easy to use as they can be connected directly to an RC receiver or controlled by a single microcontroller I/O line programmed to output RC servo pulses.
With a weight of just 9 g, the FS90R is the smallest servo we have come across that is manufactured specifically for continuous rotation. It has great speed and torque for its size (up to 130 RPM and 1.5 kg-cm at 6 V), and at only $5 per servo, it is a very simple and affordable way to add some motion to your next project. For comparison (or if you are looking for an alternative servo that offers position control), it is very similar in size, weight, speed, and torque to the Power HD Micro Servo HD-1900A.
For more information on the FS90R micro continuous rotation servo, see the product page. For other options, you can check out our full selection of continuous rotation servos or our entire RC servo category.
 |
Continuous rotation servo size comparison. From left to right: SpringRC SM-S4303R, Power HD AR-3606HB, FEETECH FS5106R, Parallax Feedback 360°, Parallax (Futaba S148), and FEETECH FS90R. |
|---|
Related post: Understanding continuous-rotation servos and multi-turn servos
New versions of our 500mA D24V5Fx step-down voltage regulators
A few months ago, we introduced our new D24V5Fx buck (step-down) voltage regulator family with inaugural members offering fixed output voltages of 3.3 V, 5 V, 9 V, and 12 V, and now we have expanded that family by adding versions with fixed output voltages of 1.8 V, 2.5 V, 6 V, and 15 V.
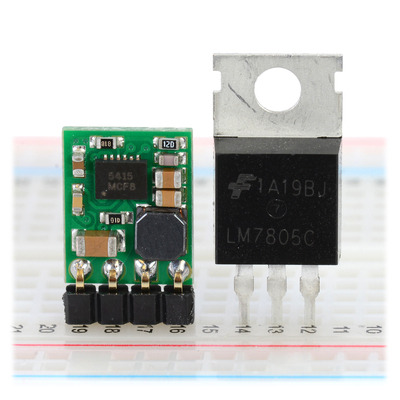
We are particularly excited about this regulator family because of its wide operating voltage range, high efficiencies, and low dropout voltages, all in a compact 0.5″ × 0.4″ × 0.1″ (13 mm × 10 mm × 3 mm) form factor that is smaller than standard through hole linear regulators with DIP packages. For example, the picture below shows a D24V5Fx next to a 7805 voltage regulator in a TO-220 package:
 |
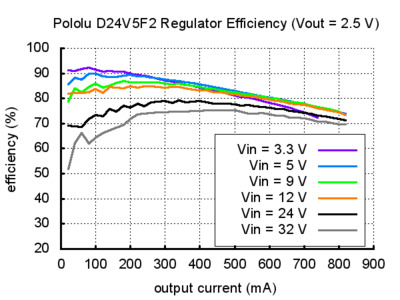
These regulators operate at up to 36 V, making them especially useful in applications where there can be large variation in the input voltage, such as solar-powered systems or devices where power supply flexibility is a benefit. Since they are switching regulators, the efficiency is much higher than linear regulators when there is a big difference between the input and output voltage, and since they are synchronous, the efficiency is high even at light loads and low output voltages. As an example of the versatility of these regulators, the same D24V5F2 module can in one application be used to get 2.5 V from a 24 V battery and in another be an efficient way to add a 2.5 V node to a system that already has regulated 5 V. As the performance graph below shows, typical efficiency in the latter scenario is 90%, which could almost double battery life in portable systems when compared to linear regulators.
 |
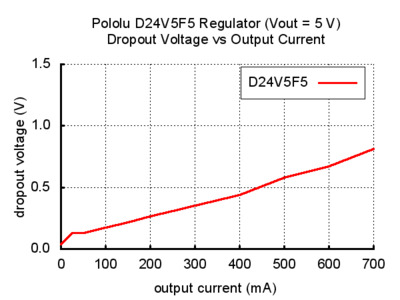
We consider the new D24V5Fx regulators to be next-generation alternatives to our D24V3Fx and D24V6Fx buck regulators, which have been some of our most popular products. In addition to having generally higher efficiencies (which in practice allow these 500 mA units to achieve maximum output currents comparable to our 600 mA D24V6Fx units), these new regulators have much lower dropout voltages (“dropout voltage” is the amount by which the input voltage must exceed the output voltage in order to ensure that the target output can be achieved). For example, the two graphs below show the dropout voltage of the new 5 V D24V5F5 compared to the older 5 V D24V6F5 and D24V3F5:
 |
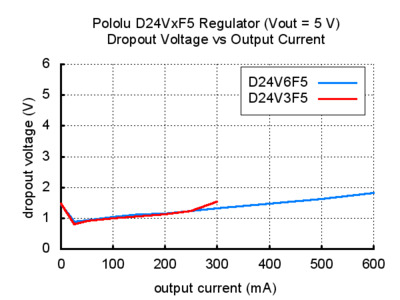 |
What this means for your project is broader operating ranges and longer battery life. For instance, a low-power 5 V system running on a 9 V battery can discharge it all the way to 5 V whereas the higher-dropout D24V6F5 regulator can only go to 6.5 V, and four-cell alkaline and five-cell NiMH packs (both with 6.0 V nominal voltages) become viable options.
For other regulator options, you can take a look at our full selection of step-up voltage regulators, step-down voltage regulators, and step-up/step-down voltage regulators.
New product: LPS25H pressure/altitude sensor carrier
We’ve just released a carrier board for ST’s newest pressure sensor, the LPS25H, and we’re also lowering the price of our LPS331AP carrier.
Like the LPS331AP, the LPS25H provides pressure readings over a range of 260 mbar to 1260 mbar (26 kPa to 126 kPa), and this data can be used to calculate the sensor’s altitude. Our LPS25H carrier mounts the sensor on a 0.4″ × 0.8″ board (0.1″ shorter than our earlier LPS331AP carrier) that breaks out all of its pins, and as usual, we’ve included level shifters and a regulator to make it easy to use in a 5 V system. Continued…
