Pololu Blog » Posts tagged “community projects” »
Posts tagged “community projects” (Page 4)
You are currently viewing a selection of posts from the Pololu Blog. You can also view all the posts.
Popular tags: community projects new products raspberry pi arduino more…
Aerial photography kite rig
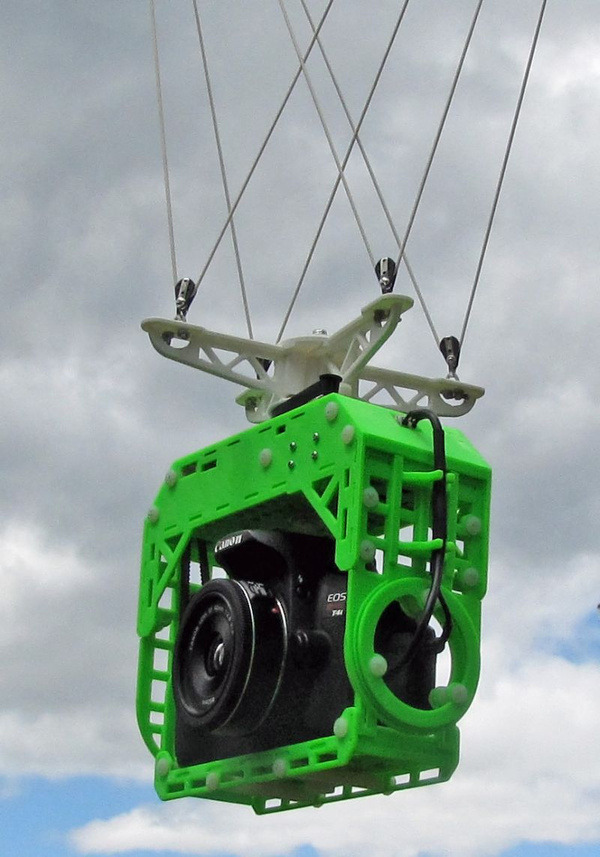 |
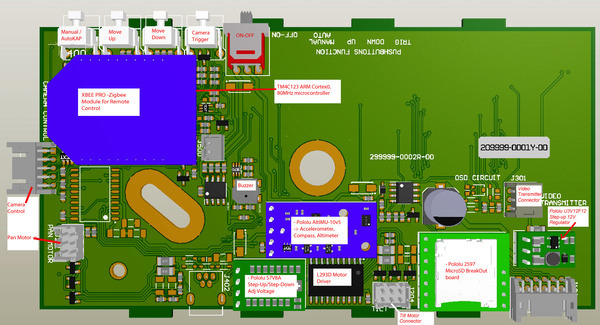
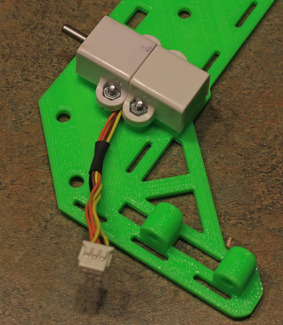
Pololu customer Yvon Hache made this 3D-printed aerial photography rig that he shared in a forum post. The rig, trailing 100 feet below the kite, automatically triggers a camera to take pictures at three tilt angles and sixteen pan angles. It incorporates an ARM Cortex-M4 microcontroller from Texas Instruments (32-bit, 80 MHz, TM4C123GH6PZ), an AltIMU-10 v5, Pololu voltage regulators, and a Zigbee module for wireless remote control. Yvon uses a pair of Pololu micro metal gearmotor extended brackets per motor—one mounts the motor to the frame and the other protects the encoder assembly.
|
|
More kite rig information and pictures can be found on Yvon’s website.
High-altitude balloon for the solar eclipse
This summer, Jon and I participated in NASA’s nationwide Eclipse Ballooning Project with the University of Nevada. Specifically, we were members of the University of Nevada, Las Vegas (UNLV) section of Nevada’s team which also had a section from the University of Nevada Reno (UNR). Our goal was to make a payload to collect interesting video footage and scientific data, then fly that payload on a high-altitude balloon that would ascend to around 100,000 ft in the totality zone during the 2017 solar eclipse on August 21. Continued…
Zumo 32U4 Robot for RoboFest's RoboHit competition
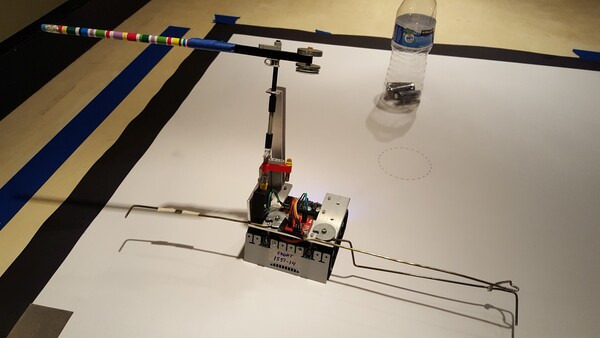
We were excited to hear from the NCA Lights high school student robotics team about their recent entry in the RoboFest Michigan Championship 2017 RoboHit competition. RoboFest is a series of robotics events and competitions organized by Lawrenece Technological University. This year’s baseball-themed competition, “RoboHit”, involved hitting a ping pong ball off of a water bottle with a pencil and circling the outer edge of the arena (base running).
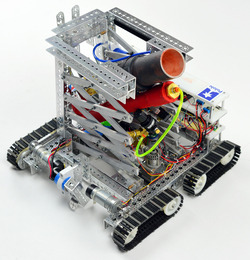
The NCA Lights used a Zumo 32U4 Robot Kit and two 50:1 Micro Metal Gearmotors HPCB 6V with Extended Motor Shaft as the base of their robot.
 |
Open-source myoelectric hand prosthesis
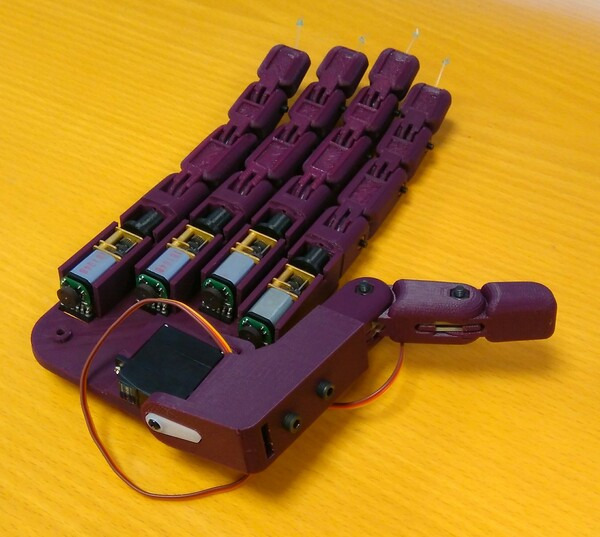
Pololu customer Alvaro Villoslada made this impressive open-source 3D-printable hand prothesis. Each finger uses a 1000:1 Micro Metal Gearmotor HP 6V with Extended Motor Shaft to wind a fishing line—acting as a tendon—onto a spool. A magnetic encoder attached to each motor enables closed-loop control, and the motors are driven by DRV8838 DC motor driver carriers. An RC hobby servo controls the thumb position. Alvaro uses a Teensy 3.1 microcontroller to monitor the encoders and control the actuators, and he built a user interface in Python for controlling the hand from a computer.
 |
For CAD files, detailed instructions and more pictures and videos, see the Hackaday project page.
MechWarfare robot
Forum member jwatte posted about a robot he made for the RoboGames MechWarfare 2017 competition. The goal is to build a walking robot that tries to hit an opponent’s pressure sensors with airsoft pellets or melee weapons. The robots walk around in a scaled-down cityscape field. Autonomous operation and teleoperation are allowed, but teleoperators must view the field from cameras mounted on the robot.
 |
The mech uses a few Pololu voltage regulators: a 3.3 V, 1 A step-down regulator D24V10F3 powers a Xbee-Pro 900 XSC S3B wireless transciever and the laser pointer, a 6 V, 500 mA step-down voltage regulator D24V5F6 powers an OpenCM 9.04A robot logic board, and a adjustable step-down regulator D24V6ALV powers a 5.8 GHz wireless camera. A 250:1 Micro Metal Gearmotor LP 6V drives the plastic BB agitator that feeds the airsoft gun. The wiring harnesses used a lot of our pre-crimped wires.
For more details including a system block diagram see the forum post.
Ten-Tec 1254 Receiver Display Upgrade Kit
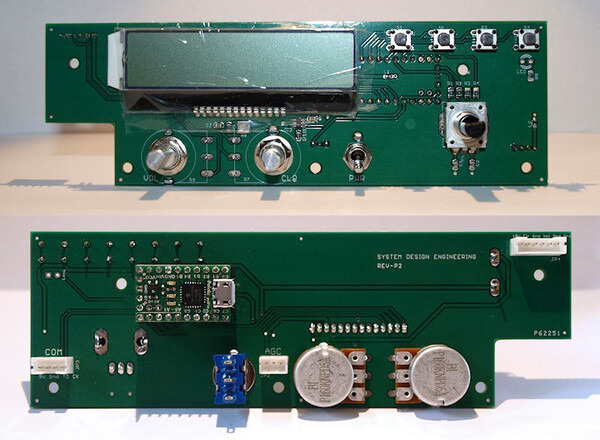 |
Edward Cholakian (call sign KB1OIE) makes and sells a Ten-Tec 1254 Receiver Display Upgrade Kit that is designed to upgrade a Ten-Tec 1254 shortwave radio receiver.
One of the main features of the kit is that it provides a backlit 2×20 character LCD to replace the receiver’s original 5-digit 7-segment display, allowing much more information to be shown. The kit includes a clear plastic window to replace the receiver’s original smoked dark plastic window, and a black plastic display mask. Edward gets both of these pieces made using our custom laser-cutting service.
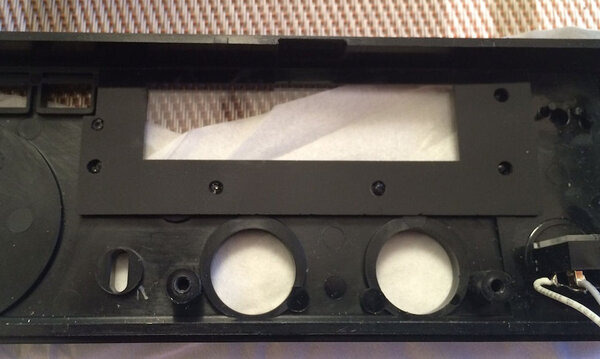 |
Two laser-cut pieces, a clear window and black display mask, shown on top of the Ten-Tec 1254 receiver’s original face plate. |
|---|
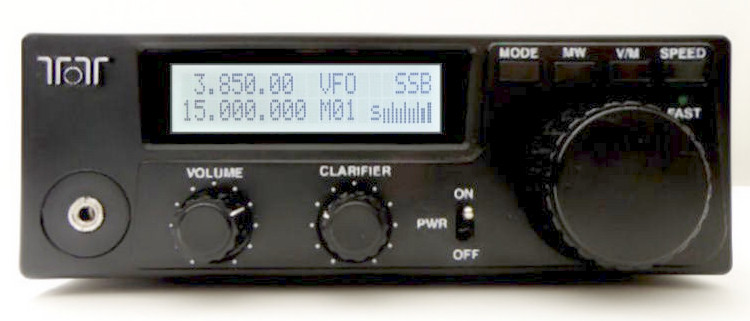 |
Ten-Tec 1254 receiver with Edward Cholakian’s display upgrade kit installed. |
|---|
The display/control board in the kit uses the P-Star 25K50 Micro as its processor. Edward, a consulting engineer who designs embedded hardware and firmware, told us that he chose the P-Star because he was already using a Microchip processor similar to the P-Star’s PIC18F25K50 in one of his previous designs, and it was more economical to buy the P-Star than to hand-assemble his own board. He said the P-Star’s cross-platform USB firmware upgrade software was also a plus since his own bootloading software does not support Linux and macOS.
The kit comes with software for Windows that can control the receiver over USB. The software provides a graphical user interface and uses WinUSB to talk to the P-Star’s native USB interface.
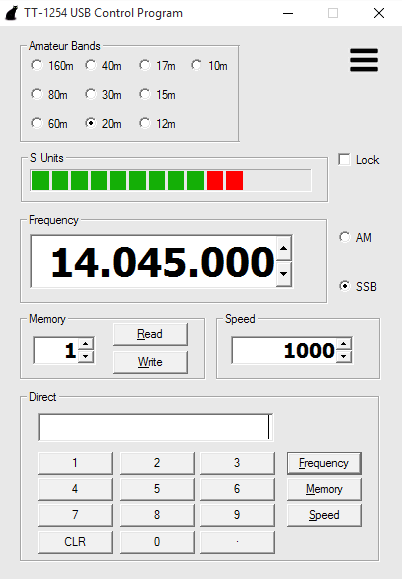 |
USB control program for the Ten-Tec 1254 Receiver Display Upgrade Kit |
|---|
For more information, see the Ten-Tec 1254 Receiver Display Upgrade Kit page.
The Rebel WIP from UNLV
It has been over a year since my last/first blog post about my mini sumo robot. Since then, I have been busy studying to earn a mechanical engineering degree at the University of Nevada, Las Vegas, working at Pololu, and, of course, building cool robots. Recently, I have been working as part of a UNLV team, Rebel Robotics, to build a robot to compete in an intercollegiate competition organized by the American Society of Mechanical Engineers (ASME) called the Student Design Competition. My team’s robot, the Rebel WIP (work in progress), competed against teams from colleges across the western half of the United Sates in the Student Design Competition at an engineering festival hosted by UNLV and ASME called E-Fest West. Continued…
Balancing robot with stepper motors
One of our customers built this six-foot tall balancing robot. The main microcontroller is a Teensy 3.6, and the stepper motors are driven by ST-M5045 drivers. For its drive train it uses two 3 A stepper motors connected to Pololu 90 mm wheels via Pololu universal aluminum mounting hubs.
Here’s what they have to say about using stepper motors:
I used stepper motors to take advantage of high torque at low RPM and zero backlash. This allows very steady stand-still performance. But dealing with the stepper-induced mechanical vibration was an issue. This was mostly solved with analog filters on the IMU and with an Extended Kalman Filter in software.
Additional description and pictures are available on the project page.
Arduino library for Sharp distance sensors
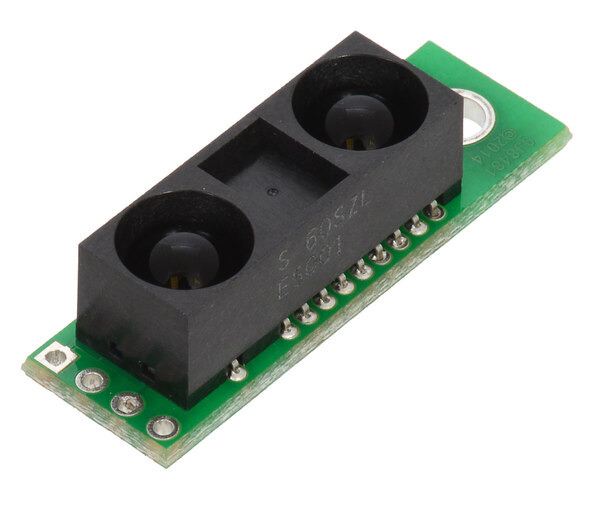
Julien de la Bruère-Terreault (also known as DrGFreeman on the Pololu Forum, creator of the Custom Mini Sumo robot and the Romi and Raspberry Pi robot shared on this blog) made “SharpDistSensor” an Arduino library for analog Sharp distance sensors. If you’re running a recent version of the Arduino IDE, you can install it with the Library Manager. The library reads the sensor’s analog voltage output, filters the data, and converts it to a distance measurement. By default it is calibrated to work with the Sharp GP2Y0A60SZLF analog distance sensor 10-150cm 5V, but you can calibrate it to other analog Sharp distance sensors (if you can fit a power function or a fifth order polynomial to the voltage vs distance response of your sensor). Pull requests are welcome for supporting other Sharp distance sensor models!
The readme, library code, and example sketches are available in the GitHub repository.
Custom laser cutting for retro-gaming TV enclosure
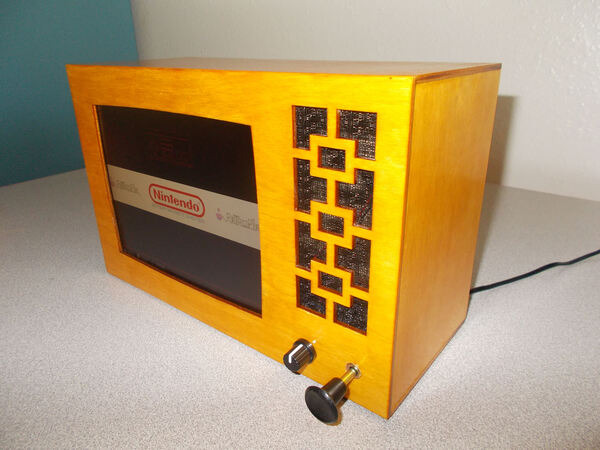
One of our customers used our custom laser cutting service to cut the birch plywood panels for his retro-gaming TV system that he sells on Etsy. The birch panels are stained with shellac. The system runs on a Raspberry Pi 3 Model B, to which you can connect (not-included) controllers with Bluetooth or USB. The Raspberry Pi’s Ethernet port, SD card slot, and 4 USB ports are accessible in the back.
 |
