Pololu Blog » Engage Your Brain »
Engage Your Brain (Page 4)
A blog by Pololu president Jan Malášek.
New Product: TB9051FTG Motor Driver Carrier
This is the second new motor driver product in less than a week, and I’m really excited about this one: the TB9051FTG from Toshiba. The TB67H420FTG I posted about the other day has this new part beat for higher voltages, but its one shortcoming for our purposes is that it doesn’t work at lower voltages. This new TB9051 doesn’t go up into those voltages where it starts getting dangerous, but it covers a great operating range of 4.5 V to 28 V, with transient operation to 40 V, which means you can use this driver with everything from 6 V lead-acid batteries and 2-cell LiPo packs all the way up to 24 V systems and 6-cell LiPo packs, maybe even 7-cell packs. The operating voltage range is similar to another recent favorite of mine, Maxim’s MAX14870, but this new Toshiba part delivers almost double the current.
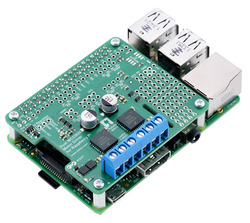 |
Pololu dual MC33926 motor driver (assembled) on a Raspberry Pi Model B+. |
|---|
With its excellent operating voltage range and great current ability for an integrated package, I expect the TB9051 to be an ideal all-around DC brushed motor driver for most indoor robots and other projects that do not involve moving frighteningly large objects at potentially catastrophic speeds. The chip seems positioned to compete performance-wise with my previous almost-favorite chip, the Motorola Freescale NXP MC33926. That chip would have been my favorite if it had been easier to work with Freescale, and things have only gotten worse since NXP acquired them and then got distracted by yet another merger, this time with Qualcomm, which seems to have been in limbo forever. Maybe their sales are actually doing great, and we just have a hard time with them because they are busy with bigger customers. In any case, a part with great performance is not so great overall if it’s difficult to get it, so you can expect us to be updating some of those products that use the NXP part to use the Toshiba part instead.
One pretty obvious feature the TB9051 has over the MC33926 is its smaller size, from 8 mm x 8 mm down to 6 mm x 6 mm, which is great for getting these onto smaller boards in smaller spaces, but it might also have some ramifications for how it tolerates pushing the limits of the specs. We liked how the MC33926 was able to endure lots of abuse from customers who were pushing it because it was our highest-voltage integrated driver. The TB9051 is, like the MC33926, an automotive-rated part, so it is intended to last a long time in harsh conditions. It’s interesting to see how thick the packages for these chips are, and I like their thickness (similar to how I like the proportions on 737 airplanes):
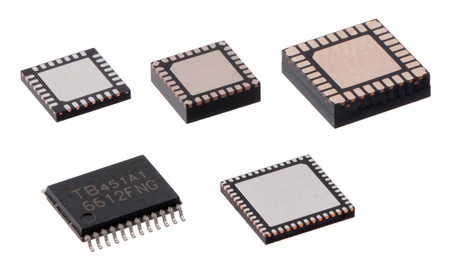 |
Clockwise from upper left: packages of a 28-pin microcontroller, TB9051FTG, MC33926, TB67H420FTG, and TB6612FNG. |
|---|
This video makes it seem like Toshiba is quite proud of their packaging accomplishment with the TB9051FTG:
Update: It looks like the above video might no longer be available on youtube, but it is still available on the Toshiba website.
Is the “competitor” in this video the MC33926? Sure seems like it to me. I know of no other part like that, and I keep looking.
Toshiba has not publicly posted a complete datasheet for the TB9051FTG yet, so the product page for our carrier only has a preliminary summary document. Our product page has more information about how to use the device, and we are working on getting a complete datasheet that we can post.
Since I expect this driver to hit a nice sweet spot for many of our customers’ general-purpose motor control needs, it’s a good candidate for using in some higher channel count products. We have not gone much beyond two motors (the TReX motor controllers have a third, unidirectional channel), and I would like to know what kind of interest there is in single boards that can control three or more motors. If you would like to see such products, please let me know.
As with all of our new product announcements, we are offering an introductory discount to make it extra easy to try out these new drivers. Be among the first 100 customers to use coupon code TB9051INTRO (click to add the coupon code to your cart) and get up to three units for just $4.95 each. We are still manufacturing our initial stock of these, and even if the quantity shown online goes to zero, you can backorder with the coupon price and chances are that we will be able to fill your order the same day.
Updated product: A-Star 32U4 Mini SV
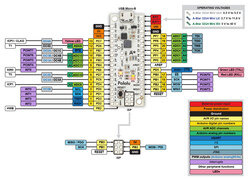 |
A-Star 32U4 Mini pinout diagram. |
|---|
I think of our new A-Star 32U4 Mini SV as more of an update than a genuinely new product. For those of you not already familiar with our A-Star 32U4 Minis, they are a series of ATmega32U4-based, USB-programmable controllers with integrated switching regulators that offer operating voltage ranges not available on typical Arduino-compatible products; the “SV” variant features a step-down converter that enables efficient operation with inputs as high as 40 V. The slight PCB update for this latest product was done primarily for manufacturing reasons (e.g. reset button footprint change, addition of a test point, and switching to an ENIG finish that has worked better for us for double-sided assembly), but I figured that while we were updating all our internal records for the new PCB, we might as well also upgrade the regulator.
There’s a difficulty to making small improvements to products when we have hundreds of distributors around the world since even if we clear out our inventory of older versions before shipping newer units, we cannot control the inventory at distributors’ warehouses. We’re all usually tolerant of products being a little better than advertised, but when we try out a product, and then buy another one, and it ends up being worse than the one we already had, it just doesn’t feel right. (That’s one reason we sometimes do not reveal exact components we use, to avoid over-specifying some aspect of a product that we feel is not that important and that we do not want to commit to.) Once the regulator was different (and better!) enough to merit changing the product specifications, we needed to change the product number, and hence we have a new product.
The regulator change is from the ISL85415 to the ISL85418, both made by Renesas (which acquired Intersil). The ISL85415 was the first of a great regulator family by Intersil, and they expanded the family with several pin-compatible versions with various current specifications. These new parts could also operate to 40 V instead of the 36 V of the original ISL85415, but even as various aspects of the datasheets got updated, the maximum voltage rating on the ISL85415 in particular did not.
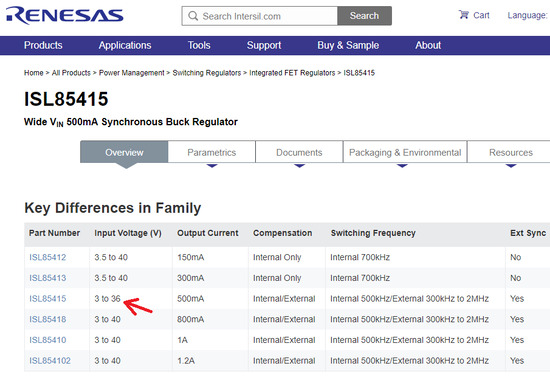 |
Renesas website screen capture showing ISL85415 is only part in its family with 36 V maximum input. |
|---|
I asked our Intersil contact about why only the ISL85415 wasn’t rated to 40 V. It sounded like it was getting made on the same process as the other parts, and that the higher voltage rating of the later parts in the family was more the result of better characterization (and thus confidence) in the process than in any modifications to the process. In other words, new ISL85415 parts can probably do 40 V just like the other parts, and the older ISL85415 parts probably the same; they just weren’t confident about calling them 40 V parts then. But who knows what the inside story is. Maybe they did tweak their recipes a bit, and once they had parts out in the world with the 36 V spec, they didn’t want to change it without changing the part number, just like we couldn’t just keep our old A-Star part number and also talk about the higher maximum input voltage.
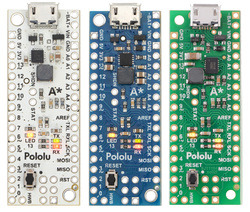 |
A-Star 32U4 Mini ULV, LV, and SV. |
|---|
In case you’re wondering why we didn’t just put the even better ISL85410 or ISL854102 with 1.0 A and 1.2 A outputs on the new board, it’s because the performance limit moved more to the inductor, and even if the better regulator chip takes up the same space, we would need a bigger inductor to take advantage of that. And the A-Star Minis are pretty packed designs, so there’s not much room for a bigger inductor.
So, to make a long story short, the main new feature of the updated A-Star 32U4 Mini SV is that it can now take up to 40 V input and give you up to 800 mA to work with. This chart shows you what the new regulator (in darker green) can do compared to the older one (lighter green) on the A-Star Mini. It looks like the old one already provided well over its 500 mA specification.
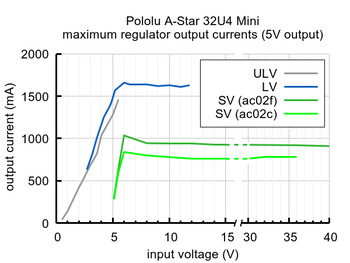 |
Typical maximum output current of the regulators on the A-Star 32U4 Mini boards. |
|---|
To make this new product a little more exciting, we reassessed our costs and cut some of our margins in keeping with our push this year to be more competitive in our manufacturing. We have reduced the unit price from $19.95 to $14.95. And as usual for our new product releases this year, we’re offering an extra introductory discount: use coupon code ASMINISVINTRO to get up to three units for just $9.95. (Click to add the coupon code to your cart.) Our promotion banner shows the usual limit for the first 100 coupon uses, but since we’re also having our Arduino Day sale, we’re removing that restriction for the duration of the sale. If we run out of stock during the sale, you can still backorder with the discount, and we should be able to catch up with production within a few days.
New products: Jrk G2 USB Motor Controllers with Feedback
After many months or years of work (depending on how you look at it), I am happy to introduce our newest motor controllers, the Jrk G2 USB Motor Controllers with Feedback, which we are releasing today in four power variants:
 Jrk G2 18v19 |
 Jrk G2 24v13 |
 Jrk G2 18v27 |
 Jrk G2 24v21 |
|
|---|---|---|---|---|
| Recommended max operating voltage: |
24 V(1) | 34 V(2) | 24 V(1) | 34 V(2) |
| Max nominal battery voltage: |
18 V | 28 V | 18 V | 28 V |
| Max continuous current (no additional cooling): |
19 A | 13 A | 27 A | 21 A |
| Dimensions: | 1.4″ × 1.2″ | 1.7″ × 1.2″ | ||
1 30 V absolute max.
2 40 V absolute max.
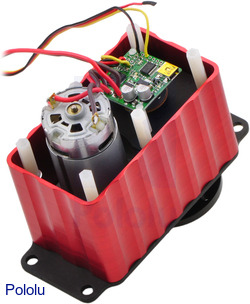 |
The main purpose of the Jrk G2 family is to enable feedback-based control of DC brushed motors, simplifying closed-loop control of things like the position of an actuator. An example that is probably familiar to most of us is the common hobby servo that has an output shaft that can rotate to various positions as commanded over a simple interface. The Jrk motor controllers can be used for giant versions of those servos, and they can also be used in many other systems as long as you can somehow get feedback in the form of an analog voltage or a frequency. Analog voltage feedback is often easy to get from potentiometers that can serve as angle or position sensors.
The frequency feedback feature is handy for maintaining a speed of a motor independent of your supply voltage and motor load. You might use that kind of feature to run a treadmill at some set speed independent of the weight of the lab rats on it or to stir some jar of goop at a constant rate as the goop gradually thickens. With mobile robot applications, it can be handy to have a motor controller that will make your wheel go at the speed you set independent of whether the robot is on a hard floor or a carpet. (The Jrks do not support quadrature encoders, but you can use one channel of a quadrature encoder as the tachometer for the Jrk. In some applications, keeping track of absolute position is not necessary, or the quadrature encoder can be monitored directly by a main controller that could still benefit from the closed-loop speed control being taken care of by the motor controller.)
To control a wide range of motors in a variety of applications, it’s important to be able to configure a lot of parameters, which makes the Jrk’s USB connection and free configuration utility software extremely important. Even if you ultimately want to use your Jrk in a radio control installation or command it over I²C from your favorite embedded controller, it’s very convenient to be able to set everything up from your computer.
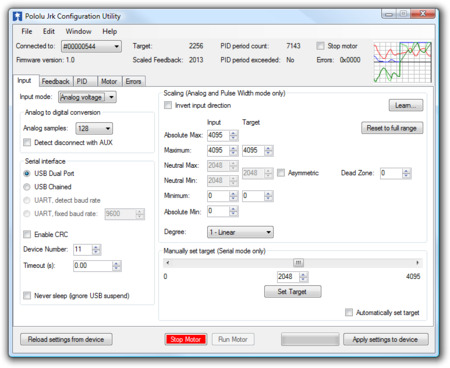 |
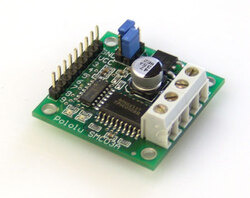
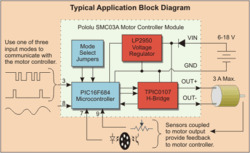
That screenshot is actually of the utility for the original Jrks, which we released almost 9 years ago (I announced those on the forum because we did not have this blog back then). You might notice on some older web pages that we referred to the original Jrks as our second-generation feedback controllers. The really original ancestor to today’s new motor controllers is this product we called simply Pololu 3A Motor Controller with Feedback, which we released at the beginning of 2005. Here are a picture and block diagram of that controller:
|
|
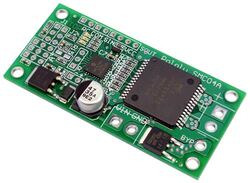 |
Candice and I were probably still running Pololu out of our house back when we started work on that controller, and it’s probably the last product of ours for which Candice wrote some of the firmware. That controller led to the development of a larger, customized controller (similar to our SMC04 High-Power Motor Controller with Feedback) and an even higher-power version that was used on control cables of large autonomous parachutes for the military.
Back to the new Jrk G2 family: these new controllers are in many ways a refinement of the original Jrks, which have been used all over the world in applications from animatronic displays to motion simulators and even full-sized airplanes. The most noticeable improvement on the four Jrk G2 controllers we are releasing today is the increased power available from their discrete MOSFET H-bridges. The G2 high-power motor driver design is part of the reason for the “G2” in the new Jrk family name, though we plan on releasing lower-power, smaller Jrk G2 products later this year. The new driver technology, along with going to double-sided PCB assembly and four-layer PCBs, allowed us to make much higher-power controllers that are smaller than the old Jrk 12v12, which used to be our highest-power version.
The Jrk G2 24v13 and 24v21 in particular open up new application opportunities because they can operate off of 24 V power rails, making them appropriate for huge linear actuators (note that we only carry 12 V versions right now, partly because we did not have controllers that we could recommend for 24 V use). It’s exciting that these tiny boards can control such huge actuators, and the size difference is so big it’s difficult to convey in a picture:
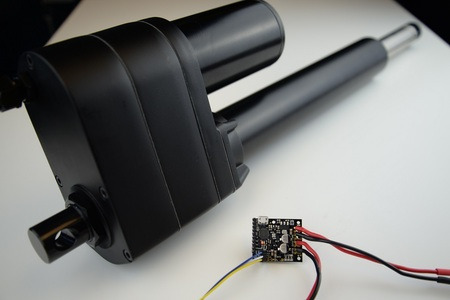 |
The size difference makes it difficult to get a Jrk G2 24v13 and an industrial-duty linear actuator in the same picture. |
|---|
Other features new to the G2 Jrks are an I²C interface option and an improved tachometer/frequency feedback mode that now offers pulse width measuring rather than only frequency counting to allow for better control of low-speed motors with lower-resolution encoders or tachometers. Here is a summary of the main features of the Jrk G2 motor controllers:
- Easy open-loop or closed-loop control of one brushed DC motor
- A variety of control interfaces:
- USB for direct connection to a computer
- TTL serial operating at 5 V for use with a microcontroller
- I²C for use with a microcontroller
- RC hobby servo pulses for use in an RC system
- Analog voltage for use with a potentiometer or analog joystick
- Feedback options:
- Analog voltage (0 V to 5 V), for making a closed-loop servo system
- Frequency pulse counting (for higher-frequency feedback) or pulse timing (for lower-frequency feedback), for closed-loop speed control
- None, for open-loop speed control
- Note: the Jrk does not support using quadrature encoders for position control
- Ultrasonic 20 kHz PWM for quieter operation (can be configured to use 5 kHz instead)
- Simple configuration and calibration over USB with free configuration software utility
- Configurable parameters include:
- PID period and PID constants (feedback tuning parameters)
- Maximum current
- Maximum duty cycle
- Maximum acceleration and deceleration
- Error response
- Input calibration (learning) for analog and RC control
- Optional CRC error detection eliminates communication errors caused by noise or software faults
- Reversed-power protection
- Field-upgradeable firmware
- Optional feedback potentiometer disconnect detection
As with all of our new product releases this year, we are offering an extra introductory discount: the first 100 customers to use coupon code JRKG2INTRO can get 40% off up to three units. (Click to add the coupon code to your cart.)
New product: Pololu USB AVR Programmer v2.1
Our new programmer, the Pololu USB AVR Programmer v2.1, was supposed to be a minor update to our existing programmer, coming right after the A-Star 328PB Micro that we released last month, with the main point of excitement being the Las Vegas-inspired $7.77 price. But as we were testing the combination of the programmer with the A-Star, we were getting brown-out resets on the programmer when it powered the A-Star. The relevant part of the circuit was just a P-channel MOSFET that connected the programmer’s own logic voltage (which we call VDD) to the VCC pin of the ISP connector:
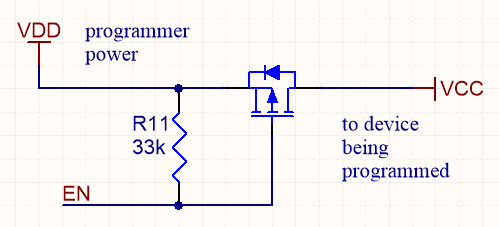 |
MOSFET-based target VCC power control used on Pololu USB AVR Programmer v2. |
|---|
The problem was caused by the MOSFET turning on too well (quickly and with low resistance), causing the logic voltage on the programmer to drop if the VCC of the target device had more than a few µF of discharged capacitance on it. The bigger the capacitance on VCC, the bigger the voltage drop on VDD, until eventually the drop was big enough to trigger the brown-out reset protection on the programmer’s microcontroller. We tried various firmware tricks with our existing hardware, such as turning on the MOSFET for very short pulses to gradually charge up the target device’s VCC capacitance, but none of them worked reliably enough. So in the end, we decided to redo our PCB and put in a dedicated high-side power switch with a controlled slew rate. The new programmer can now power target boards with up to about 33 µF on their logic supplies.
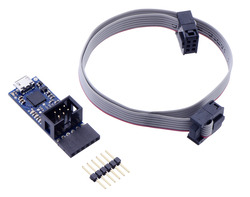
These are the two other improvements we made to the new v2.1 programmer over the older v2 programmer:
 |
- Plugging a v2 programmer into a 3pi robot could cause one of the motors to briefly run at full speed because the programmer’s circuitry for measuring VCC could inadvertently pull up one of the 3pi’s programming pins (which doubles as a motor driver input) before the GND connection was established. The v2.1 programmer has improved circuitry for measuring VCC which limits the duty cycle of this effect to about 0.2%, so the motor won’t move (but it might make a 25 Hz clicking sound).
- The v2 programmer would typically brown-out if a 5 V signal was applied to its RST pin while it was operating at 3.3 V. The v2.1 programmer does not have this problem.
The v2.1 programmer is otherwise identical to the v2 programmer, which means it’s a USB AVR microcontroller programmer that can program targets at 3.3 V and 5 V and offers an extra UART-type TTL serial port (like the popular FTDI USB-to-serial adapters) that can be super handy for debugging, bootloading, or even general connection of your project to a USB port.
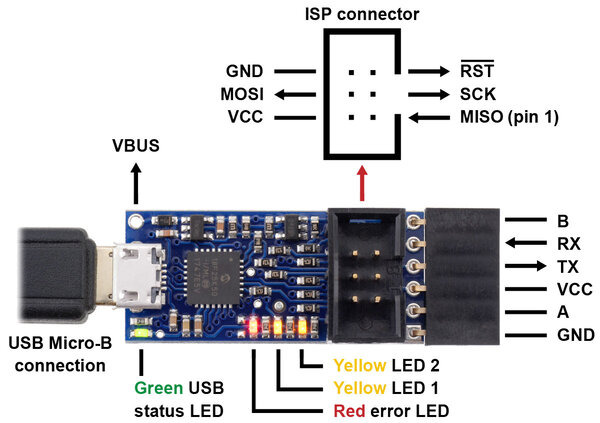 |
Pololu USB AVR Programmer v2.1, labeled top view. |
|---|
The v2 programmer was already a good deal at under $12, but at $7.77, and with free shipping in the USA, we hope to make AVR development extremely accessible. The manufacturing improvements and other cost reduction initiatives I have been blogging about this year help us make this offer without losing money on it, but I am not expecting to be making money directly off of the programmers, either. My goal is to give you the best value in a basic tool you will use over and over as you build your own projects, with the hope that that will help you keep Pololu in mind the next time you need some electronics or robotics parts.
And, as usual for our new product releases this year, we’re offering an extra introductory discount: the first 100 customers to use coupon code AVRPROGINTRO get that already great $7.77 price dropped to $5.55 (limit 2 per customer). (Click to add the coupon code to your cart.)
February 2018 new equipment wrap-up: 3D AOI
My posts last month (here, here, and especially here) about the new electronics manufacturing equipment we installed focused on our new pick and place machine and stencil printer. This post is about the other major new machine we got at the same time, an automated optical inspection (AOI) machine from Mirtec.
AOI machines have cameras that move around over an assembled board to take a bunch of pictures that then get processed to determine whether or not the board is assembled correctly. The machines often have several cameras that enable taking pictures from various angles, along with fancy lighting to variously illuminate the boards and components being inspected. Our AOI machines have rings of LEDs of different colors at different angles, so that, for example, red light highlights a different portion of a solder fillet than blue light. This picture shows a panel of our Dual G2 High-Power Motor Drivers in one of our older AOI machines:
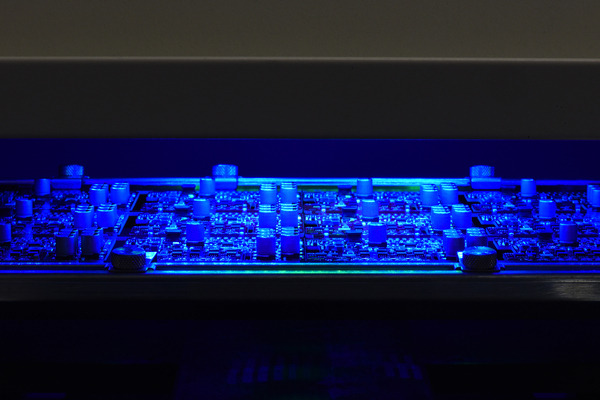 |
A panel of Dual G2 High-Power Motor Drivers illuminated by blue LEDs during automated optical inspection (AOI). |
|---|
The tricks with lighting are basically attempts to generate more three-dimensional information than you can get with just 2D pictures out of a camera. What is exciting about our new machine is that in addition to the traditional lighting and cameras, it also has a sophisticated sensor for doing precise height measurements everywhere along a component. Machines with this kind of sensor are called 3D AOI machines.
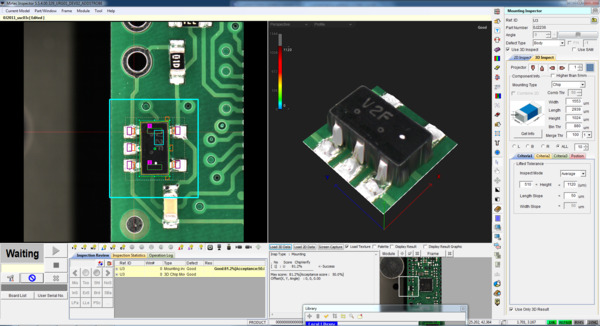 |
5-pin SOT-23 component getting set up for 3D automated optical inspection (AOI). |
|---|
The machine we got is Mirtec’s latest AOI machine, the MV-3 OMNI, which is a desktop or batch version of their inline inspection machine that has the same technology. I ordered the machine with the optional stand, which turned out to be a good thing because for a desktop machine, this thing is huge. The crate was much larger than I expected, and while not requiring a 10,000 pound forklift rental like the pick and place machine, we did have to use our fork extensions.
 |
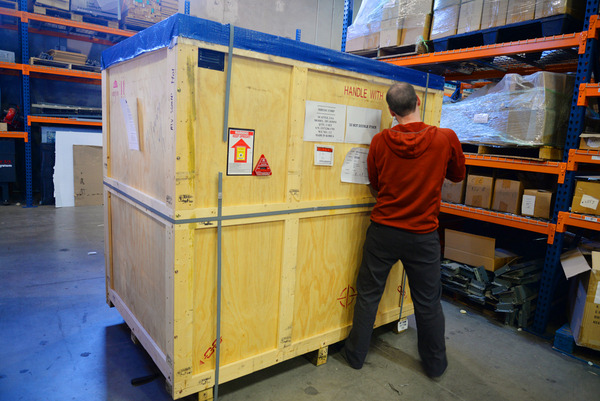 |
Out of the crate, the machine and stand are quite a bit smaller. Something to keep in mind for anyone considering such a machine is that this one is too big to fit through a single three-foot door.
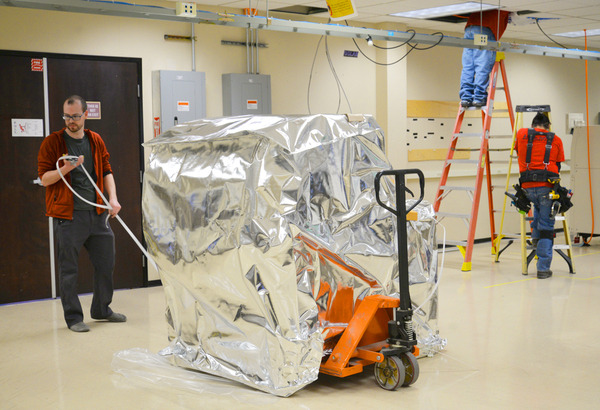 |
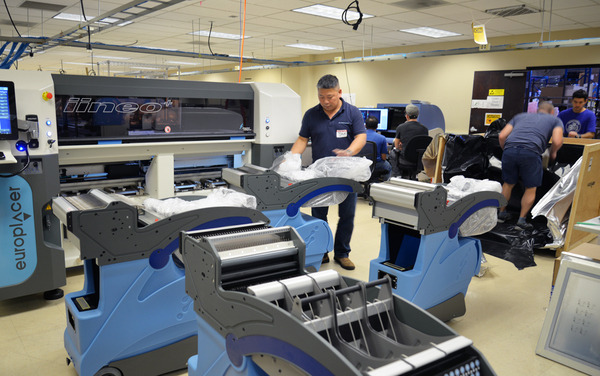
We had an especially busy week, with the installation and training for the AOI machine happening at the same time we were doing the Europlacer pick and place machine and stencil printer installation that I wrote about earlier.
 |
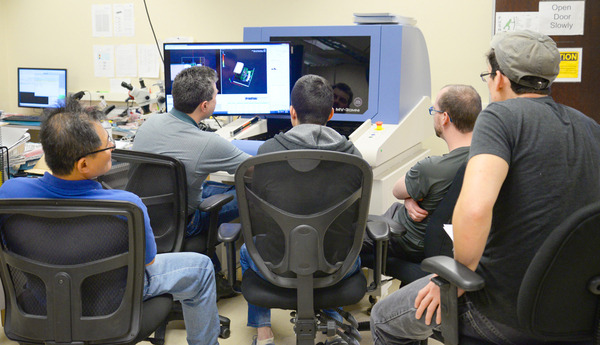 |
Mirtec MV-3 OMNI 3D AOI machine training. |
|---|
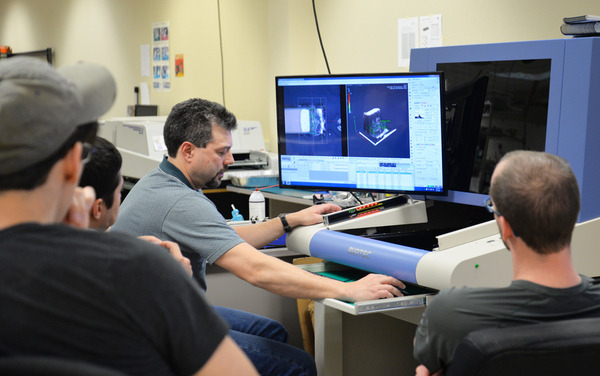 |
Our Yestech AOI machines are visible in the background of that last training photo. (They are also featured in our The Manufacturing of A-Star 32U4 Micro video.) We already performed 100% AOI on every board we made before we got this latest machine. We are happy with those machines, and since we had two, capacity and redundancy were not primary motivations for getting this new one. With any piece of equipment like this, the challenge is to find every possible defect without generating a lot of false positives. If the settings are too lax, or the machine is not capable enough, defects will make it through, but it’s not enough to just flag every mismatched pixel since the ultimate authority is still the human operator that inspects every spot the machine identifies as suspect. If the machine inundates the operator with a thousand possible defects for every actual defect, the operator is likely to miss the one actual problem. It’s difficult to characterize this since there are many different components and every design is different, plus how we set up or train the machines also matters a lot.
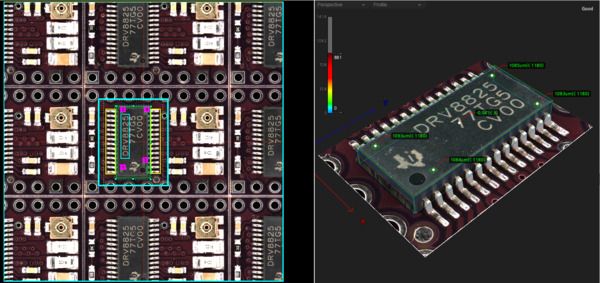 |
3D automated optical inspection (AOI) setup for Pololu DRV8825 stepper motor driver carrier. |
|---|
So, the main motivation for getting this new machine was the hope that it will give us more capabilities going forward to have the highest possible confidence in the quality of our products. The new machine is almost twice the cost of the older ones, and especially with the 3D capability, it should be able to deliver that. Our first impressions have been very positive, but to really know, it will take some time to get familiar with the machine’s strengths and weaknesses and to integrate it well into our manufacturing processes.
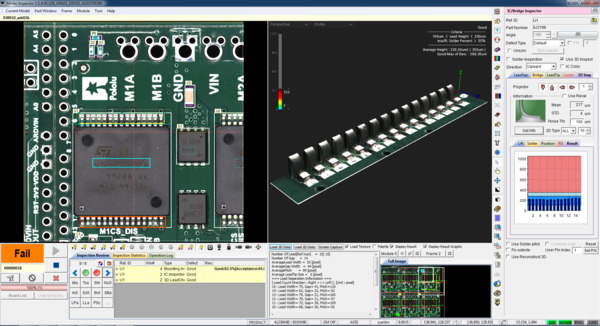 |
3D automated optical inspection (AOI) setup for Pololu Dual VNH5019 Motor Driver Shield for Arduino. |
|---|
Purchasing electronics components in America
 |
I am a little proud (but mostly embarrassed) that I still do basically all of the electronics component purchasing for Pololu. Today I am writing about buying components because their prices have a huge impact on the end price of our products, especially when we work to cut down other costs as I have been discussing lately. Buying parts when trying to compete globally is more frustrating than you might think, and I hope that writing this will help trigger some conversations that will help us do better and also encourage component manufacturers and distributors to better support small electronics manufacturers in the United States.
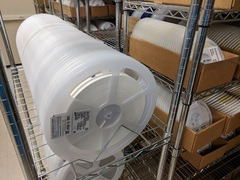
I buy almost all of the electronic components that go into our products from suppliers in the United States. That includes integrated circuits, discrete semiconductor products like transistors and diodes, resistors, capacitors, inductors, and so on. The only parts I do not buy in America are components like connectors and electromechanical devices like switches and buzzers. This post is mostly about buying components in the US from US suppliers, but I will briefly touch on the non-US components to provide some background and comparison.
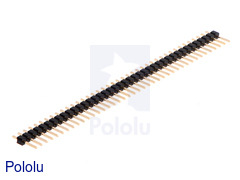 |
There are two main reasons for those non-US components: they are much cheaper than similar parts in the US and we can evaluate that they are good enough. That second reason is important because counterfeits and fake parts are a big problem in the electronics industry. We can look at something like a 0.1" male header or an electromagnetic buzzer and see basically what it is. Once we can be confident that a component or supplier is good enough for the level of performance and reliability we need from our products, we can look at prices to see whether it’s worth the extra hassle (and that amount of hassle keeps going down) to get the components overseas, which pretty much means China (and Taiwan, in case that distinction is meaningful). And that price difference can be huge. When I started getting connectors directly from Taiwan over ten years ago, the price difference was approaching a factor of ten, meaning that for around a thousand dollars I could buy what would cost me ten thousand domestically. Some of the price differences seem to be getting smaller, but the components still seem to be easily three to five times cheaper in China. Early on (around 2005), local salespeople would ask me what prices I was getting in China, thinking they had some better deal or connection than I knew of; nowadays, they don’t even ask or try to compete.
With all the other component types, even for the most basic parts like resistors and capacitors, we are not really qualified to evaluate them, and I would not want to be responsible for doing quality control for millions of units even if we could analyze one particular instance of a resistor or capacitor and conclude that it is good enough. So, I only buy components from reputable brands through their authorized distributors, which means I buy basically all our components through American companies (with one exception I’ll get to soon that almost doesn’t feel like an exception, anyway). Those companies also tend to be the biggest electronic parts distributors in the world.
I still buy some components from the catalog-type sources that are probably familiar even to most students and hobbyists, like Digi-Key, Mouser, and Newark. Once upon a time, these companies printed large catalogs that were the best way to find out what kinds of components even existed (especially when I was growing up in Hawaii). Digi-Key stopped printing catalogs a few years ago; Newark apparently still does. In any case, these kinds of sources now have good online resources for finding parts, they tend to have a lot of parts in stock, and they are set up for small quantities, which is why they are great resources for individuals, too. Usually, it’s very easy to buy components from these sources, and I rarely interact with anyone when I do since I usually just place the orders through the web sites at their listed prices.
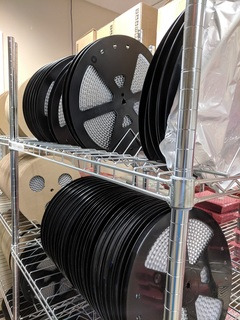 |
However, the prices usually are not the best at those most convenient sources, especially when my minimum quantities tend to be full reels with thousands of parts rather than a few individual parts. So for most of my electronics purchasing, I go with big distributors like Arrow, Avnet, and Future Electronics. These companies have local offices (though for Las Vegas, “local” tends to mean in Phoenix, Arizona or somewhere in Southern California) that have salespeople that I can talk to that can help me get lower prices. Future Electronics, being a Canadian company, is the exception that I mentioned earlier; but, working with them is basically the same as working with Avnet or Arrow since they have the local staff and things like a distribution center near Memphis, Tennessee (here is a video about it).
Back when I was a student and before I started Pololu, I thought electronics distributors just bought components from manufacturers and then sold them with some markup on their cost. I think some of that did happen and still happens today, but it’s less common and less practical now because there are so many different, specialized components that they cannot all just be sitting in stock somewhere, waiting for the unlikely scenario that someone would come along and buy them. When I buy from distributors like Digi-Key and Mouser, I am almost always buying something they have in stock; when I buy from Arrow and Future, it’s almost never something they have in stock (or it’s something they have in stock because they had good reason to expect me to order).
But there was a much bigger misconception in my naive view than just the timing of when a distributor bought some parts relative to when the end customer ordered them. The major thing I learned in the early years of running Pololu is that component manufacturers charge the distributors different prices for the same components, based on the end customer! In some ways, that’s frustrating because it means I have to do a lot more work to get a good price. I have to convince each distributor and each manufacturer to give me a good price, and sometimes I have to do that with each component. It can also be a good thing in that if I do establish a good relationship with some manufacturer and distributor, the hassle per part goes down over time as they get to know our business and what factors are important to us. And some of them probably do give me a globally competitive price sometimes.
The difficulty, and what prompted me to write this post, is with those manufacturers that do not. (That or counterfeits, which is sometimes the explanation or excuse I get back from manufacturer’s representatives.) Well, the really specific thing that led me to write this post is the AVR Freaks thread about my last post, in which I introduced our new A-Star 328PB Micro:
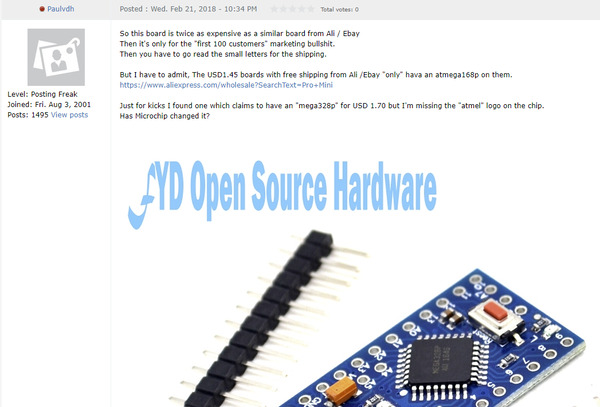 |
AVR Freaks post about A-Star 328PB Micro announcement, the motivation for this blog post. |
|---|
The poster mentions a board similar to Pololu’s with an ATmega328P for $1.70 (and wonders about the chip authenticity). I went to look at the part price on Digi-Key, and this is what I saw:
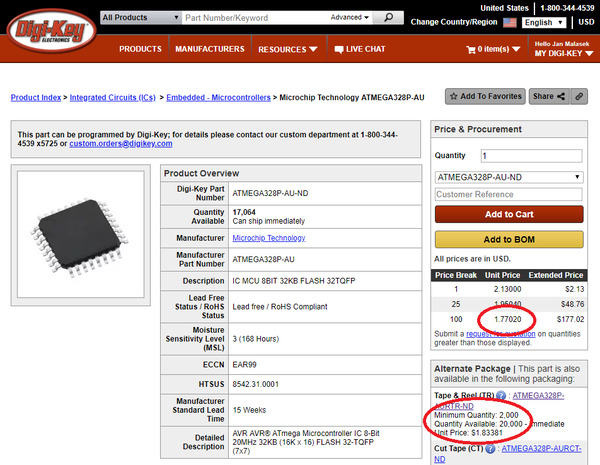 |
Screenshot of Digi-Key price for ATmega328P with prices highlighted, retrieved 25 February 2018. |
|---|
I have highlighted the relevant fields, which are the lowest prices: $1.77 each at 100 pieces, and alternately, on a reel of 2000 pieces for $1.83. 100 pieces is kind of low for a highest price break. A long time ago, I tried out the higher volume quote request option that is suggested under the 100-piece price, and after some back-and-forth, Digi-Key gave me an official volume quote for higher quantities with the exact same price as at the 100-piece break:
 |
Excerpt from quantity price quote from Digi-Key (from around 2010) |
|---|
I tried it a few more times with some other parts, but it was basically the same result every time, so I have not tried special pricing with Digi-Key since. That was close to ten years ago, so maybe it’s different now, and maybe it would be different if I had asked for 10k or 100k pieces.
Back to the original point: you can get the whole assembled board from China, in single-piece quantities, for less than the price of just the one component, even in volume quantities. And this Atmel/Microchip example is far from atypical or anywhere near the worst case. Here is an AliExpress listing for a small development board for the STM32F103C8T6 microcontroller:
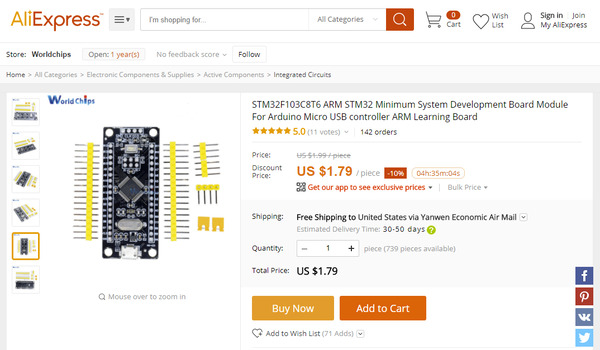 |
AliExpress listing for an STM32F103 development board for $1.79 including shipping, captured 25 February 2018. |
|---|
In this case, Digi-Key has prices listed for higher quantities than in the earlier example, and the 2400-piece reel has the best unit price of $3.04:
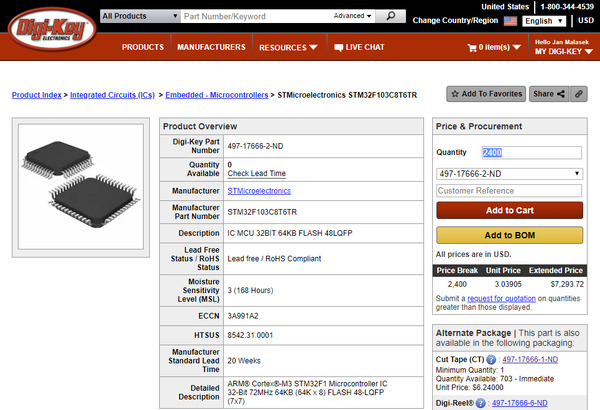 |
Screenshot of Digi-Key price for STM32F103C8T6, retrieved 25 February 2018. |
|---|
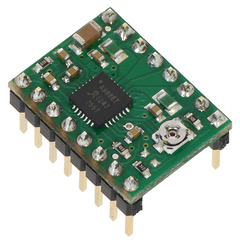
I have been working on pricing for similar STM32 parts, and even at twenty thousand pieces (not through Digi-Key), they are not getting to the prices of just one of these complete boards, with double-sided assembly and a bunch of additional components (and free shipping!—though that is some separate scam that I do not blame the electronics component manufacturers and distributors for). Something clearly doesn’t add up, right?
 |
As I mentioned earlier, some manufacturers will say the parts in the cheap boards from China are counterfeits. I believe that is the explanation in some cases, and we have our share of frustrations with knock-offs and counterfeits of our own products. But I had one experience around five years ago that makes me very skeptical that that is anywhere near the whole story. One of our more successful early products, at least by number of units sold, was a basic carrier for Allegro’s A4988 stepper motor driver. I remember being frustrated because Allegro seemed to have some deal in place with Digi-Key that gave them the best prices (and unlike the examples above, Digi-Key did have volume breaks up to many tens of thousands on that part). Digi-Key has been getting better on prices, but still, paying “Digi-Key prices” seemed like an insult when I was buying tens of thousands of these parts at a time.
It became more of a problem when the knock-offs of our boards started appearing on eBay and other sites for basically the same prices as just our component costs. I kept trying to get my suppliers to help me with my prices until I got the parts from Asia via Future Electronics. They assured me these were genuine parts through their global partners or subsidiaries, and they could do that for me because they were not authorized distributors for Allegro in the United States. So, that alone was a good indication that these parts were out there, through reputable sources, at lower prices than I could get in the US. But the conclusion to this story gets better: someone who could do something about it at Allegro finally got word that I was getting these parts elsewhere (they noticed the sales abruptly went away, and they wanted to see my invoices from other vendors) and reduced my authorized price, through Arrow, to almost half of what it had been.
This was over the course of maybe two years, and while it did help and we lowered our prices, I believe we missed out on a lot of potential sales because it took so long to get the prices down. The sad thing is that there are probably many more missed opportunities, not even just for Pololu, because of how components get priced in the US. The manufacturers seem more willing to cut prices after demand is proven and they start losing sales rather than up front to make the sales happen in the first place. And to be clear, I am not talking about small quantities like broken reels and cut tape that require extra handling and processing. I also understand that these modern 32-bit microcontrollers like the STM32 are such amazing achievements that it seems really unappreciative to complain about one costing $2. It’s just that when the same parts are costing one dollar somewhere else, we need to figure out how to get that price if we want to be globally competitive with our products.
Since I know many of you are also interested in open-source hardware, I should mention the ramifications component pricing has for openness with our designs. One of the factors that goes into how much information we release is how good I think our component price is. It’s easier to share key components that we use if I think we can keep making our products competitively.
Back to some of the comments that led me to start writing on this topic. I hope I have shown you a different kind of behind-the-scenes view than just the machines that go into making our products. Some of that “twice as expensive as a similar board from Ali / Ebay” goes all the way down to the basic component level. I hope you can see that I am working on addressing that. I would be interested in what other small manufacturers in America (and in other countries besides China) do. Should I just start sourcing more components from China? Should I be using smaller distributors in the US? (I am skeptical that would make a big difference because of my understanding that manufacturers are basically setting the prices). Or is there something else I’m completely missing? I know some of you who read my posts work for the electronics manufacturers and distributors; can you help push for getting better component pricing in the US? For all of you who like making electronics, wouldn’t it be nice to have the option (or for your kids to have the option) to do that without having to live in China or being limited to industries like aerospace and military where components costs might not matter as much?
New product: A-Star 328PB Micro
Today we are releasing our newest A-Star programmable controller, the A-Star 328PB Micro. It is basically our version of the ubiquitous Arduino Pro Mini type products, but with the newer ATmega328PB microcontroller. The board itself is pretty straightforward (though the updated AVR is exciting), so the main thing I want to share in this post is our history with the Atmel ATmega328PB microcontrollers (this was before Microchip acquired Atmel) and how this product would not have existed without our lower-cost manufacturing initiative that I have been discussing.
We have been using the ATmega8, and then the ATmega48, ATmega168, and ATmega328P, since 2004 in many of our user-programmable products because of their versatility and excellent free compiler support (which also made Arduino possible). We first heard about the ATmega328PB in early 2014. The product kept being delayed, and I did not get a quote for them until October 2015. I ordered a reel right away; it arrived in March 2016. Over those two years, we put our AVR-related efforts into the ATmega32U4, releasing several A-Star 32U4 programmable controllers and using it on robots like the Zumo 32U4. The ATmega32U4 was a superior part with native USB and more I/O lines, making it a better fit for many of our applications. By the time we finally got the ATmega328PB parts, we had the A-Star 32U4 Micro available for just $12.75, making it less exciting to put effort into a lower-performance product that might end up costing almost the same amount.
 |
Original ATmega168-based Baby Orangutan robot controller from 2005 (left) next to A-Star 32U4 Micro boards. |
|---|
The new manufacturing equipment I ordered in the fall of 2017, along with the availability of our latest AVR programmer, brought attention back to the feasibility of a basic ATmega328PB carrier. I was hesitant to put effort into a product where we could not offer something substantially more compelling than what was already available. Despite the ATmega328PB being out in the wild for almost two years, it still had not really made it into many Arduino products, so I thought that perhaps we could offer something there. But more importantly, I wanted to see how low we could price it. I was aware of Arduino Pro Mini clones available on eBay and the AliExpress-type sites for under $3. Most official Arduino Pro Mini type products cost more like $10. For this project to be worthwhile, I wanted to get under $5.
It turns out we had to squeeze quite a bit just to get to the upper limit of that “under $5” goal, and so we are releasing this product at a unit retail price of $4.95. It’s not the under-$3 you can find for the absolute cheapest clones, but if you get the A-Star 328PB Micro from us, you are getting a well-supported, well-made product (each unit is 100% automatically visually inspected and 100% functionally tested) and supporting a company that is doing more than just copying products that are already out there.
It is my hope that by being able to offer the A-Star 328PB Micro for under $5, we are offering something meaningful, giving you a new option for general-purpose controllers at the price of a cheap lunch. I am interested to hear what you think. Is the 328PB interesting when you can get USB for not much more? Is the price low enough for you to buy from us instead of getting it from China?
We are offering the A-Star 328PB Micro in four voltage and frequency combinations:
- 5 V, 16 MHz (blue power LED)
- 5 V, 20 MHz (red power LED) Note: See item-specific page for speed warning.
- 3.3 V, 8 MHz (green power LED)
- 3.3 V, 12 MHz (yellow power LED)
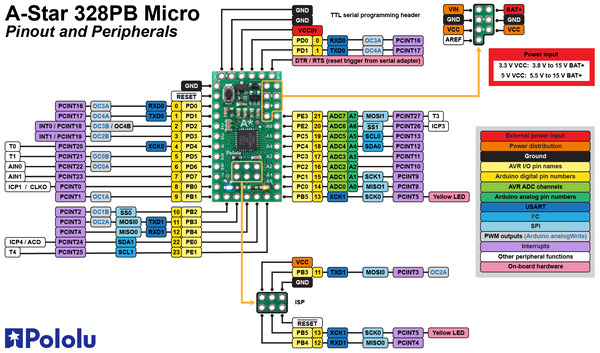 |
A-Star 328PB Micro pinout diagram. |
|---|
The A-Star 328PB Micro provides access to all 24 I/O lines of the microcontroller and ships with an Arduino-compatible serial bootloader; you can also use an AVR in-system programmer (ISP) for access to the entire chip. We recommend our USB AVR Programmer v2, which supports both programming interfaces and can be configured to run at either 3.3 V or 5 V.
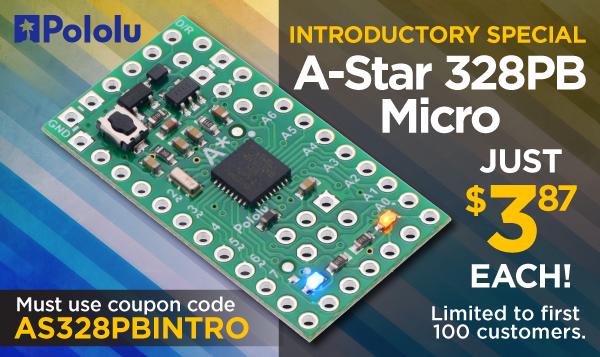
Last but not least, we are continuing our plan of offering new products at the highest quantity price break at single unit quantities as an introductory celebration. That means that for the first 100 customers, you can get an A-Star 328PB Micro for just $3.87! (Must use coupon code AS328PBINTRO; click to add the coupon code to your cart.)
While we assemble (and design and document and ship and support) the boards here in Las Vegas, we still get the bare PC boards from China, where they are currently on holiday celebrating Chinese New Year. That is constraining how many units we can make at the moment, so we are limiting shipments to 5 units per customer. However, the introductory coupon has no quantity limit, and you can order more than five at that price if you would like. Backordered units are likely to ship within a few weeks.
TI launches Robotics System Learning Kit (TI-RSLK) based on Pololu Romi platform
 |
| Image from TI Robotics System Learning Kit introductory video courtesy of university.ti.com. |
|---|
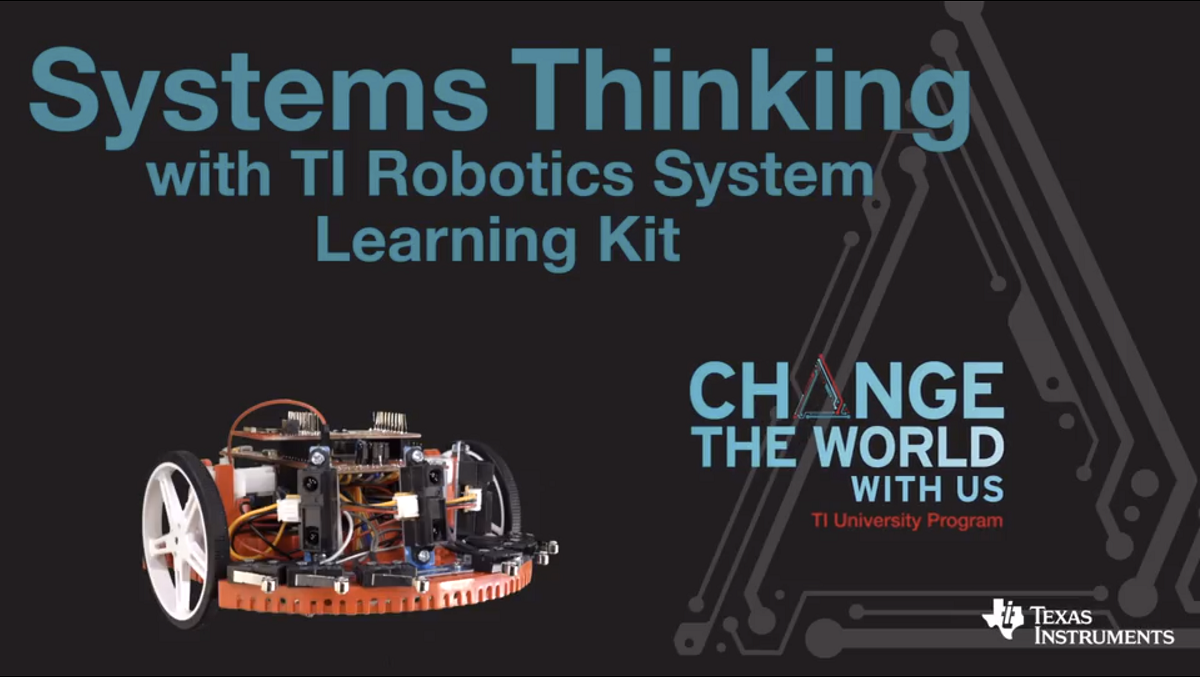
Texas Instruments just launched their new Robotics System Learning Kit (TI-RSLK), a complete robotics kit and curriculum aimed at university students and based on our Romi platform. Twenty modules with lecture notes, lab activities, and over a hundred videos are all publicly available now.
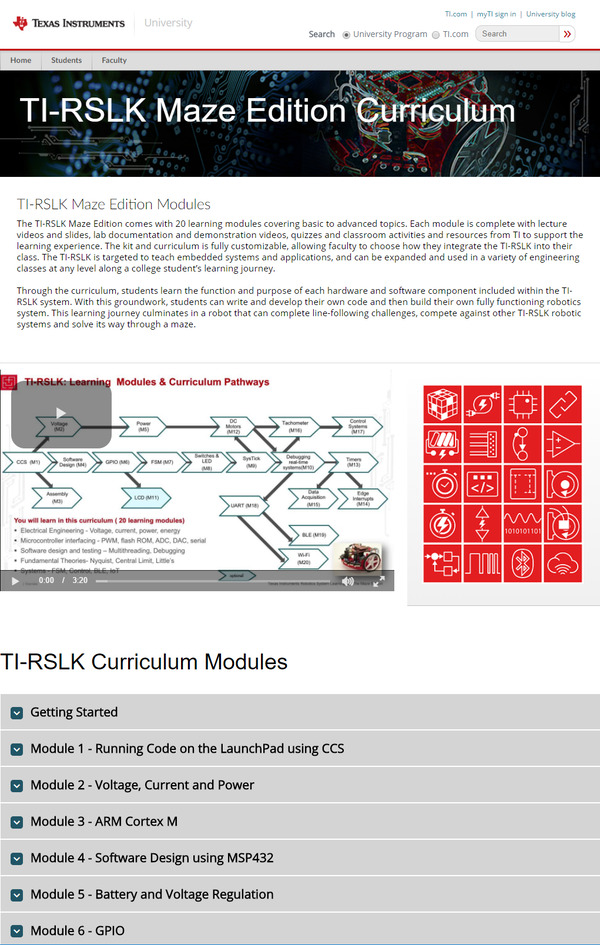 |
Image from TI Robotics System Learning Kit curriculum overview web page courtesy of university.ti.com. |
|---|
Several kits specifically for the course will be available soon through element14.
We are just starting to go through the ton of content ourselves since we were not directly involved in creating any of the course materials (except to the extent that TI used documentation from our products). We are excited about robotics and engineering education, and I am very interested to hear what you think of what TI is offering. Let me know, and I can pass your comments back to our contacts at TI, who of course are interested in the feedback, too.
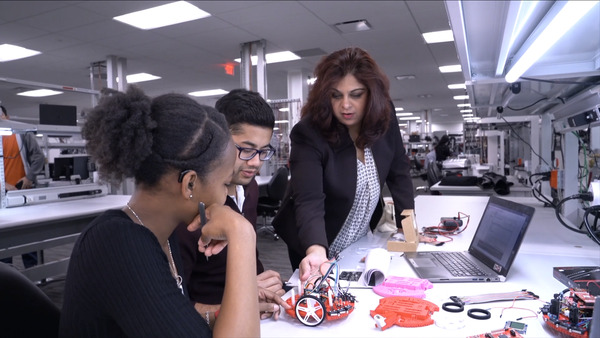 |
Image from TI Robotics System Learning Kit introductory video courtesy of university.ti.com. |
|---|
The versatile Romi chassis is available in a variety of colors as just a mechanical kit for those who want to do all of their own electronics development. We also offer a growing selection of supporting electronics that include the Motor Driver and Power Distribution Board that TI is using in the TI-RSLK (along with their own microcontroller and LaunchPad modular development system). The more integrated Romi 32U4 Control Board includes an Arduino-compatible ATmega32U4 microcontroller and is ready for expansion with a Raspberry Pi or compatible embedded computer module.
How I picked our new machines (and what they mean for you!)
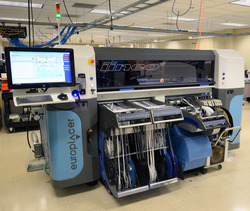 |
The new equipment I have been sharing for the past two weeks (here and here) represents our biggest manufacturing capacity increase in five years. Today I will go into more detail about the pick and place machine and stencil printer we got, along with what it means for our customers.
Assembling a circuit board with surface-mounted components involves three main steps: printing solder paste on a bare circuit board, placing the components on the board, and then sending the board through an oven, which melts the solder paste, soldering the components to the board. You can see the steps in this video we made a while ago about how the A-Star 32U4 Micro gets made:
Pick and place machine
At the end of 2012, we got two very different pick and place machines, an SM421F from Samsung (which has since sold their electronics assembly equipment business to Hanwha) and an iineo from Europlacer. Both machines are very versatile, designed to place everything from the smallest components to large and tall parts, and we have run all of our products on both machines. I got both machines back then because each manufacturer made a compelling case, and I wanted to try both. The new machine we installed this month is another Europlacer machine. So… does that mean it’s better?
First off, the Europlacer machine is much bigger and more expensive than the Samsung/Hanwha machines, so the real comparison for this round of new equipment was two Hanwha machines vs. one from Europlacer. Each SM482 Plus has 120 feeder slots, so two of those machines have very similar feeder capacity to the 264 slots of the iineo+. The pair of Hanwha machines is also similar to the Europlacer option in terms of combined size and price. I should also say that we have had a great experience with both machines and vendors, and I do not regret having bought either of those machines in 2012. The Hanwha machine route had one major advantage: the machines, even individually, are faster than the Europlacer in the straight parts per hour component placement rate; with two of them, it should be no contest, with a combined advertised placement rate of around 60,000 components per hour vs. around 15,000 for the Europlacer machine. Having two smaller machines would also give us some more flexibility (we could operate them as two separate machines, running different products, as opposed to one big machine) and redundancy, so that we could keep at least some production running if one machine went down. The redundancy argument probably would have pushed me in the direction of the Hanwha, two-machine route, if we didn’t already have any other machines.
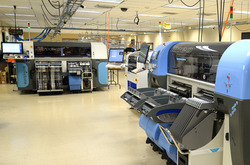 |
But we did already have a Europlacer machine, so getting a second one would give us that redundancy. And despite the sustained placement rate being four times lower, we expect the Europlacer to actually be the faster option for our purposes. That’s because our products tend to be relatively small and simple, but we have hundreds of different products (and I want it to be thousands soon), so we need to be able to run many different products a day efficiently. We might get some of that efficiency from the Europlacer software, though it’s not that clear to me that there really is that much difference between the machines (as opposed to operator familiarity). The interchangeable carts should also help eventually, though I do not expect that to make much of an impact until we have more of them, and so far we just have enough to basically fill each machine. What I think matters the most is the huge feeder count on a single machine, minimizing the amount of component changes that have to be made from one product to the next. It’s inevitable that the raw throughput will be lower when the placement head has to on average travel farther from the board being assembled to the part in the machine, but for our mix of quantities, it’s worth it.
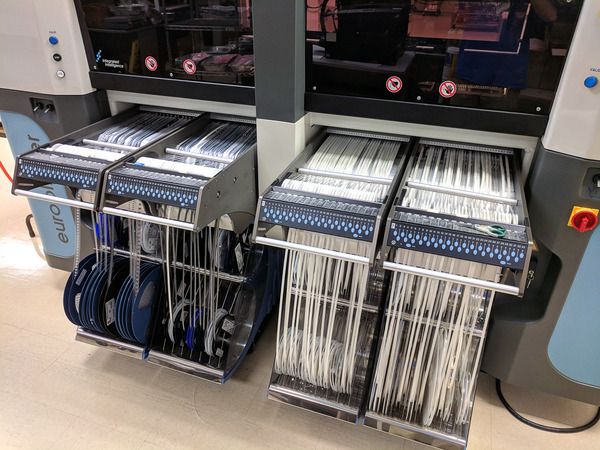 |
132 feeder locations across four carts on the back side of the Europlacer iineo+ machine. There are 132 more on the other side! |
|---|
Stencil printer
For solder paste printing, I thought some more about a jet printer. The general idea is that the printer has the solder paste in a cartridge that moves all over the bare circuit board and squirts some on every pad, as opposed to squeegeeing a bead of solder paste through a stencil the way solder paste is more typically applied. I have been looking at MyData’s jet printers since they came out probably over ten years ago now, and the prospect of not needing stencils and being able to vary deposit thicknesses keeps being attractive, especially for our scenario where I want to be able to do just a few panels each of many different designs every day. But, at more than double the cost of a traditional stencil printer, the cost seems difficult to justify, especially since we cut our own stencils in-house. So, I ended up ordering another stencil printer from Europlacer since we are happy with the one we already have. MyData is now Mycronic, and you can see more about their jet printer at the Mycronic Jet Printer page.
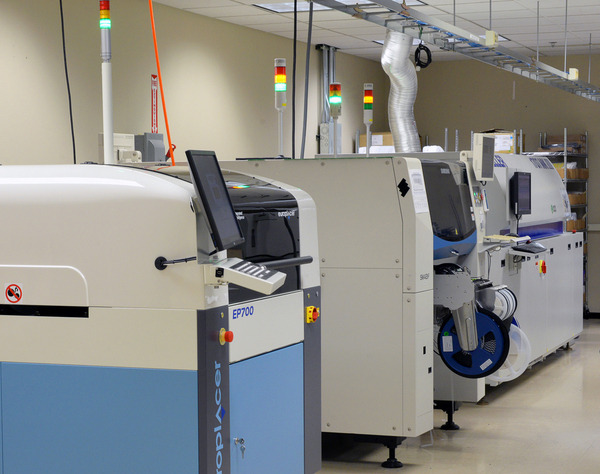 |
The technician from Europlacer performing the installations was disappointed that we were pairing the nice new color-coordinated stencil printer with our Samsung pick and place machine. |
|---|
Commitment to better manufacturing and lower prices
What does all this mean for our customers? (Other than a higher likelihood of getting to see an awesome machine running when you come visit us.) Partly I am sharing this because I expect most of you like making things, like to see how things get made, and would love to have machines like this of your own. More importantly, I want to remind you of the effort we are going through to bring you better products at lower prices. Having more of this extremely flexible manufacturing capacity means we can keep churning out new prototypes quickly and then be able to manufacture the products at a globally competitive price. Over the coming months, we will be assessing our manufacturing costs and lowering prices on many of our popular products, and new products will have lower prices as soon as we introduce them.
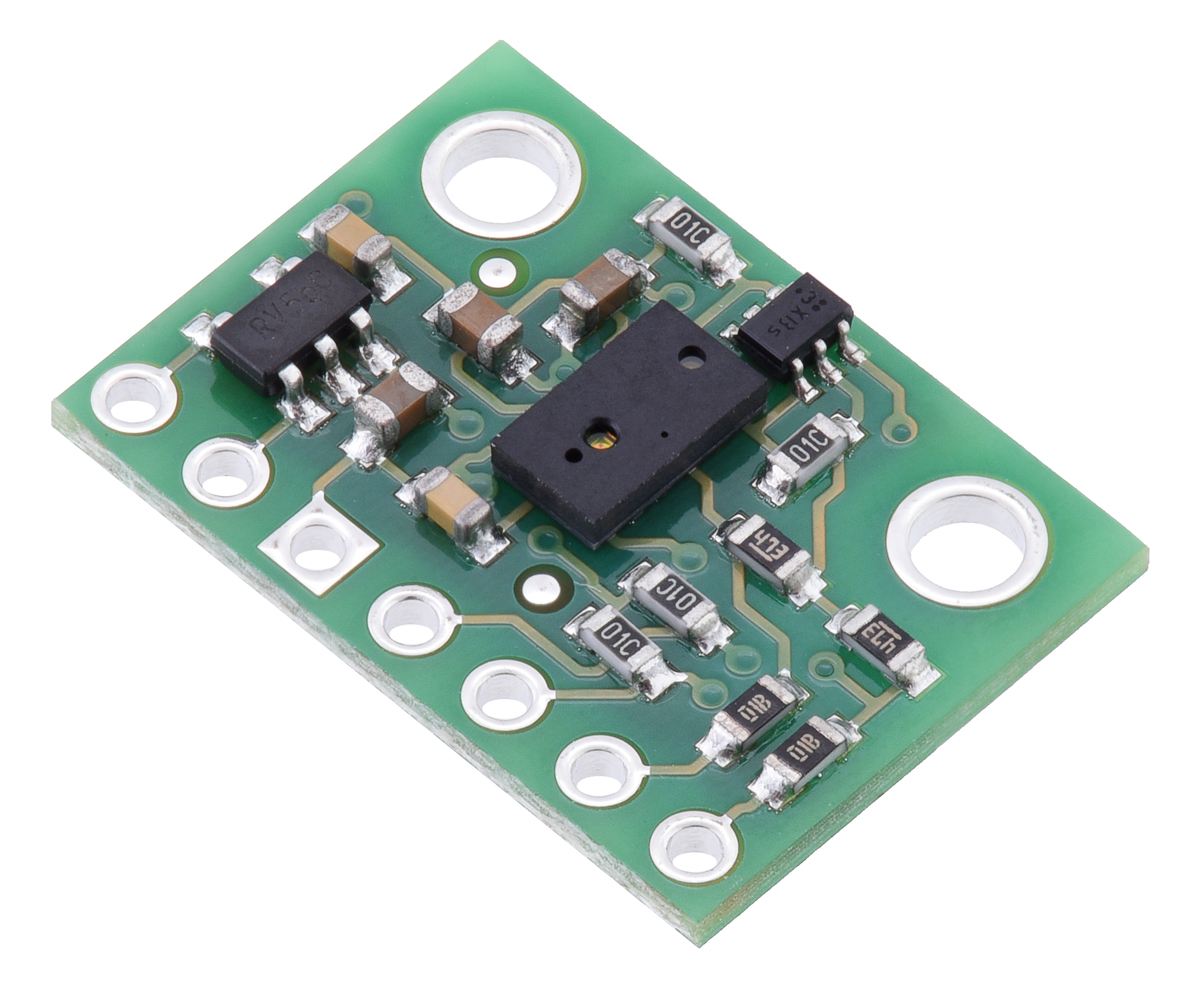
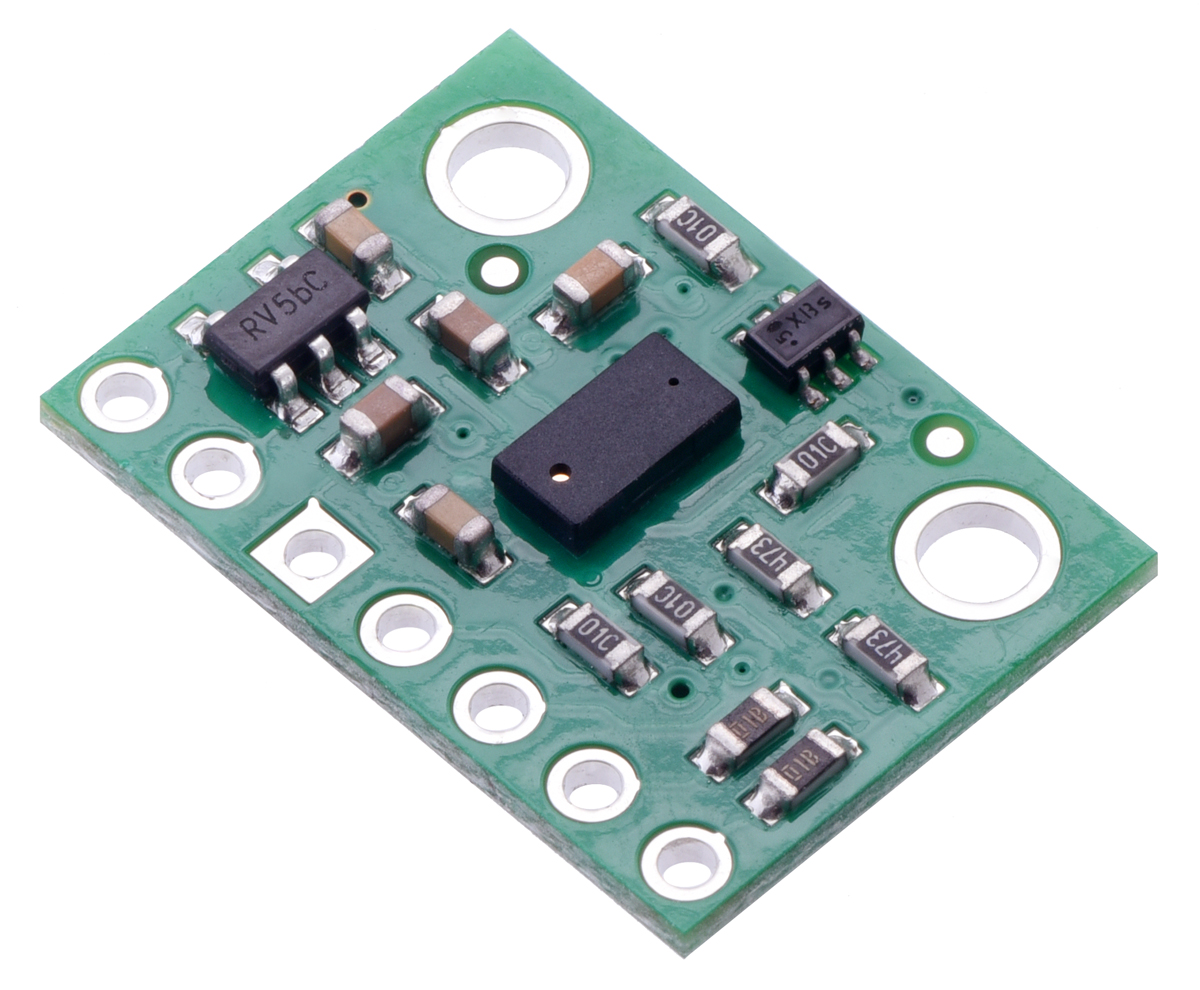
We are kicking that off with a substantial price cut on our popular time of flight distance sensors:
 |
 |
| VL6180X Time-of-Flight Distance Sensor Carrier with Voltage Regulator, 60cm max |
VL53L0X Time-of-Flight Distance Sensor Carrier with Voltage Regulator, 200cm Max |
And to help everyone share in our excitement, we’re offering the new, low, 100-piece pricing at single-unit quantities to the first 100 customers using coupon codes 2489PRICECUT and 2490PRICECUT (Click to add both coupon codes to your cart).
New equipment installation progress
Some more of our new equipment showed up yesterday, and installation has been progressing all week. Here are a few more pictures.
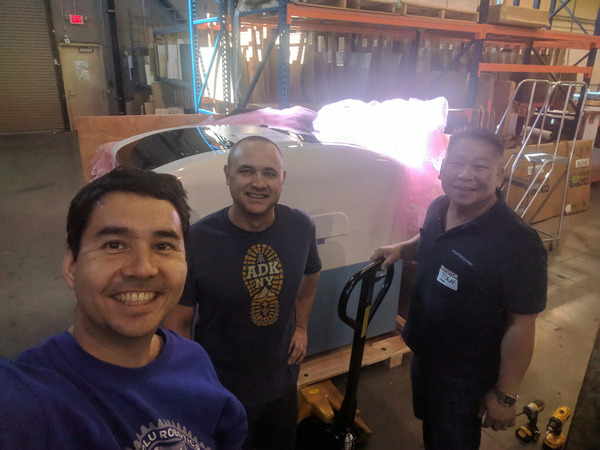 |
Stencil printer selfie! |
|---|
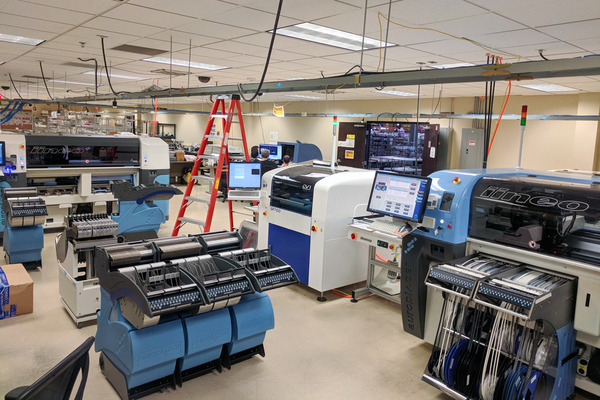 |
New Europlacer pick and place machine on the left, older one on the right. |
|---|
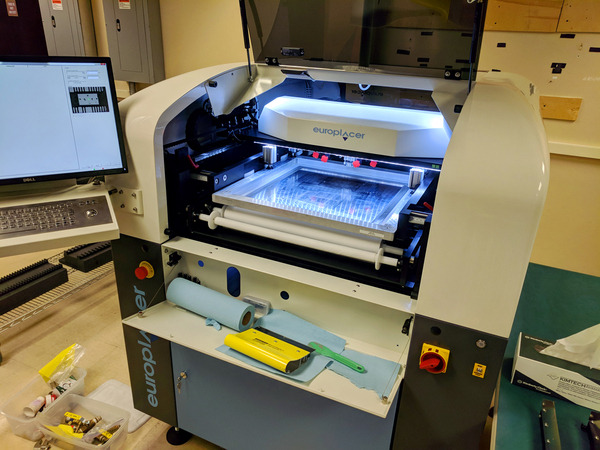 |
Stencil printer ready for first print. |
|---|
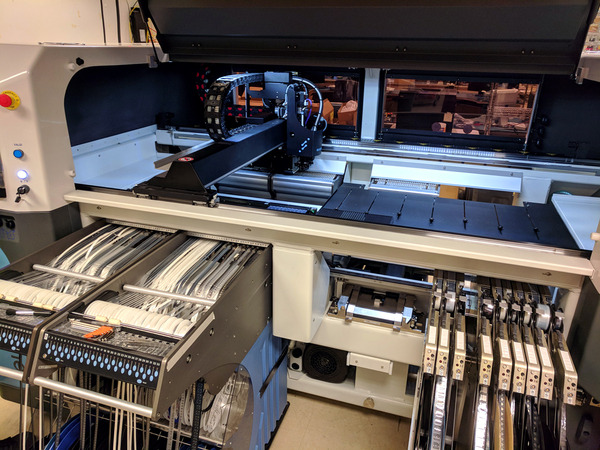 |
We like the Europlacer’s huge number of feeder slots. |
|---|
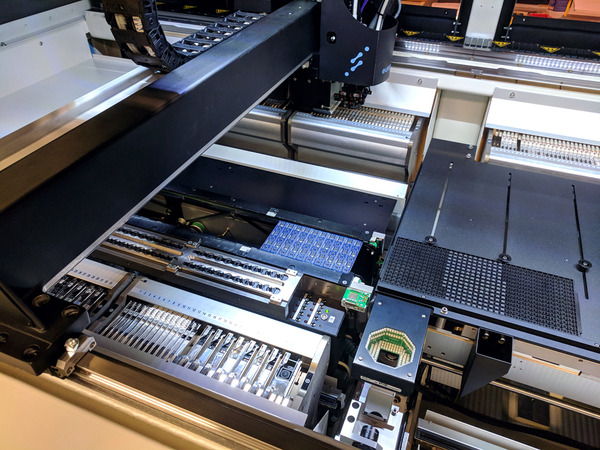 |
First production board on new Europlacer iineo+ pick and place machine, 7 February 2018. |
|---|
Europlacer’s iineo pick and place machine is one of the biggest and most versatile I know of, with space for up to 264 feeders (each feeder can hold a different component). For comparison, our Samsung pick and place machine, which itself has a decent feeder capacity compared to most machines, has 120 slots. We do not have any individual products that come close to requiring that many different components, but having such a huge feeder capacity means that we can run many different boards without having to change out a lot of parts. The feeders are also on carts that we can move around and between machines, which are also networked so that we can do things like set up new products on one machine and then run with the same setup on the other. I will write more soon about how this fits into our future plans, and about the other exciting new machine that is in the background of some of these pictures.


