Pololu Blog »
Raspberry Pi Solar Tracker
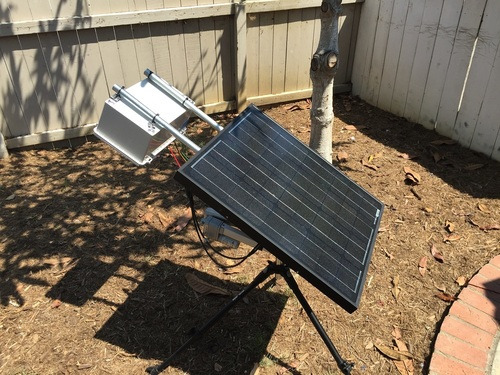
Jay Doscher posted on his blog at Polyideas.com about his 2-axis solar tracker designed to provide the optimal amount of power output with a portable setup. In the build, Jay uses a Raspberry Pi A+ topped with our Dual MC33926 Motor Driver for Raspberry Pi to control the motion of the system, which is accomplished using a Concentric 4″ linear actuator with feedback. In lieu of a GPS unit, the tracker uses hard-coded longitude and latitude coordinates with Pysolar, an open-source Python library, to calculate the sun’s predicted position. The system keeps the solar panel pointed at the calculated position with the help of a Razor IMU from SparkFun. The video above is time lapse footage of a mechanical test of the system that shows the unit tracking the sun (although it is indoors).
 |
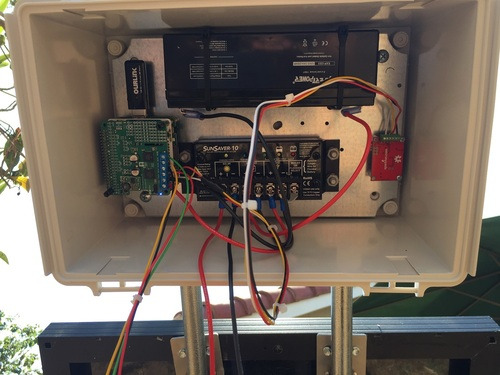
In the picture above, you can see the Raspberry Pi and dual MC33926 driver board on the left and the IMU on the right. The Dual MC33926 Driver for Raspberry Pi fits on top of the Raspberry Pi mainboard, eliminating a lot of wiring and making it easy to use while also leaving the setup looking clean and organized. Additionally, the Dual MC33926 Driver for Raspberry Pi provides a set of three through-holes where an appropriate voltage regulator can be conveniently connected, allowing the motor supply to also power the Raspberry Pi. You can see one of our D24V10F5 switching step-down regulators mounted on top of the dual MC33926 driver board to serve this purpose in the picture above as well.
 |
This project was also a 2015 Hackaday Prize entry and made it to the quarterfinals!
For more information about this project, see Jay’s blog post, which has additional photos and details including a parts list and links to his code.
2 comments
Unfortunately, we do not have any affiliation with the creator of this project or Helistat Control, so we do not have any advice or suggestions.
-Brandon


