Pololu Blog »
Curtis's laser-cut arcade stick case
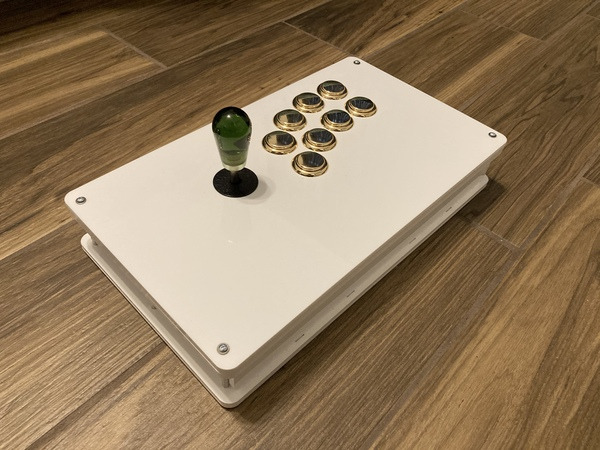
Hello, I’m Curtis, an engineering intern at Pololu. I’m studying mechanical engineering at University of California, Irvine. I’ve been playing a lot of Tekken during the pandemic. In fighting games like Tekken a lot of people use arcade sticks to play. So, I wanted to build my own.
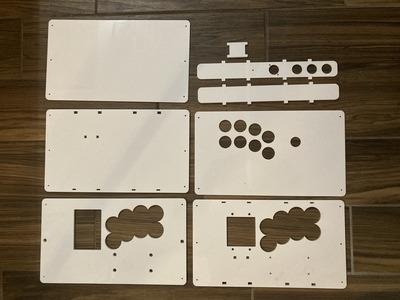
I built an arcade joystick case using acrylic parts (3mm and 6mm thickness) that I made with our Custom Laser Cutting Service as well as various M-F standoffs, F-F standoffs and screws and nuts.
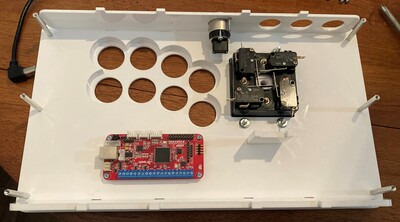
I designed the case myself in Solidworks. I decided on a length and width of 8" × 14" because that makes it large enough to be comfortable, while being small enough to fit in a backpack and carry around. The positioning of the buttons and joystick is based on Hori arcade sticks, with some modification to fit my hands. The difficult part was figuring out how to mount all the components. I ended up layering the acrylic pieces to form the top and bottom plates. This let me mount components in between the layers, which hid screws and made the case look better. I was also able to cut holes to position vertical supports, like the front and back walls, to increase the case’s rigidity.
 |
It’s designed to fit:
- 8 × 30mm and 3 × 24mm Sanwa buttons
- Neutrik USB type A to B pass-through
- Brook Wireless Fighting Board
- IST Alpha 49s Joystick.
PCBs from Brook are popular for arcade sticks. They have low latency and are compatible with PC and consoles. Button and joystick choices are based on personal preference, similar to mechanical keyboard switches. Sanwa buttons are popular as well, and pretty standard in a lot of arcade cabinets, so I picked them because I’m used to them. I chose the IST joystick because the joystick tension is stiffer, which I prefer because it makes quick movements easier.
It can be a little tricky to put together. I didn’t realize that the joystick switches had tabs that extended beyond the sides of the joystick, so it couldn’t slide into the case. To get around this, the joystick just has to be taken apart and put back together inside the case.
 |
Overall the case works really well. I was worried that the acrylic wouldn’t be stiff enough, but the case is rigid, and all the components fit.
You can download my CAD files (.DXF and .CDR) for the laser cut parts here (97k zip) to cut out the same case I designed, or as a starting point to design your own.
4 comments
Unfortunately, Curtis is no longer here and I do not have the arcade stick in front of me to verify the final parts. The best I can tell from the design is that the 6 standoffs that hold the frame together are a combo of a Aluminum Standoff: 1/2" Length, 4-40 Thread, F-F, Aluminum Standoff: 1" Length, 4-40 Thread, M-F and Machine Screws: #4-40, 3/4″ Length. The design also uses 4 M5 12mm screws, and M5 nuts to hold the joystick in place. It also uses Machine Screws: #4-40, 3/4″ Length, #4-40 hex nuts and Aluminum Standoff: 1/4" Length, 2-56 Thread, F-F to hold the board and USB pass through in place.
The last sentence of Curtis's post has a download link for a zip file containing all of the design files.
Brandon


