Pololu Blog »
Controlling a Maestro in C using a Raspberry Pi
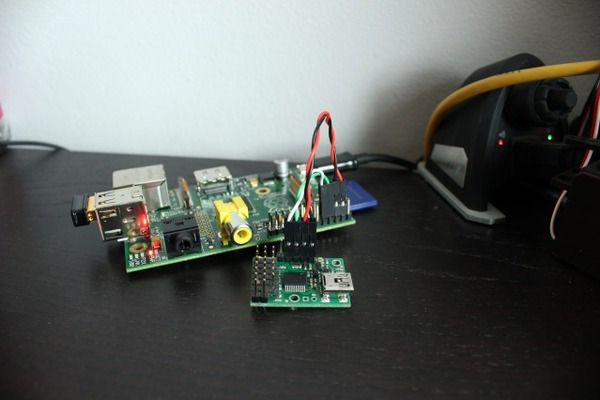 |
Shahmir Javaid tweeted about a tutorial he wrote that describes how he used a Raspberry Pi to control a Maestro servo controller in C. His tutorial documents the steps he took, including setting up the Raspberry Pi for UART, wiring, and programming. The setup is simple, and the code is provided.
Featured link: http://shahmirj.com/blog/raspberry-pi-and-pololu-servo-controller-using-c
-
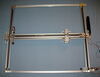
Internet Controlled T-Slot XY Table
- 22 August 2013A customer sent us a link to this instructable that shows how to make an automated XY table that can be controlled through the internet. It is...
-
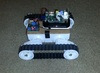
Dagu Rover 5 controlled by a Raspberry Pi
- 23 August 2013Pololu forum user chrisptx posted this video of his Dagu Rover 5. He is using a Raspberry Pi as the main controller and sending signals to a TReX...
2 comments


Another customer recently shared a blog post with us that contains a breakdown of the code from Shahmir Javaid's blog post. You can find the blog here.
There are also some customer-contributed examples in the "Related Resources" section of the Maestro user's guide with code for using a Raspberry Pi to control a Maestro that you might find helpful.
Post a comment


Home | Forum | Blog | Support | Ordering Information | Lists | Distributors | BIG Order Form | About | Contact
© 2001–2026 Pololu Corporation


