Pololu Blog »
Building a Raspberry Pi robot with the A-Star 32U4 Robot Controller
In this post I will show you how to build an expandable robot platform based on a Raspberry Pi and an A-Star 32U4 Robot Controller. With this platform, the powerful Raspberry Pi can take care of high-level tasks like motion planning, video processing, and network communication, while the A-Star, which mounts to the Pi’s GPIO header, takes care of actuator control, sensor inputs, and other low-level tasks that the Pi is incapable of. The total cost of the parts I used is about $120.
While the hardware is simple and there is only a little soldering required, this project is not for beginners: it is aimed at experienced Raspberry Pi users wanting to get into robotics, or resourceful robotics hobbyists wanting to do a Raspberry Pi project. I won’t get into the details of setting up and using a Raspberry Pi, since that’s a huge topic covered in detail elsewhere.
The main point of this project is actually to demonstrate software that allows the Raspberry Pi and A-Star to communicate over an I2C channel. Getting this to work right is tricky due to a hardware bug on the Pi’s processor and inconvenient interrupt requirements on the AVR, but the included code and configuration details should help you overcome those challenges and get your robot up and running quickly.
The hardware I used is just an example. I am showing all the details so that you can build this exact robot if you want, but maybe you will want to customize some parts, like upgrading the motors or laser-cutting your own custom base plate, or maybe you already have some chassis that you want to use for the project. You might not even want a mobile robot; if you are building a Raspberry Pi-controlled chicken coop, your setup will obviously look quite different.
Here are all the parts I used:
Mechanical components
- Pololu 1″ ball caster
- Pololu RP5/Rover 5 expansion plate – wide
- 2 × Mini Plastic Gearmotor HP, Offset 3mm D-Shaft Output
- Pololu Mini Plastic Gearmotor Bracket Pair – Tall
- Pololu Wheel 90×10mm Pair
- M2.5 standoffs for mounting the Raspberry Pi (four are included with the A-Star Robot Controller)
- One pack Machine Screw: M3, 8mm Length, Phillips (#4 screws will also work)
- One pack Machine Hex Nut: M3
I also recommend that you get some extra M2.5 screws and M2.5 nuts just in case. They are easy to lose and hard to find in stores.
Electronics
- 6-AA battery holder
- A-Star 32U4 Robot Controller SV.
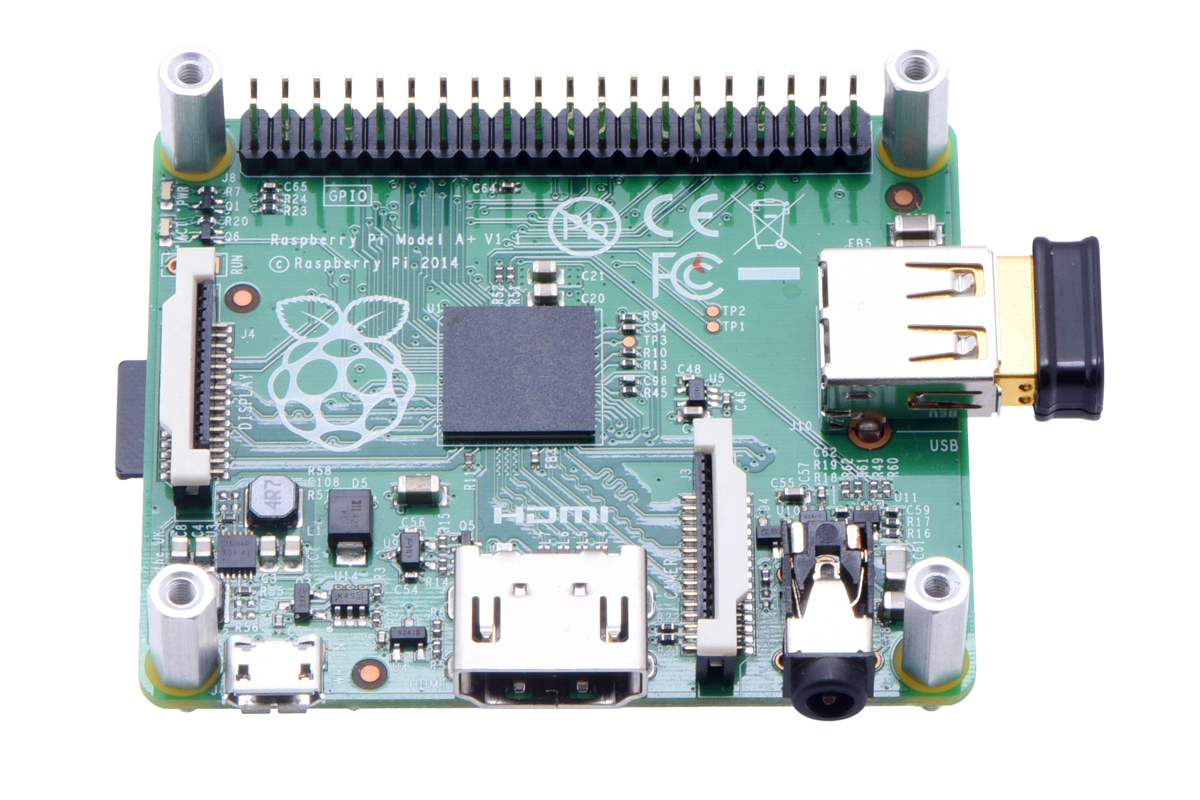
- Raspberry Pi Model A+ (other models, such as the Pi 3, B+, or Zero, should also work but need to be mounted differently)
- A microSD card for your Linux installation
- Wi-Fi module (I used an Edimax “nano” adapter)
- A few colors of 22-26 AWG stranded wire for connecting the motors
Here is a picture of all of those items (Remember, this is just an example, and you might use a very different selection of parts):
 |
Miscellaneous items that you probably have already
You will need a USB micro-B cable, some small screwdrivers, supplies for stripping and soldering leads to the motors, six AA batteries, and a battery charger. For the initial setup of the Raspberry Pi, you will need a way to power it: I recommend this USB wall power adapter, though a typical phone charger or connection to a normal USB port on a desktop or laptop computer will probably work fine, too. You will also need a keyboard and an HDMI connection to a display.
Alternative electronics
I chose our SV robot controller, but the LV model also works, especially if you want to power your project with four cells (4.8 V). The SV has higher current capability so it should be safer for powering the Raspberry Pi.
The Raspberry Pi B+ and the Raspberry Pi 2 Model B should also work but need to be mounted differently; I like the A+ for its compact size and low price.
Now I will describe, step by step, how to put the robot together.
Part 1: Set up the Raspberry Pi
You will need a working Linux distribution (I used Raspbian “Jessie”) on your Raspberry Pi as well as the ability to log in remotely over Wi-Fi, install software, and configure the system. If you are just getting started with the Raspberry Pi, there are hundreds of tutorials available online, but here are links to a few useful resources:
- Raspbian downloads and installation guide
- SD Association’s SD Card Formatter
- Automatically connect a Raspberry Pi to a Wi-Fi network
If you are using an Edimax or similar Wi-Fi adapter with the 8192cu module, you will notice frustrating delays or dropped connections unless you disable power management. Create a module configuration file:
sudo nano /etc/modprobe.d/8192cu.conf
and add the following lines:
# Disable power management
options 8192cu rtw_power_mgnt=0 rtw_enusbss=0
The A-Star Robot Controller communicates with the Raspberry Pi over I2C; enable it by running
sudo raspi-config
and selecting the option within the “Advanced” or “Interfacing Options” menu. By default, I2C runs at 100 kHz, but you can safely increase that rate to 400 kHz and get a much faster communications channel between the boards. To increase the speed, edit the configuration file:
sudo nano /boot/config.txt
At the end, add the line:
dtparam=i2c_arm_baudrate=400000
If you want to log in as a user other than the default pi, give yourself access to the I2C devices with this command, replacing <user> by your username:
sudo usermod -a -G i2c,dialout <user>
One further configuration step that will come in handy is to allow your user to safely shut down or reboot the Pi without typing a password. On Raspbian Jessie, the user pi can already do this. To make this possible for another user, run visudo and add the following lines at the end, again replacing <user> by your username:
<user> ALL = (root) NOPASSWD: /sbin/halt
<user> ALL = (root) NOPASSWD: /sbin/shutdown
<user> ALL = (root) NOPASSWD: /sbin/reboot
Try it out now with sudo reboot. After the reboot you should see the device /dev/i2c-1 on your Raspberry Pi, indicating that I2C is available.
Part 2: Try out your A-Star 32U4 Robot Controller
 |
Test the A-Star before connecting it to other parts. |
|---|
I recommend reading through the A-Star 32U4 Robot Controller User’s Guide, particularly the sections on getting started and using the A-Star Arduino library. Before connecting any other components to it, make sure you can successfully use the Arduino IDE to load the “BlinkLEDs” example from the A-Star library.
Once this is working, install the Pololu Raspberry Pi I2C Slave Arduino library. Assuming you are using version 1.6.2 or later of the Arduino software (IDE), you can use the Library Manager to install this library:
- In the Arduino IDE, open the “Sketch” menu, select “Include Library”, then “Manage Libraries…”.
- Search for “Pololu RPi Slave”.
- Click the “Pololu Raspberry Pi I2C Slave Arduino library” entry in the list.
- Click “Install”.
If this does not work, you can manually install the library:
- Download the latest release archive from GitHub and decompress it.
- Rename the folder “pololu-rpi-slave-arduino-library” to “PololuRPiSlave”.
- Move the “PololuRPiSlave” folder into the “libraries” directory inside your Arduino sketchbook directory. You can view your sketchbook location by opening the “File” menu and selecting “Preferences” in the Arduino IDE. If there is not already a “libraries” folder in that location, you should make the folder yourself.
- After installing the library, restart the Arduino IDE.
From the examples menu under PololuRPiSlave, select AStarRPiSlaveDemo, and load this example onto your A-Star. You should hear a short tune play when the board restarts. It is now ready to receive I2C commands from a Raspberry Pi.
Part 3: Connecting the Raspberry Pi to the A-Star
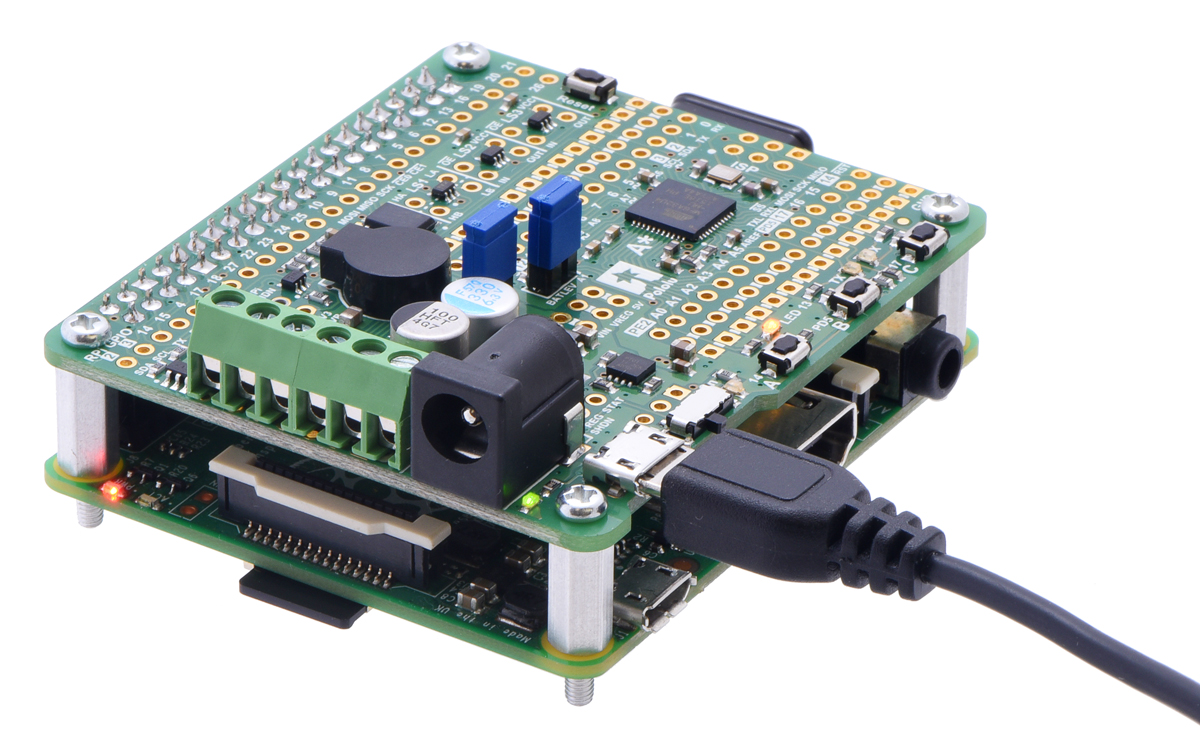
With USB (and anything else) disconnected use M2.5 standoffs and screws to secure the A-Star atop the Raspberry Pi:
|
|

The A-Star is configured to power the Raspberry Pi from its 5 V supply by default. This means that if you plug in a power source to its USB port, you will turn on both boards:
 |
Try out USB power now, and make sure that your A-Star and Raspberry Pi are both running correctly. Then shut down the Pi and remove the USB cable before going on to the next step.
halt) before removing power to the Raspberry Pi. As with a normal computer, if you remove power while the Raspberry Pi is running, its filesystem could possibly become corrupted.Part 4: Motors
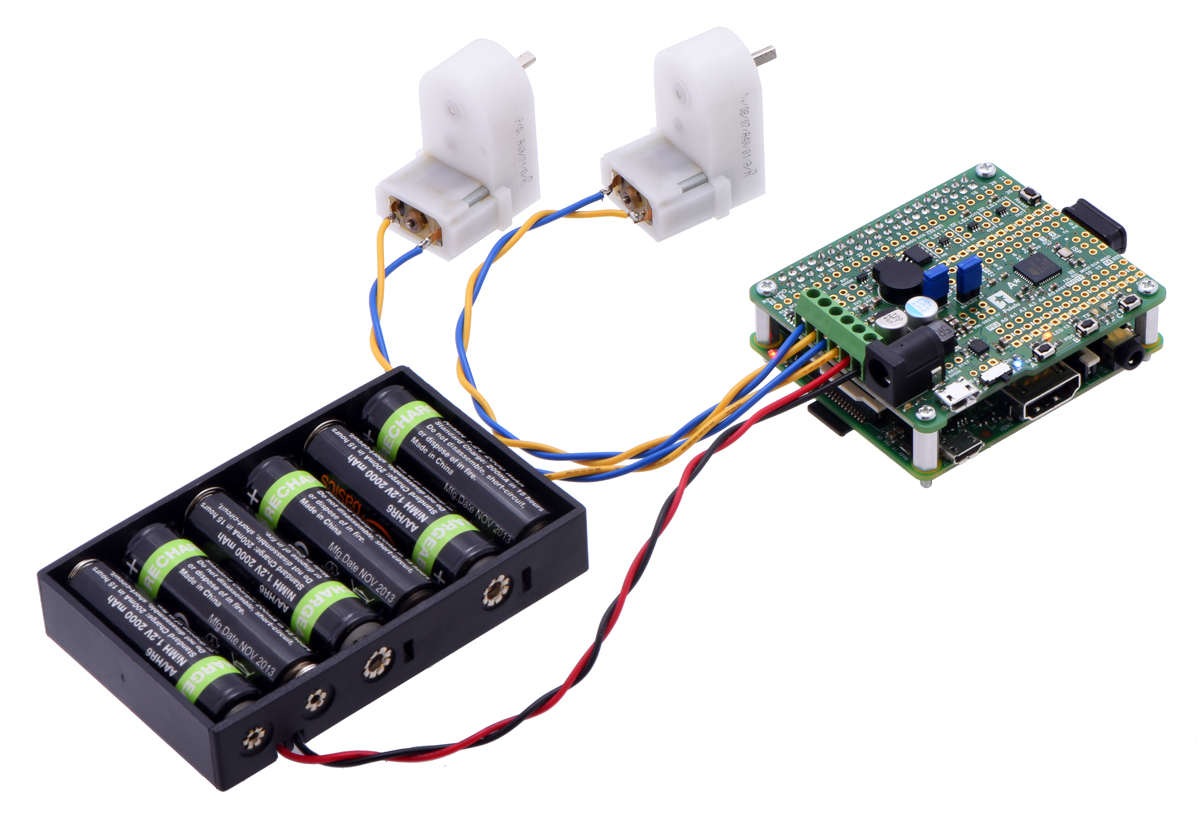
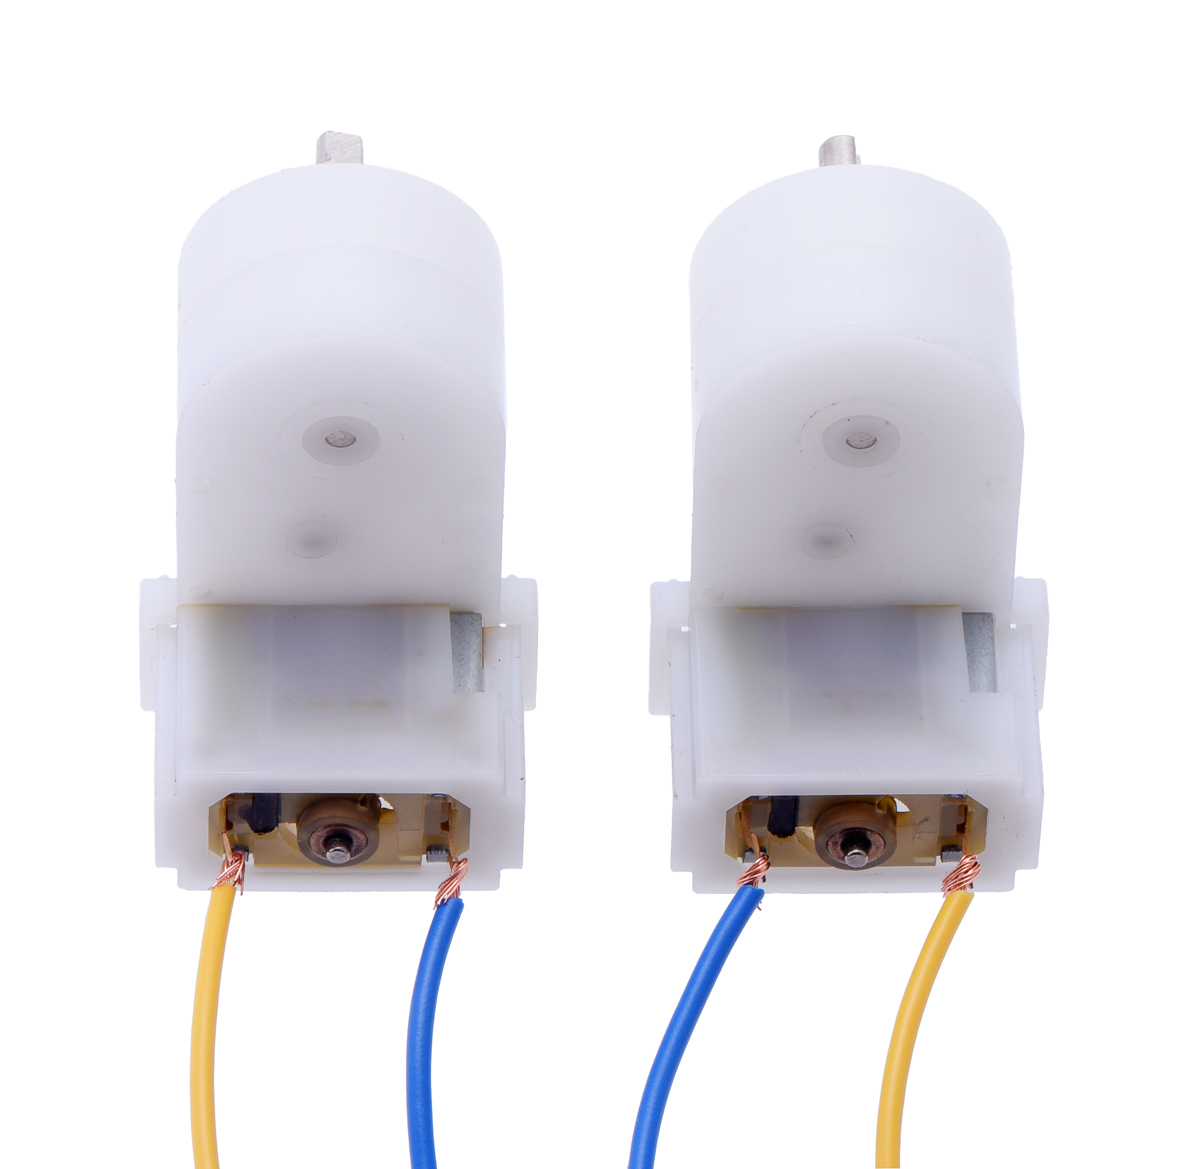 |
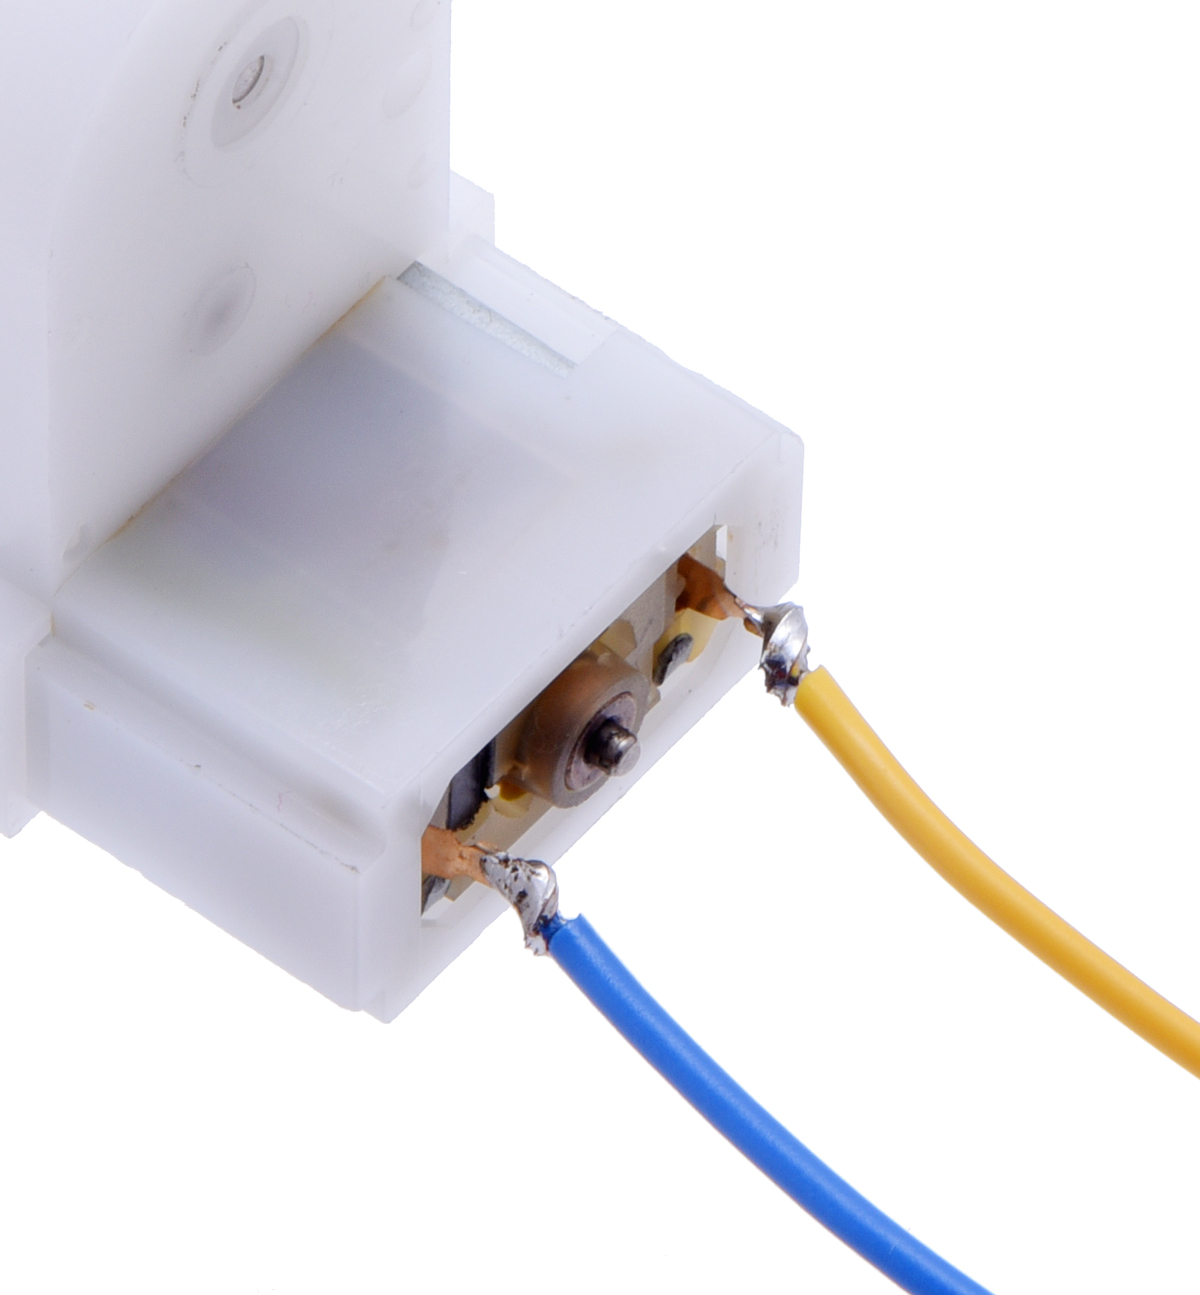
You will need four pieces of wire for the four terminals, each about 6" long. Strip about 1/4" from one end, enough so that you can wrap the bare wire through and around the motor leads. The wires should be mechanically secure before soldering, to reduce stress on the solder joints.
Solder the wires to the motor leads, then twist each pair of wires as well as the battery pack together. Twisting wires reduces mechanical stress and electrical noise, and it makes the wiring a little cleaner:
|
|

Using a small screwdriver, connect the wires to the terminal blocks.
|
|

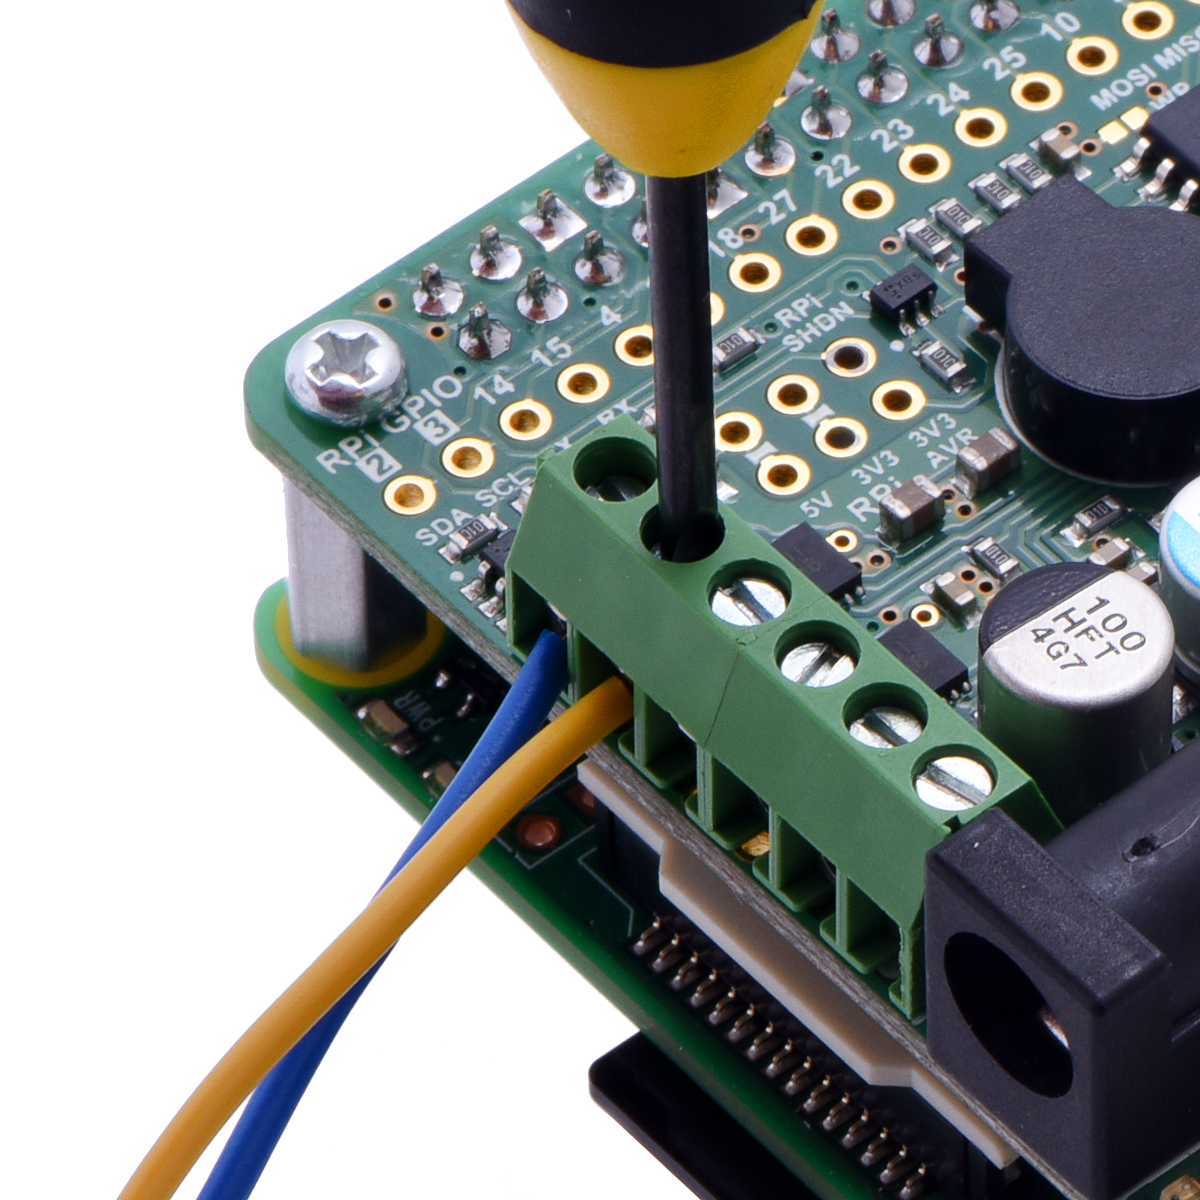
The order of the pins, from top to bottom, should be:
- Left motor (+)
- Left motor (−)
- Right motor (+)
- Right motor (−)
- Battery (+)
- Battery (−)
You probably don’t know which sides of your motor to call positive and negative, so you might have to switch them later to make the robot drive correctly. Here’s what it looks like with all the wires connected:
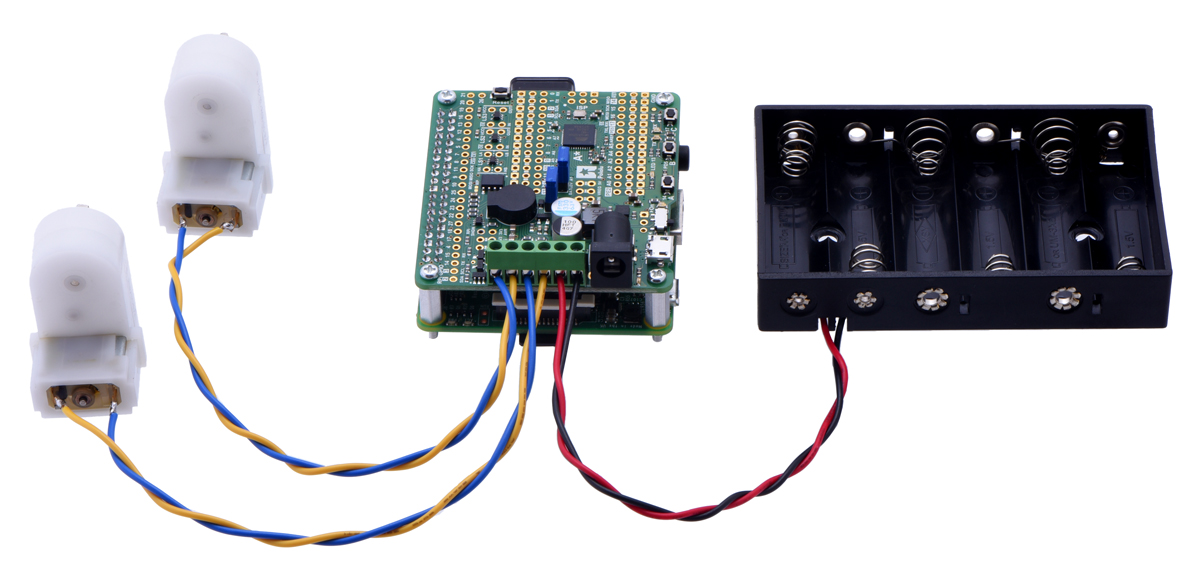 |
Finish connecting the motors and battery pack to the A-Star’s terminal block. |
|---|
Part 5: Testing the I2C bridge
Insert batteries and turn the power switch to the ON position. Both the A-Star and Raspberry Pi should power up. The blue LED on the A-Star indicates that its 5 V regulator is operating, and the red LED on the Pi indicates that it is receiving 5 V.
 |
This step requires some software installation, so you might want to temporarily switch to USB power and turn the switch to OFF to save battery power. Since the A-Star switches automatically between power supplies, you can do this without shutting down the Raspberry Pi.
To run our example code, you should make sure Python 3 and a couple of required libraries are installed. Install them with:
sudo apt-get install python3 python3-flask python3-smbus
Next, download the pololu-rpi-slave-arduino-library code from our GitHub repository. You can do this a number of ways, but if you are unfamiliar with Git, the simplest is to do the following, replacing <version> with the version of the library that you installed for your Arduino IDE (e.g. “1.0.0”).
wget https://github.com/pololu/pololu-rpi-slave-arduino-library/archive/<version>.tar.gz
tar -xzf <version>.tar.gz
mv pololu-rpi-slave-arduino-library-master pololu-rpi-slave-arduino-library
In the folder pololu-rpi-slave-arduino-library/pi is some example Python code for controlling the A-Star. These scripts can be run with the python3 command (not python, which typically invokes the incompatible Python 2 interpreter). Since you loaded AStarRpiSlaveDemo in Part 2, the A-Star should be ready to respond to these scripts. Try running
python3 pololu-rpi-slave-arduino-library/pi/blink.py
If everything goes well, you should see the LEDs on the A-Star flash a sequential pattern. Next, try running the control panel server:
python3 pololu-rpi-slave-arduino-library/pi/server.py
The server starts up on port 5000, so you can access it at http://<ip>:5000/ where <ip> is the IP address of your Raspberry Pi. The server displays a simple control panel:
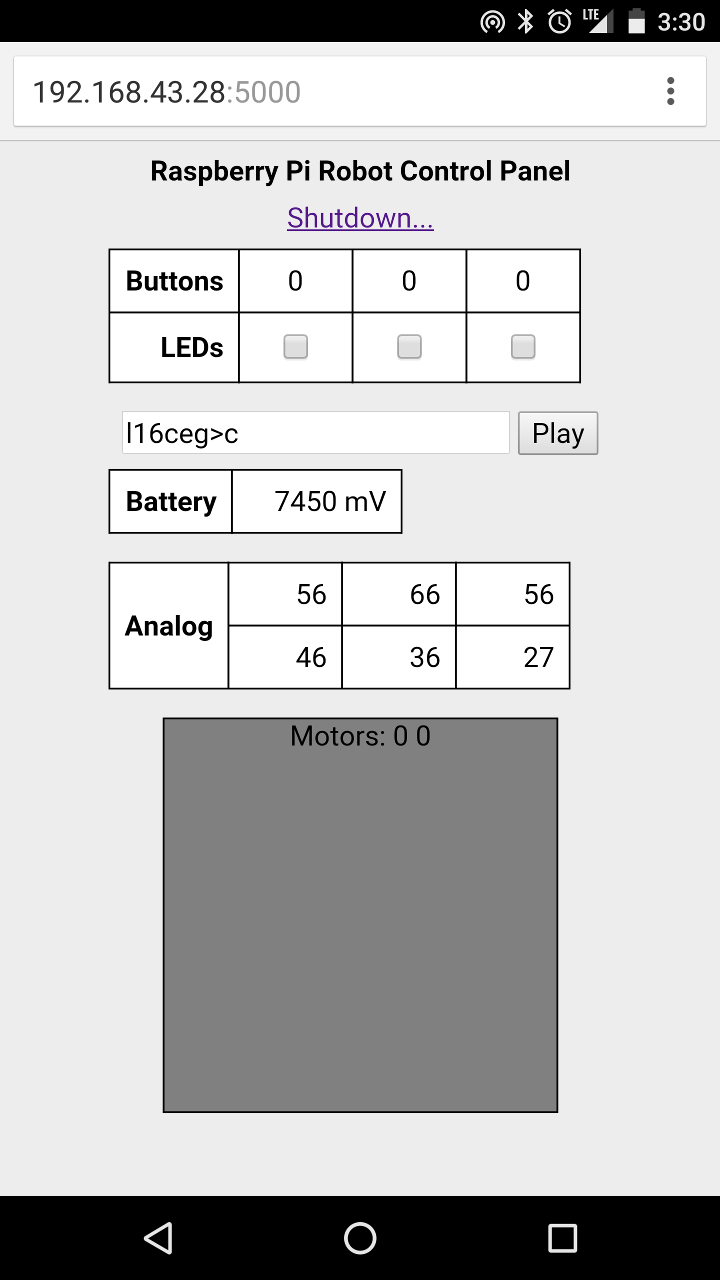 |
The upper part of the display allows you to interact with various parts of the A-Star: buttons, LEDs, buzzer, and analog voltage sensors, and you can touch or click within the gray square to command the robot to drive around. (The battery power switch must be ON for the motors to receive power from the batteries.)
Note the direction that each motor spins when commanded to drive forward and which corresponds to left and right, so that you can assemble them correctly in the next part.
Part 6: Mechanical assembly
Now it is time to put everything together on the chassis. Before doing more work, safely shut down the Raspberry Pi – if everything is configured correctly, you can do this by clicking the “Shutdown…” link on the web control panel. Then, remove the batteries from the battery holder, and set them aside. If you have designed your own chassis, you will have to figure out how to put everything together yourself; here is how to put together my robot:
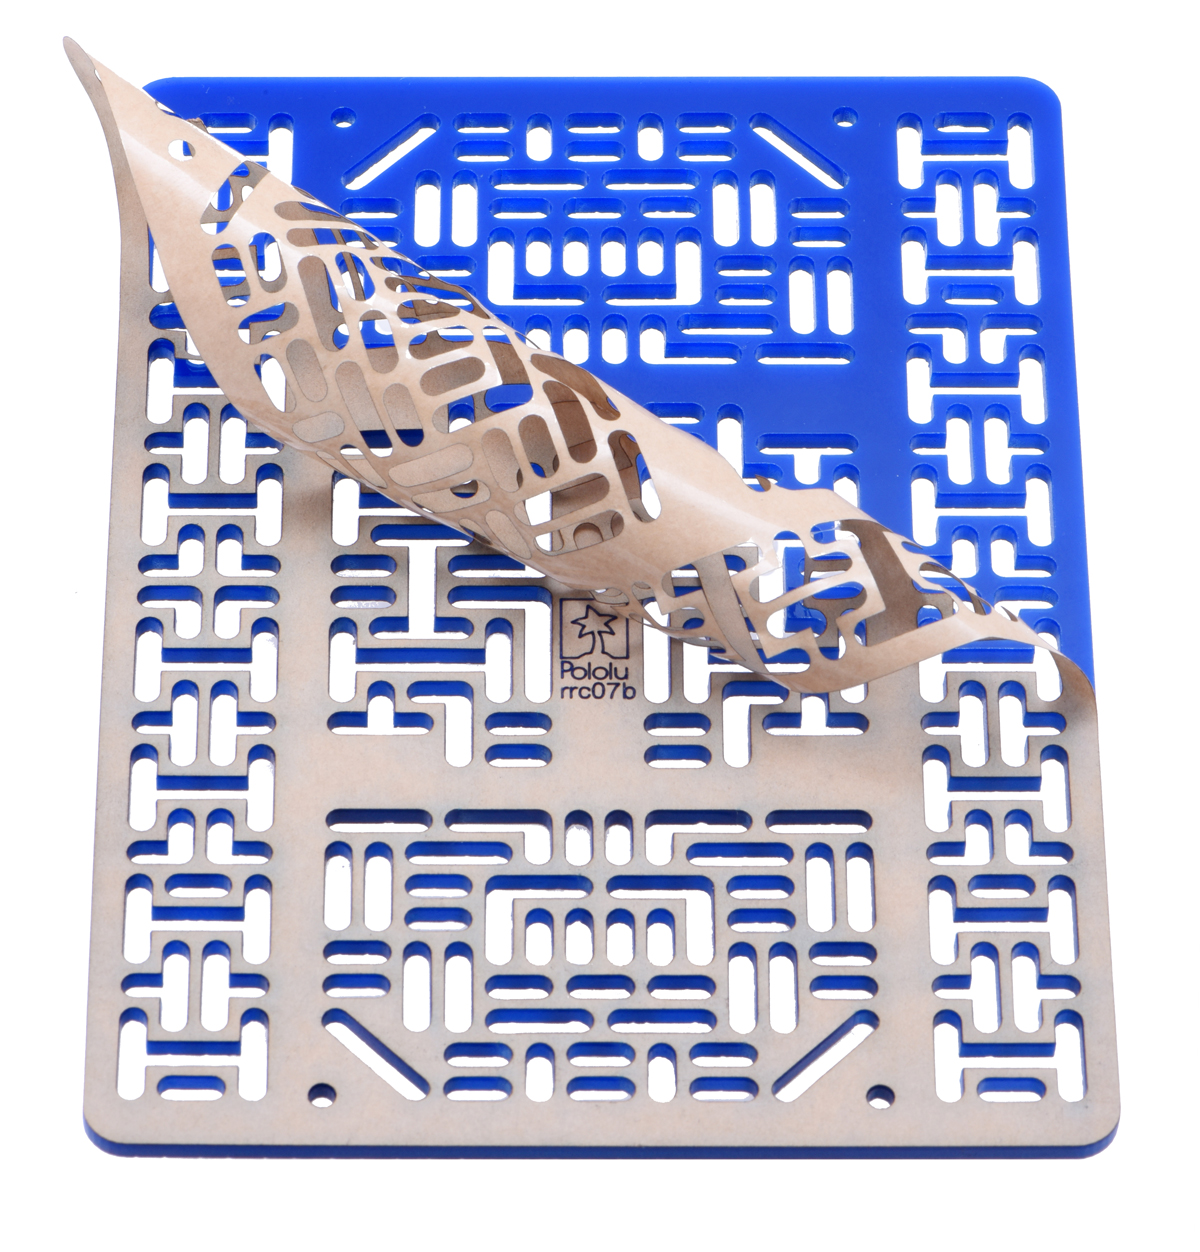
First, peel the protective paper backing from the chassis plate:
 |
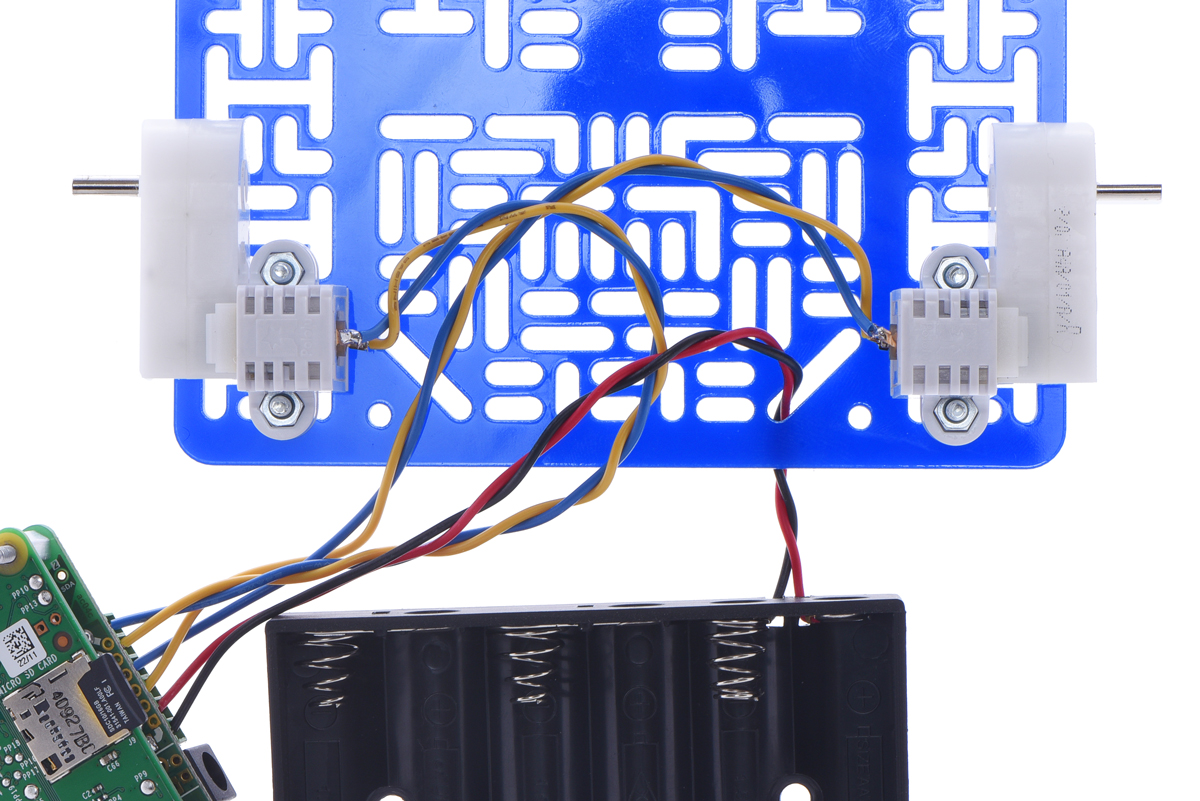
Then, using the brackets, their included M3 screws, and the spacer plates, mount the motors on the top at the left and right sides. Since you noted how the motors spun in your earlier tests, you should be able to place them so that left/right/forward/back will work properly, but you might need to exchange some of the wires at the terminal block. Disconnect the battery holder wires from the terminal block to thread them through the chassis, so that the battery holder can sit on the bottom without loose wires sticking out. It should look something like this:
 |
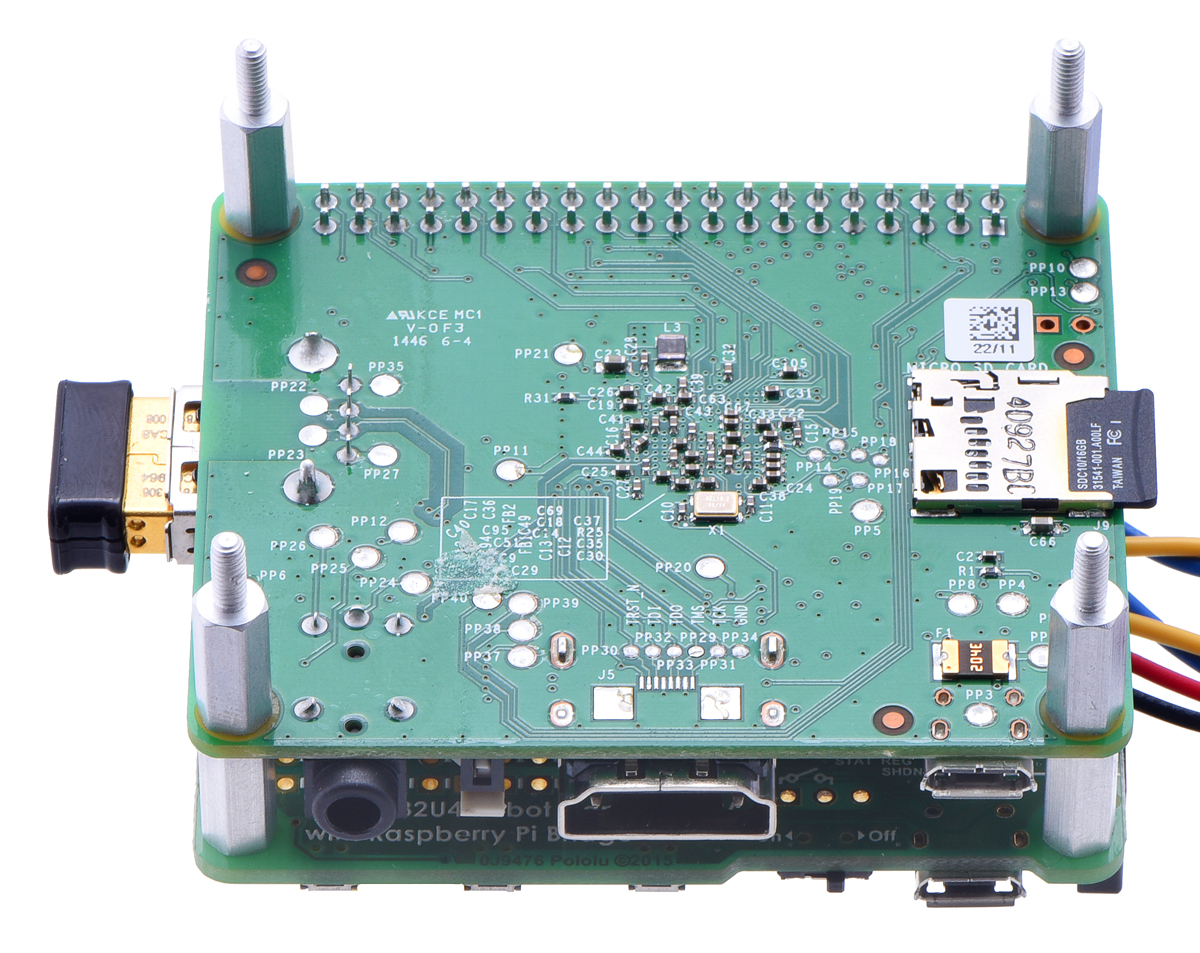
Screw four M2.5 standoffs to the bottom of the raspberry Pi:
 |
Position the chassis onto the standoffs as shown below and fasten securely with M2.5 nuts. Try to get the motor and power wires to feed nicely between the standoffs.
 |
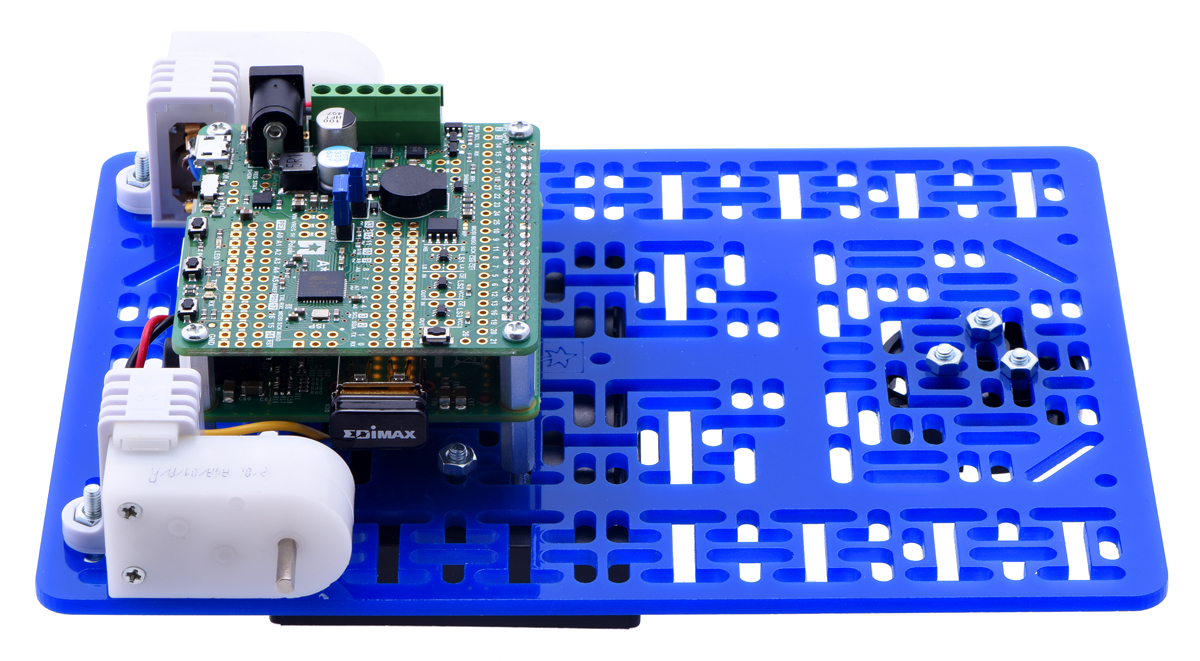
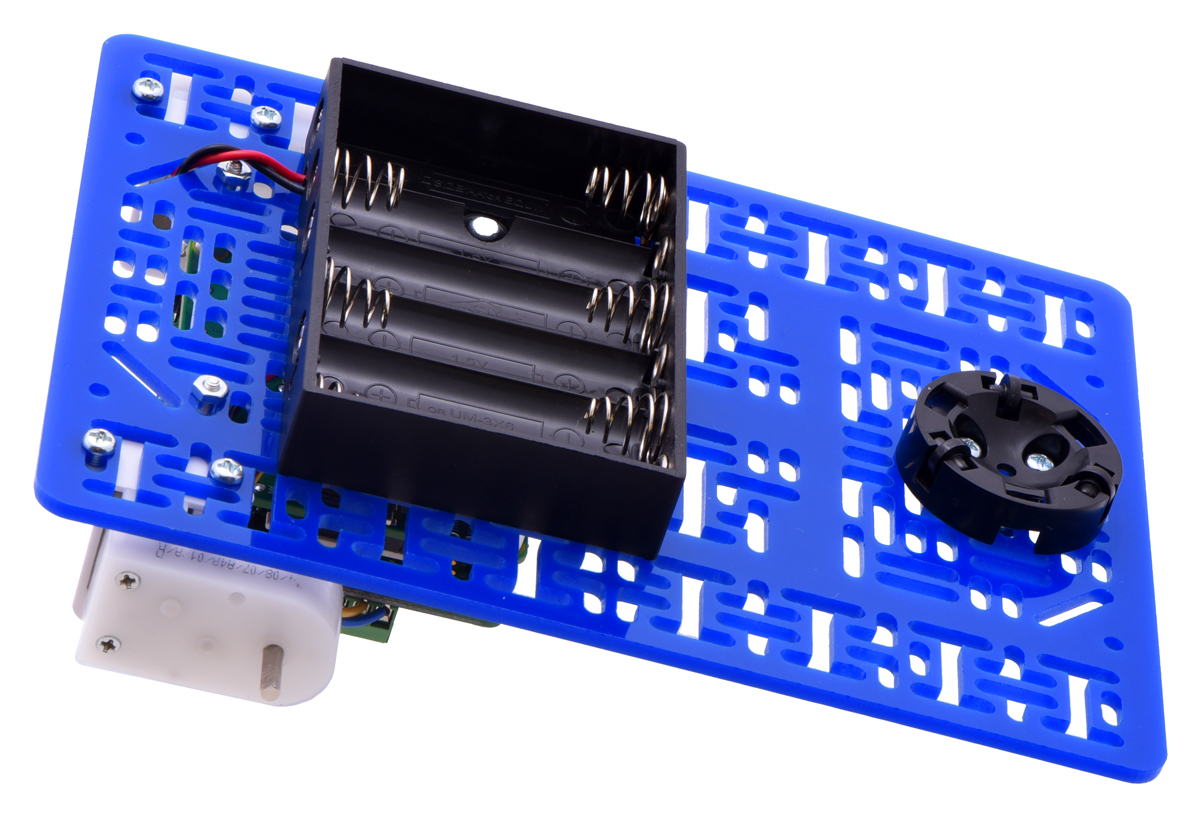
Attach the battery holder and the base of the ball caster with M3 screws and nuts. There are various places that you can put it, but it’s a good idea to have them near the back, keeping most of the weight on the drive wheels.
 |
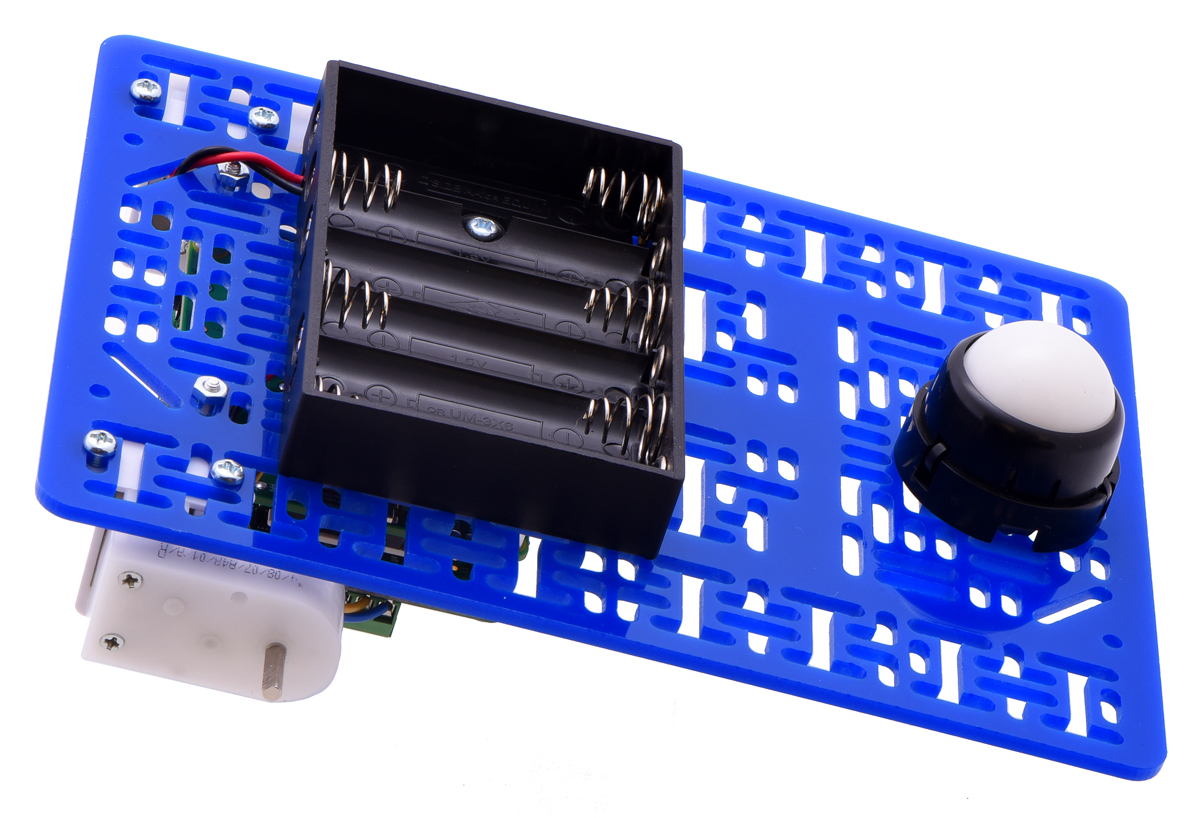
Flipping the robot over again, place the rollers into the ball caster, place the ball on top, and snap the cover piece over it:
|
|
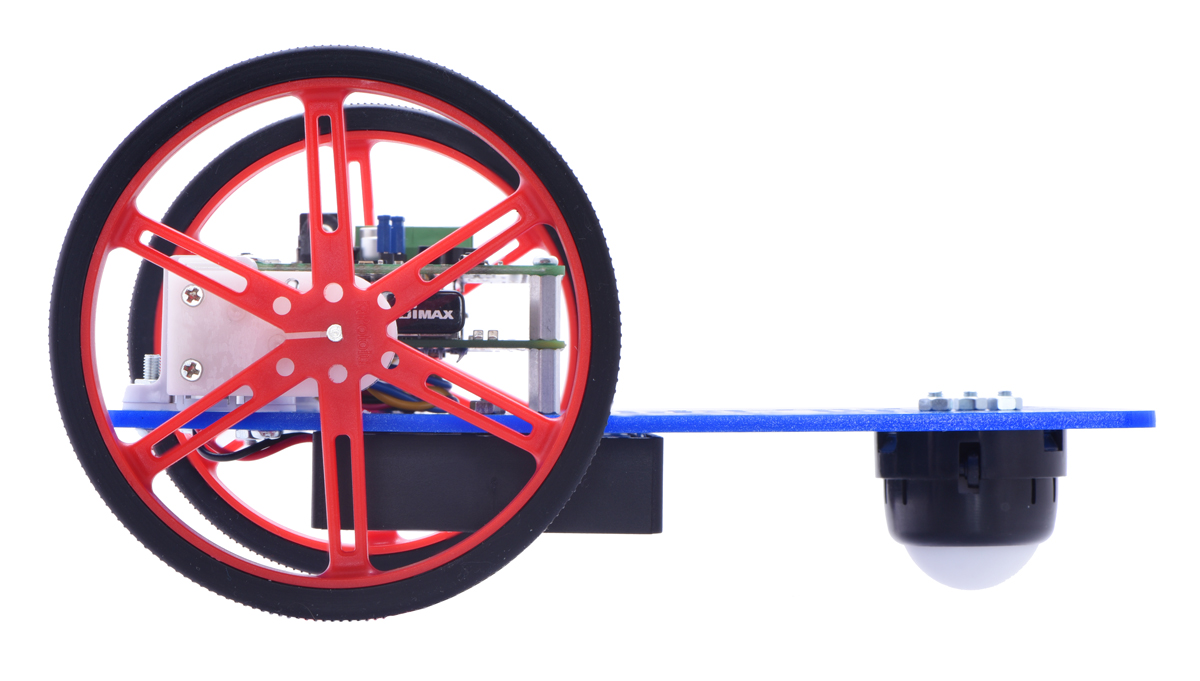
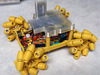
Carefully press the wheels onto the motors. This takes a lot of force, so make sure you are pushing against the motor body itself rather than the chassis, which could easily crack. Put the batteries back in, boot up your Raspberry Pi, and try out your completed robot!
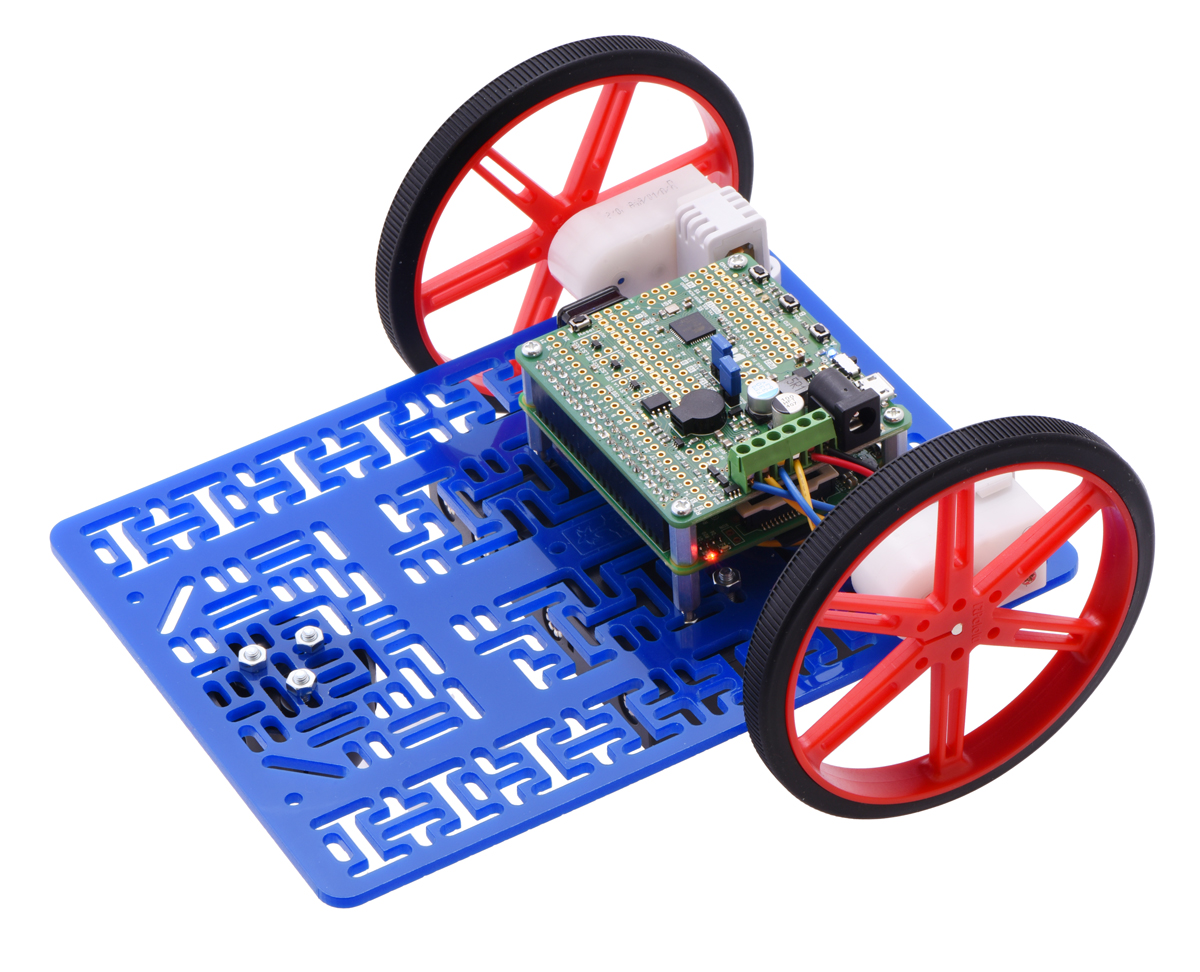 |
|
|

Part 7: Starting the server automatically
It’s annoying to have to log into the Raspberry Pi every time you start up your robot, so you will probably want to set up the server as a background service that starts automatically. With Raspbian Jessie and later, it’s easy to do this using systemd. Edit a file in the service directory:
sudo nano /lib/systemd/system/a_star_slave.service
Add the following lines (adjusting User and the path to server.py if necessary):
Description=A-Star Slave Server
After=multi-user.target

[Service]
User=pi
Type=idle
ExecStart=/usr/bin/python3 /home/pi/pololu-rpi-slave-arduino-library/pi/server.py

[Install]
WantedBy=multi-user.target
There is also an included script that periodically pings the server to blink the LEDs as a heartbeat indicator. Edit a file for this service:
sudo nano /lib/systemd/system/a_star_heartbeat.service
Add the following lines, again adjusting User and the path if necessary:
Description=A-Star Slave Heartbeat
After=multi-user.target

[Service]
User=pi
Type=idle
ExecStart=/usr/bin/python3 /home/pi/pololu-rpi-slave-arduino-library/pi/heartbeat.py

[Install]
WantedBy=multi-user.target
Enable and start these services:
sudo systemctl enable a_star_slave
sudo systemctl enable a_star_heartbeat
sudo systemctl start a_star_slave
sudo systemctl start a_star_heartbeat
Expansion ideas
Now that you have a basic mobile robot platform, here are some ideas for additions and improvements:
- Add sensors for line following or obstacle detection.
- Add inertial/compass sensors for navigation.
- Mount servos or other actuations on the chassis. (See this page for what you need to do to get the Arduino Servo library to work on the controller.)
- Add a camera and put live video on the web interface.
- Improve the responsiveness of the web interface (which is really just a proof of concept) using something like WebSockets.
- Set up a convenient battery charger. The iMAX B6AC comes with cables that can be used to charge batteries via the DC jack, but you might want to design your own docking station.
- Use one of the buttons to trigger a safe shutdown of the Raspberry Pi; you can detect shutdown on the Pi’s RX line and use the RPISHDN pin to shut off power when shutdown is complete.
- Add a real-time clock for accurate timekeeping when disconnected from Wi-Fi.
Whatever you do, I would be interested to hear about your project and see pictures of what you made. Please share in the comments below! If you have technical issues getting the project to work, however, and you need some help, it’s better to go through technical support.
Note (31 March 2017): We originally wrote these instructions for the first version of the pololu-rpi-slave-arduino-library code, in which the Raspberry Pi scripts used Python 2. Version 2.0.0 of pololu-rpi-slave-arduino-library updates the scripts to run with Python 3 instead, and we have updated the instructions here accordingly.
Related products


-
3D-printed mecanum wheel rover
- 9 February 2016One of our forum members, gchristopher, posted about his 3D-printed mecanum wheel rover. The rover uses our D24V10F5 5V regulator and some of our...
-

Room mapping robot based on the Rover 5 chassis
- 19 February 2016This robot, created by theophil on Let’s Make Robots, uses a Rover 5 chassis with encoders, a MinIMU, sonar sensors, and a few expansion plates to...
4 comments

I am following this excellent tutorial with Ubuntu MATE 16.04 (instead of Rasbian). The following command will over-write all of user's existing groups (including sudo)!
sudo usermod -G i2c,dialout
The following command will simply append these groups to the user's existing list:
sudo usermod -a -G i2c,dialout

-Paul

I will combine a RasPi Zero and the Zumo32U4. Now I have trouble with point 2 from your tutorial.
I made some changes in the arduino sketch to make it compatible with the Zumo32U4 library. "AStar" changed to "Zumo" and "readBatteryMillivoltsLV()" changed to "readBatteryMillivolts()"
Now I stuck at the compiling process.
The following error occurs:
Arduino: 1.6.13 (Windows 7), Board: "Pololu A-Star 32U4"
libraries\Wire\utility\twi.c.o (symbol from plugin): In function `twi_readFrom':
(.text+0x0): multiple definition of `__vector_36'
libraries\PololuRPiSlave\PololuTWISlave.cpp.o (symbol from plugin):(.text+0x0): first defined here
collect2.exe: error: ld returned 1 exit status
exit status 1
Error compiling for board Pololu A-Star 32U4.
Please can you explain how i fix this problem.
-Peter

That sounds like a really cool project! The Zumo 32U4 library contains additional component libraries that are not included in the A-Star 32U4 library, specifically the L3G library and the LSM303 library, which conflict with the PololuRPiSlave library. To get the AStarRPiSlaveDemo sketch to compile with the Zumo 32U4 library, you need to remove those two component libraries.
Blog comments are not the most appropriate place for troubleshooting, so if you need further assistance, I suggest continuing the discussion on our forum.
By the way, we would love to see some pictures of your project and to hear more about it! If you have more progress to share, feel free to reply here or post about it in the "Sharing your projects" section of our forum.
- Amanda
Post a comment


Home | Forum | Blog | Support | Ordering Information | Lists | Distributors | BIG Order Form | About | Contact
© 2001–2026 Pololu Corporation

