Support » Pololu Maestro Servo Controller User’s Guide »
8. Writing PC Software to Control the Maestro
There are two ways to write PC software to control the Maestro: the native USB interface and the virtual serial port. The native USB interface provides more features than the serial port, such as the ability to change configuration parameters and select the Maestro by its serial number. Also, the USB interface allows you to recover more easily from temporary disconnections. The virtual serial port interface is easier to use if you are not familiar with programming, and it can work with existing software programs that use serial ports, such as LabView.
 |
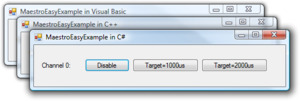
The Pololu USB SDK contains example code for the Maestro in C#, Visual C++, and Visual Basic .NET. |
|---|
Native USB Interface
The Pololu USB Software Development Kit supports Windows and Linux, and includes the source code for:
- MaestroEasyExample: a simple example application that uses native USB and has three buttons that control the Maestro. Versions of this example are available in C#, Visual Basic .NET, and Visual C++.
- MaestroAdvancedExample: an example graphical application that uses native USB to send commands and receive feedback from the Maestro and automatically recover from disconnection (written in C#).
- UscCmd: a command-line utility for configuring and controlling the Maestro (written in C#).
- C# .NET class libraries that enable native USB communication with the Maestro (written in C#).
You can modify the applications in the SDK to suit your needs or you can use the class libraries to integrate the Maestro in to your own applications.
Example code that uses the native USB interface from other languages can be found in Section 10.
Virtual Serial Ports
Almost any programming language is capable of accessing the COM ports created by the Maestro. We recommend the Microsoft .NET framework, which is free to use and contains a SerialPort class that makes it easy to read and write bytes from a serial port. You can download Visual Studio Express (for either C#, C++, or Visual Basic) and write programs that use the SerialPort class to communicate with the Maestro. You will need to set the Maestro’s serial mode to be either “USB Dual Port” or “USB Chained”. The serial interface is documented in Section 5. For example serial code in many different languages, see Section 5.h and Section 10.


