Pololu Blog »
Pololu Blog (Page 37)
Welcome to the Pololu Blog, where we provide updates about what we and our customers are doing and thinking about. This blog used to be Pololu president Jan Malášek’s Engage Your Brain blog; you can view just those posts here.
Popular tags: community projects new products raspberry pi arduino more…
New products: Addressable RGB LED strips based on the SK6812
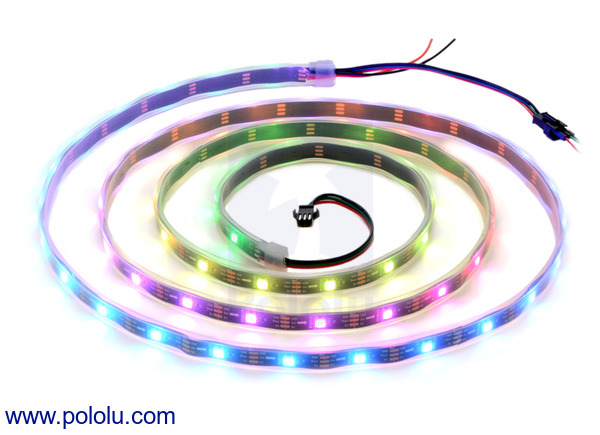 |
We are now selling new addressable RGB LED strips based on the SK6812. These LED strips replace our older WS2812B LED strips. Like the WS2812B, the SK6812 is an RGB LED with an integrated driver that allows independent control over a chain of LEDs using just one I/O line. The main difference between the two drivers is that the SK6812 has constant current control capabilities that let it have a voltage-independent color and brightness over a wide range of voltages, so any voltage drop due to long power lines is less of a concern.
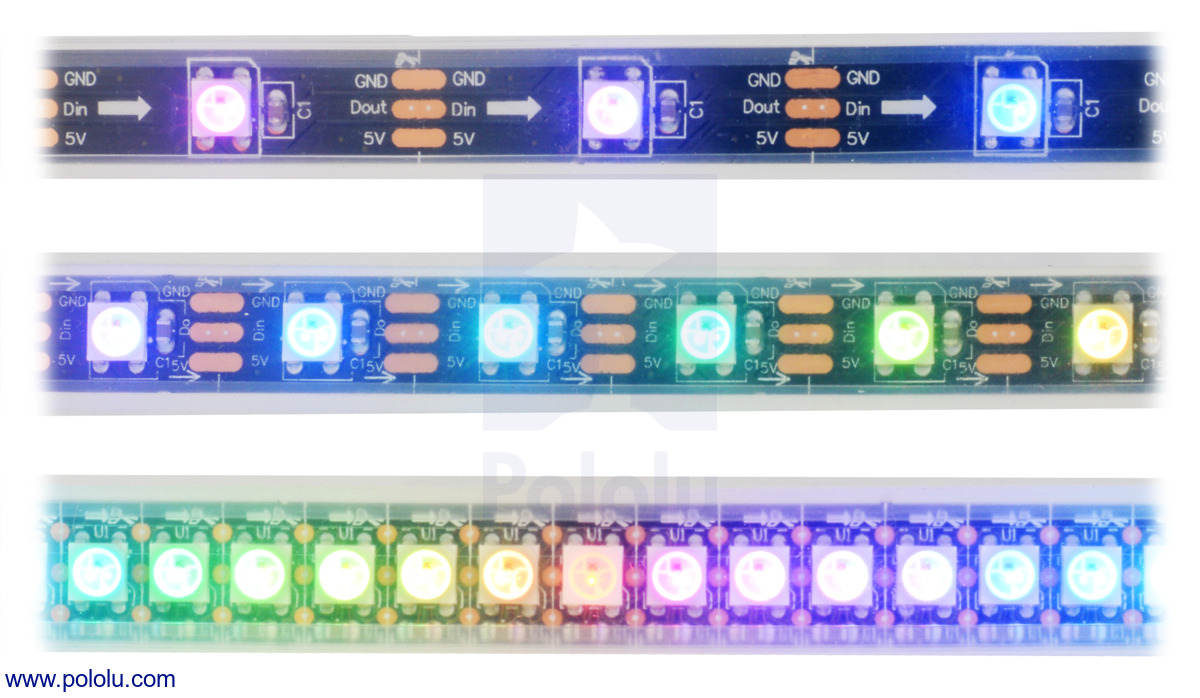 |
LED side of the SK6812-based addressable LED strips, showing 30 LEDs/m (top), 60 LEDs/m (middle), and 144 LEDs/m (bottom). |
|---|
We offer six different kinds of SK6812 LED strip with different LED densities and lengths. Our strips with 30 LEDs per meter are available in three lengths:
We also offer denser SK6812 LED strips that have 60 LEDs per meter:
Our highest density strip has 144 LEDs per meter:
We provide LED strip example code for the Arduino, AVR, and mbed microcontroller platforms. More information about the LED strips and how to use them can be found on the LED strip product page.
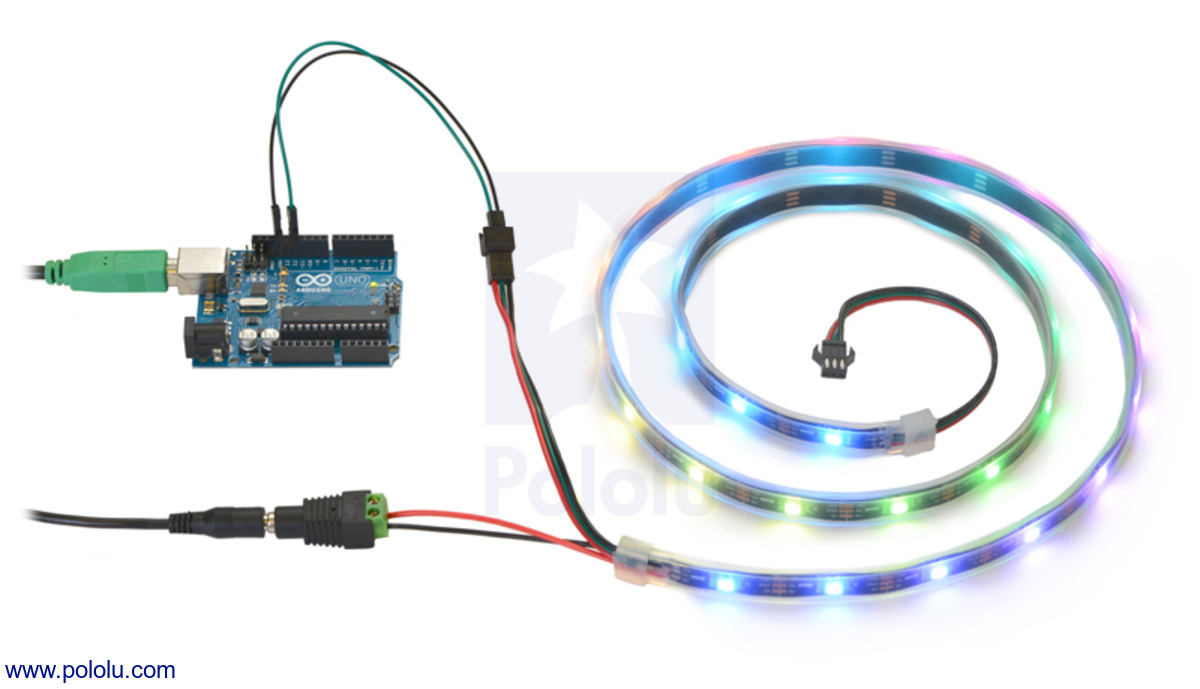 |
Controlling an addressable RGB LED strip with an Arduino and powering it from a 5V wall power adapter. |
|---|
Related products


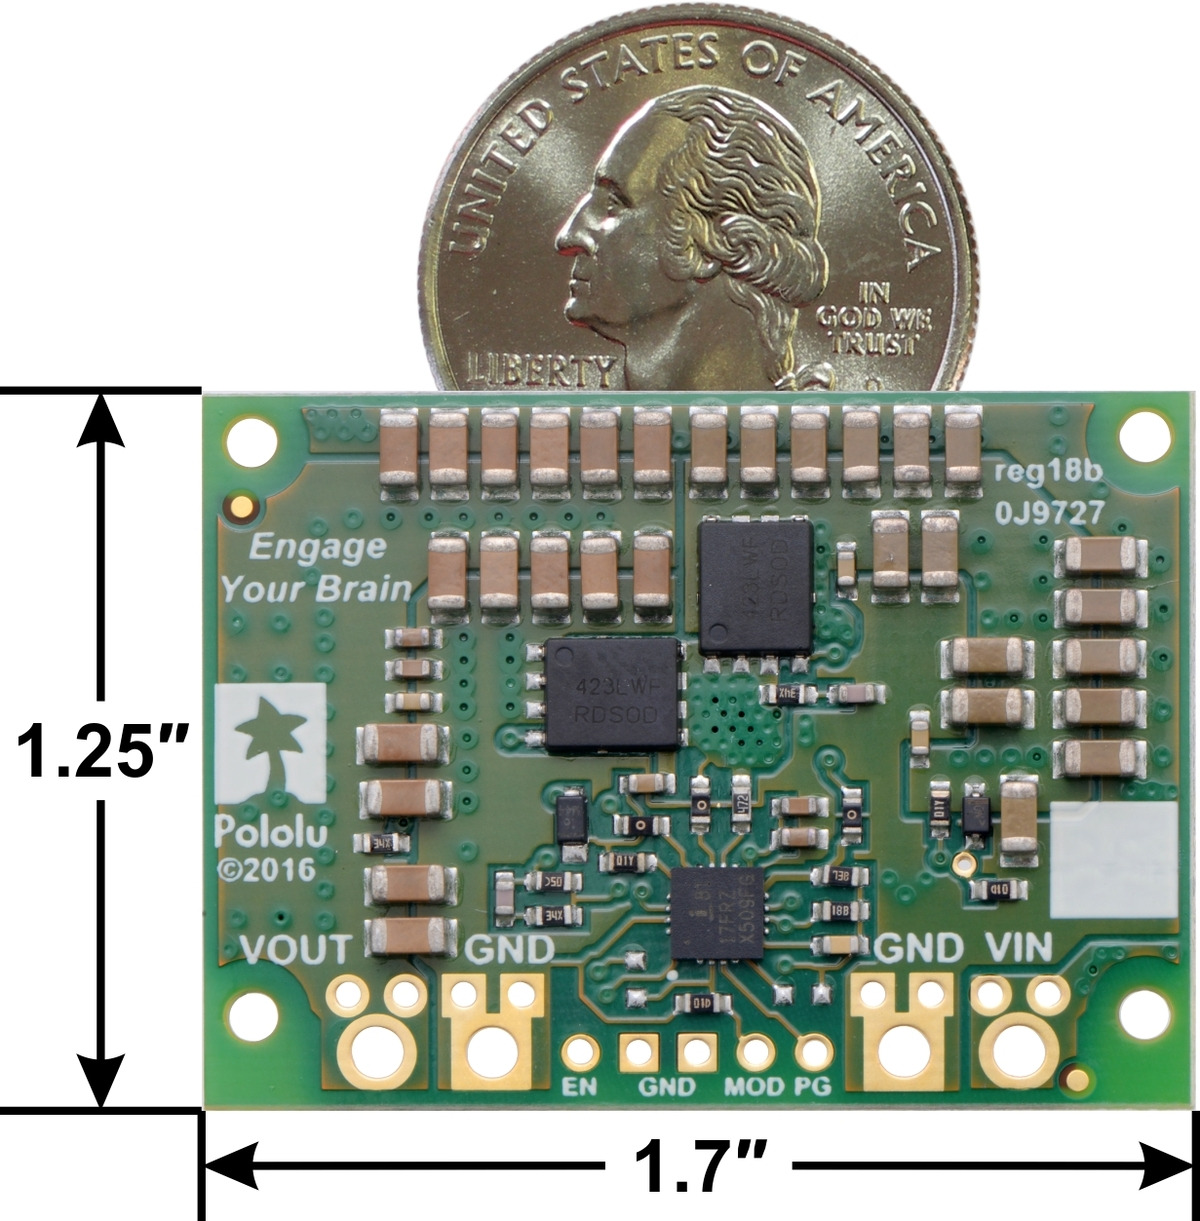
New D24V150Fx 15A step-down voltage regulator family — our highest-power regulators yet!
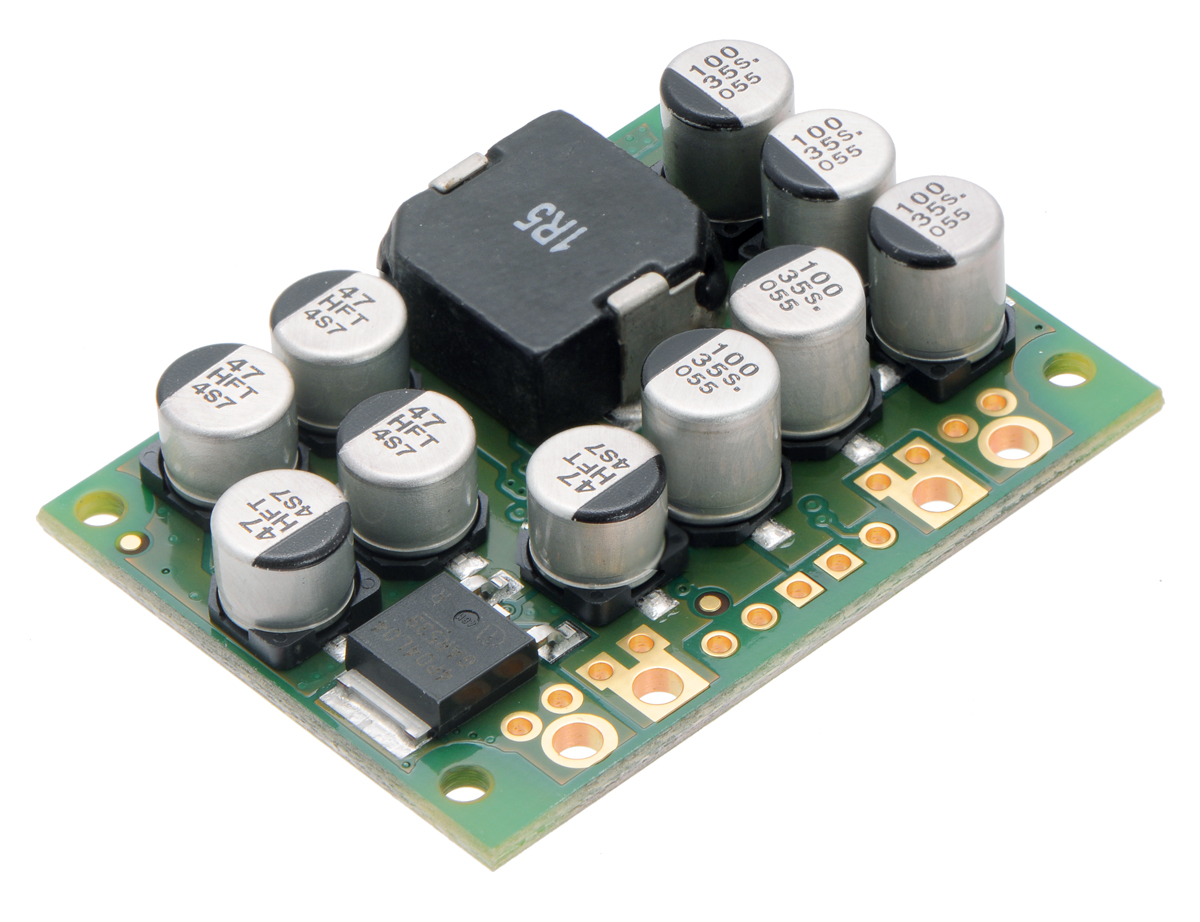 |
I am excited to announce that we just released our highest power regulators ever. The new D24V150Fx family of step-down regulators includes units with 3.3 V, 5 V, 6 V, 7.5 V, 9 V, and 12 V outputs and can output currents of around 15 A! With all of the output voltages available, the D24V150Fx family of regulators is great for a variety power-hungry projects like running servos or our metal gearmotors and supplying large LED displays.
|
|

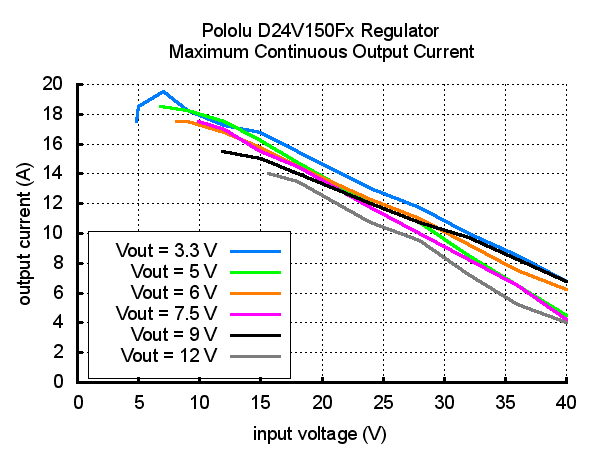
The maximum continuous output currents for all the members of the D24V150Fx family are shown in the graph below. You can see that the available output current is generally a little higher for the lower-voltage versions than it is for the higher-voltage versions, and it decreases as the input voltage increases.
 |
These regulators accept input voltages up to 40 V and have typical efficiencies between 80% and 95%. Integrated reverse-voltage protection, over-current protection, over-temperature shutoff, undervoltage lockout, and soft-start features make these regulators robust, and a power good output can be used to monitor the output voltage.
See the product pages for any of the D24V150Fx regulators for more information on these new regulators, or visit our voltage regulator category to see all of our regulator options.
Related products


New versions of our 38 kHz IR proximity sensors
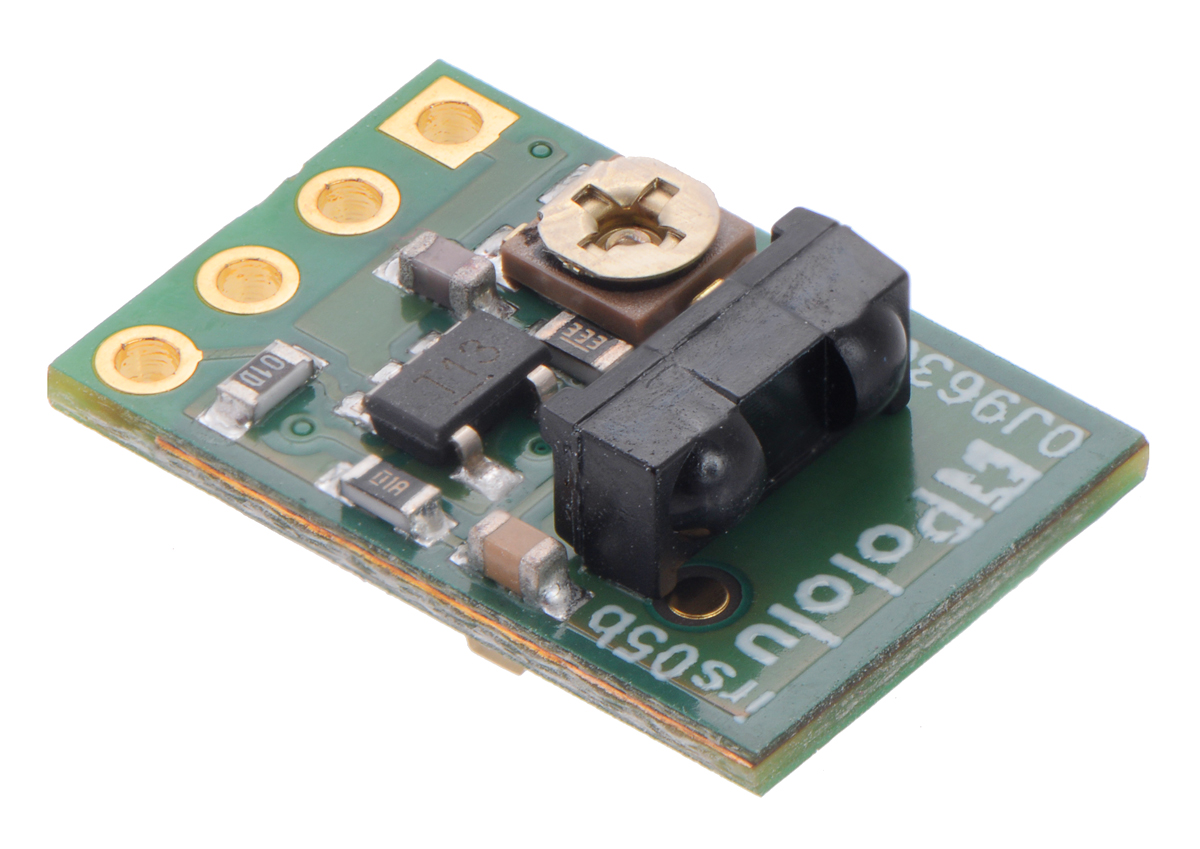 |
We have released slightly updated (irs05b) versions of our 38 kHz IR proximity sensors and discontinued the previous (irs05a) versions. The main changes are to the locations of the IR emitter and receiver, which have been moved away from the edge of the board. This results in better shielding from the PCB itself, which improves performance. Also, the front edge is now routed rather than scored to provide a cleaner edge that also slightly improves the sensor performance and consistency.
Like the originals, these new sensors are available in high-brightness and low-brightness versions with typical sensing ranges up to around 24″ (60 cm) and 12″ (30 cm), respectively. The new versions have the same dimensions and pinouts as the originals, so they can be used as drop-in replacements for any applications that are not dependent on the original component locations.
Related products

Reaper puppet master Halloween prop using a Mini Maestro 24
If you are looking for some inspiration for scary Halloween prop ideas, check out the truly creepy reaper puppet master that forum user rasco66 built! The prop is a tall, menacing installation: a grim reaper with glowing red eyes and outstretched hands overlooks a dark stage containing a lone skeleton. Once activated, the reaper commands the puppet to dance and animates its movement to a cover of Blue Oyster Cult’s Don’t Fear the Reaper. The skeleton animation is achieved with seven servos and a linear actuator; a Mini Maestro 24 controls all of the servo sequences and is triggered by a PicoBoo Max, which also coordinates the music, strobe, and linear actuator. You can watch a video of the prop on YouTube or read more about the project, including some code, in this forum post.
By the way, there are still 10 days left to take advantage of our Halloween sale and save on parts for your own grim reaper puppet master or whatever other terrifying thing you want to create (but you really shouldn’t wait that long if you want something done by Halloween as these things almost never work on the first try!).

Related products

UM7-LT and UM7 orientation sensors now from Redshift Labs
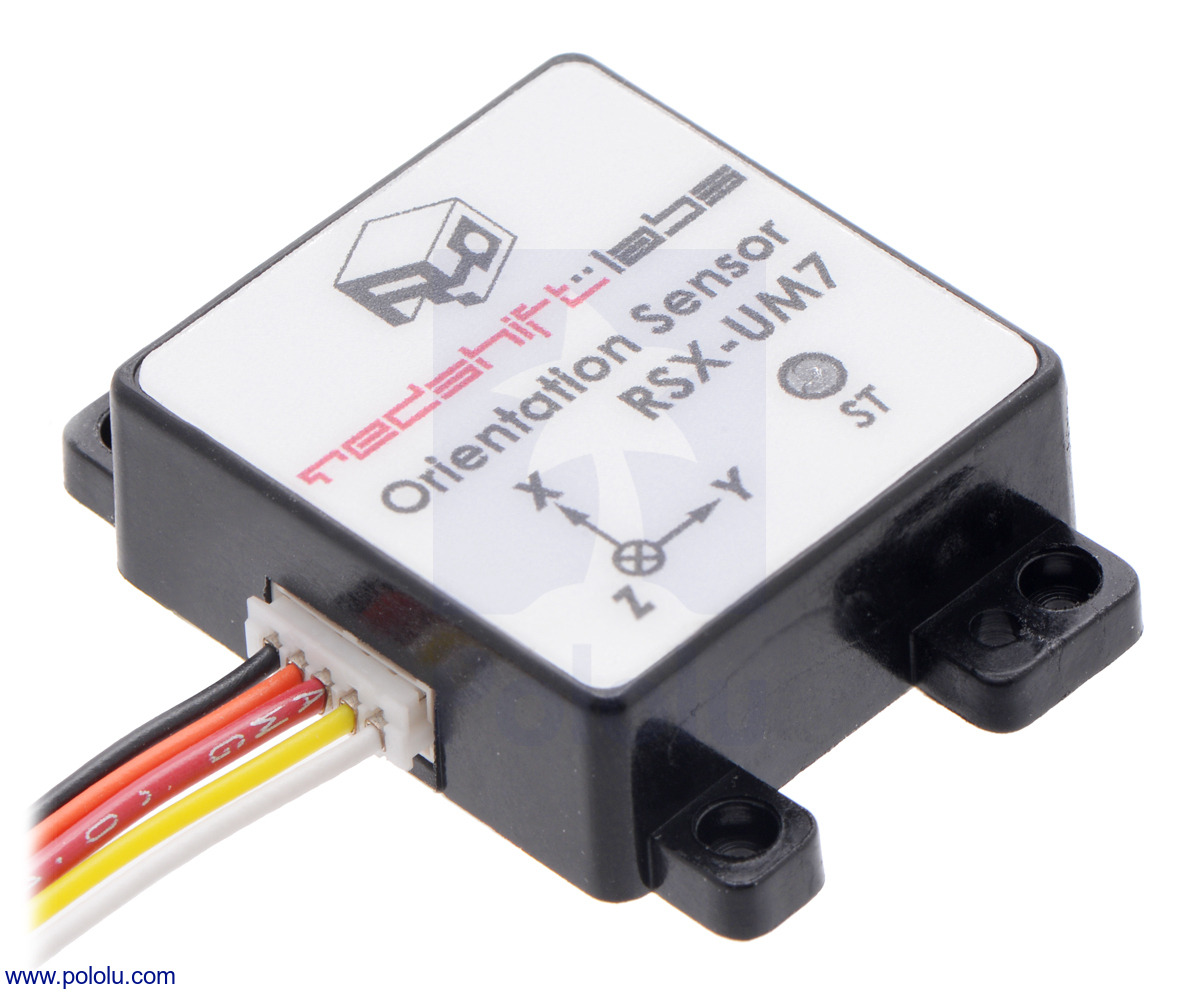 |
The UM7-LT and UM7 orientation sensors, originally developed by CH Robotics, are now being manufactured and supported by Redshift Labs. The updated versions of these sensors are now available from Pololu.
|
|
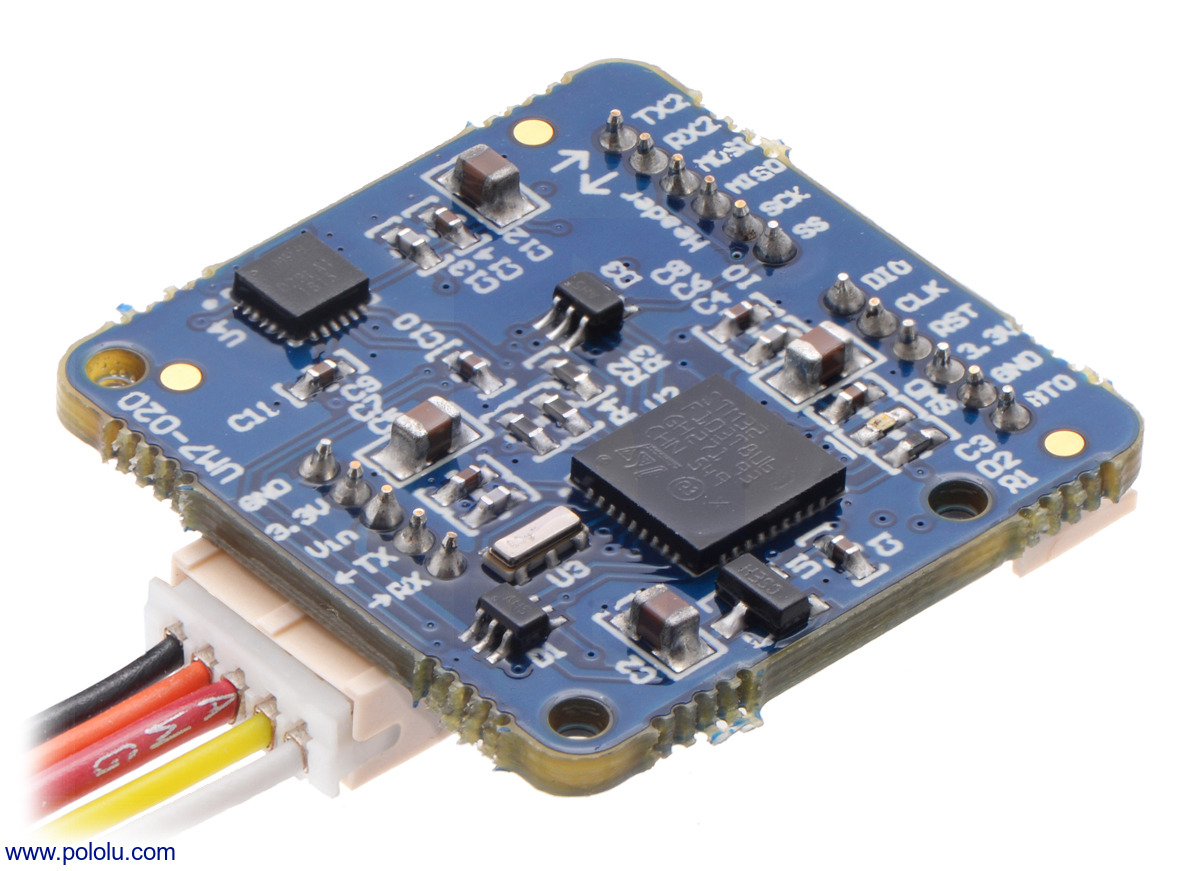

The UM7 is an Attitude and Heading Reference System (AHRS) that takes measurements from its three-axis accelerometer, gyro, and magnetometer and calculates orientation estimates with its integrated microcontroller. It is available with an enclosure as the UM7 or without one as the UM7-LT. Aside from a few updated components and the addition of a conformal coating on the UM7-LT, these sensors are functionally identical to the original versions produced by CH Robotics.
For more information about the orientation sensors, see their product pages below.
Related products


Polo-BOO! Halloween Sale

Halloween is quickly approaching, but there is still plenty of time for you makers out there to build something that will impress/terrify your friends and neighbors, and we want to help! We are having a sale on servos, motors, programmable controllers, sensors, LEDs, power supplies, and more – products that might come in handy for building an amazing costume or interactive yard display. See the sale page for more details and the full list of products.
Note: The United States Postal Service is closed on Monday, October 10 in observance of Columbus Day. Pololu will be in operation and will ship orders via FedEx as usual. Orders scheduled for shipping via USPS on Monday will be shipped the following day.
Remote control food
With Halloween on its way, and trick-or-treating eminent, you might be asking yourself if there are any alternative uses for the mountain of candy bars your kids will soon be bringing home. Well, customer Mike Kohn, whose projects we previously blogged about, has a solution for giving new life to not just candy, but all sorts of unwanted food items: remote controlled food!
For this project, Mike ditched plastic and aluminum and tried out a sampling of more savory chassis materials like candy bars, a carrot, a bell pepper, a grapefruit, and a chicken sausage. The candy bars, carrot, and sausage were used for four-wheeled differential drive cars and the pepper and grapefruit were used for boats. All the vehicles were actuated by a pair of micro metal gearmotors and the cars also used our 32mm wheels. Below is a picture of one car made with a 3 Musketeers bar.
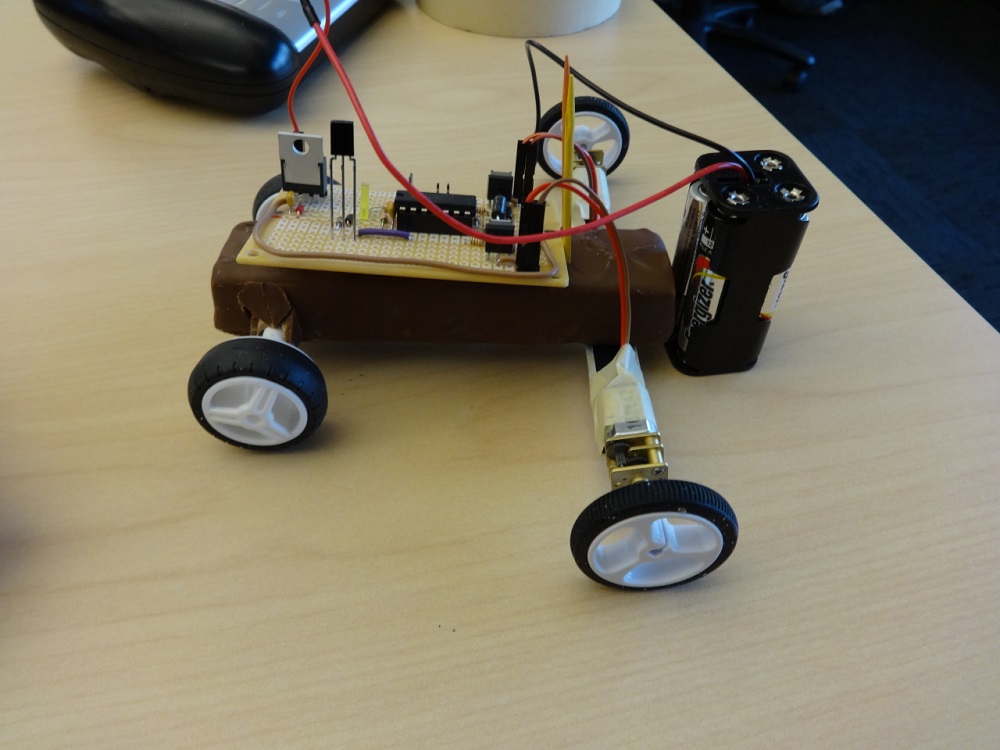 |
Mike also wrote his own firmware for decoding the IR signals from a Syma S107 controller. You can find out which foods made the best chassis and plenty more information about the vehicles, including a parts list, schematic, and several other videos, on Mike’s website.
Related products


RC wildlife photography usingTReX motor controllers and RC switches
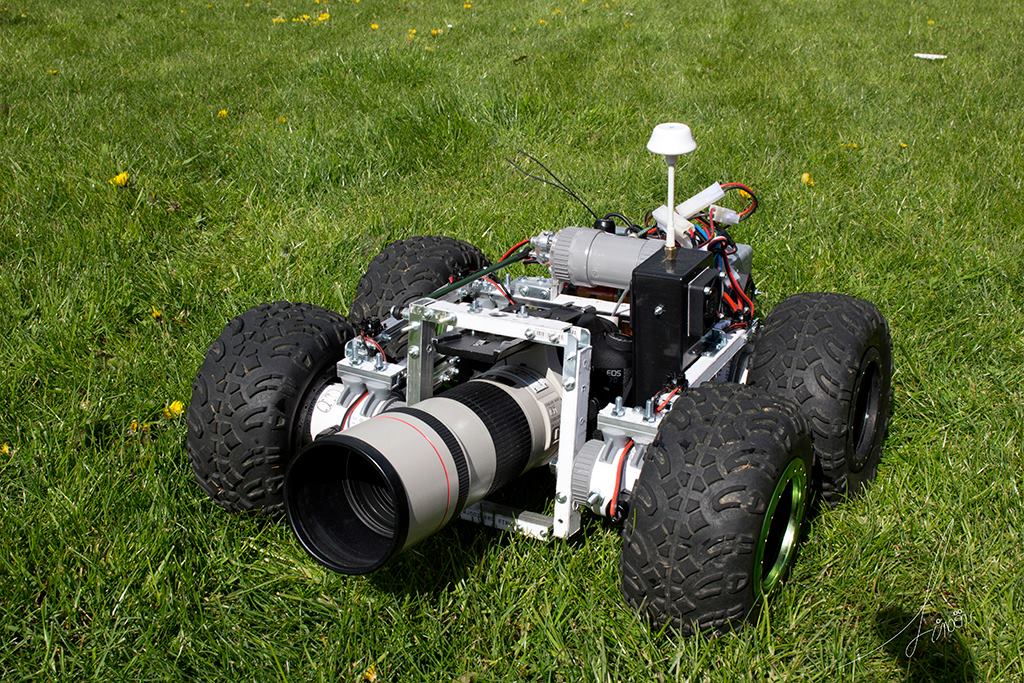 |
Wildlife photographer Stéphane Simoëns uses a remote-controlled, camouflaged vehicle to bring his camera closer to animals without scaring them away. The vehicle is a custom-built, metal-framed, 4-wheeled chassis that is controlled with a pair of our TReX dual motor controllers. One TReX drives while the other provides tilt control for the onboard camera. The vehicle also features three of our RC switches; one switches on and off the video transmitter and the other two control camera shutter and focus. You can find more information about this project in Stéphane’s forum post.
|
|


New products: XYZrobot Bolide humanoid robot DIY kit and A1-16 smart servo
|
|


We are now offering two new products from XYZrobot: the Bolide Y-01 advanced humanoid robot DIY kit and the A1-16 smart servo.
The Bolide Y-01 DIY kit from XYZrobot comes with all of the components needed to build this advanced humanoid robot, including a Bluetooth controller, an Arduino-compatible ATmega1280 microcontroller, sensors, and 18 A1-16 smart servos. The ATmega1280 microcontroller comes preprogrammed to perform a range of complex movements, including dancing, walking and standing up in response to commands from the included Bluetooth remote or a smartphone or tablet running the XYZrobot app. The control board includes a three-axis accelerometer for maintaining postural stability and detecting falls, and the robot also has a distance sensor in its chest that can detect objects in front of it. For those interested in expanding the capabilities of this robot beyond the preprogrammed routines, the Bolide Y-01 control board can be programmed with the Arduino IDE and the XYZrobot Editor software. You can find more details about the Bolide Y-01 advanced humanoid robot DIY kit on its product page.
|
|

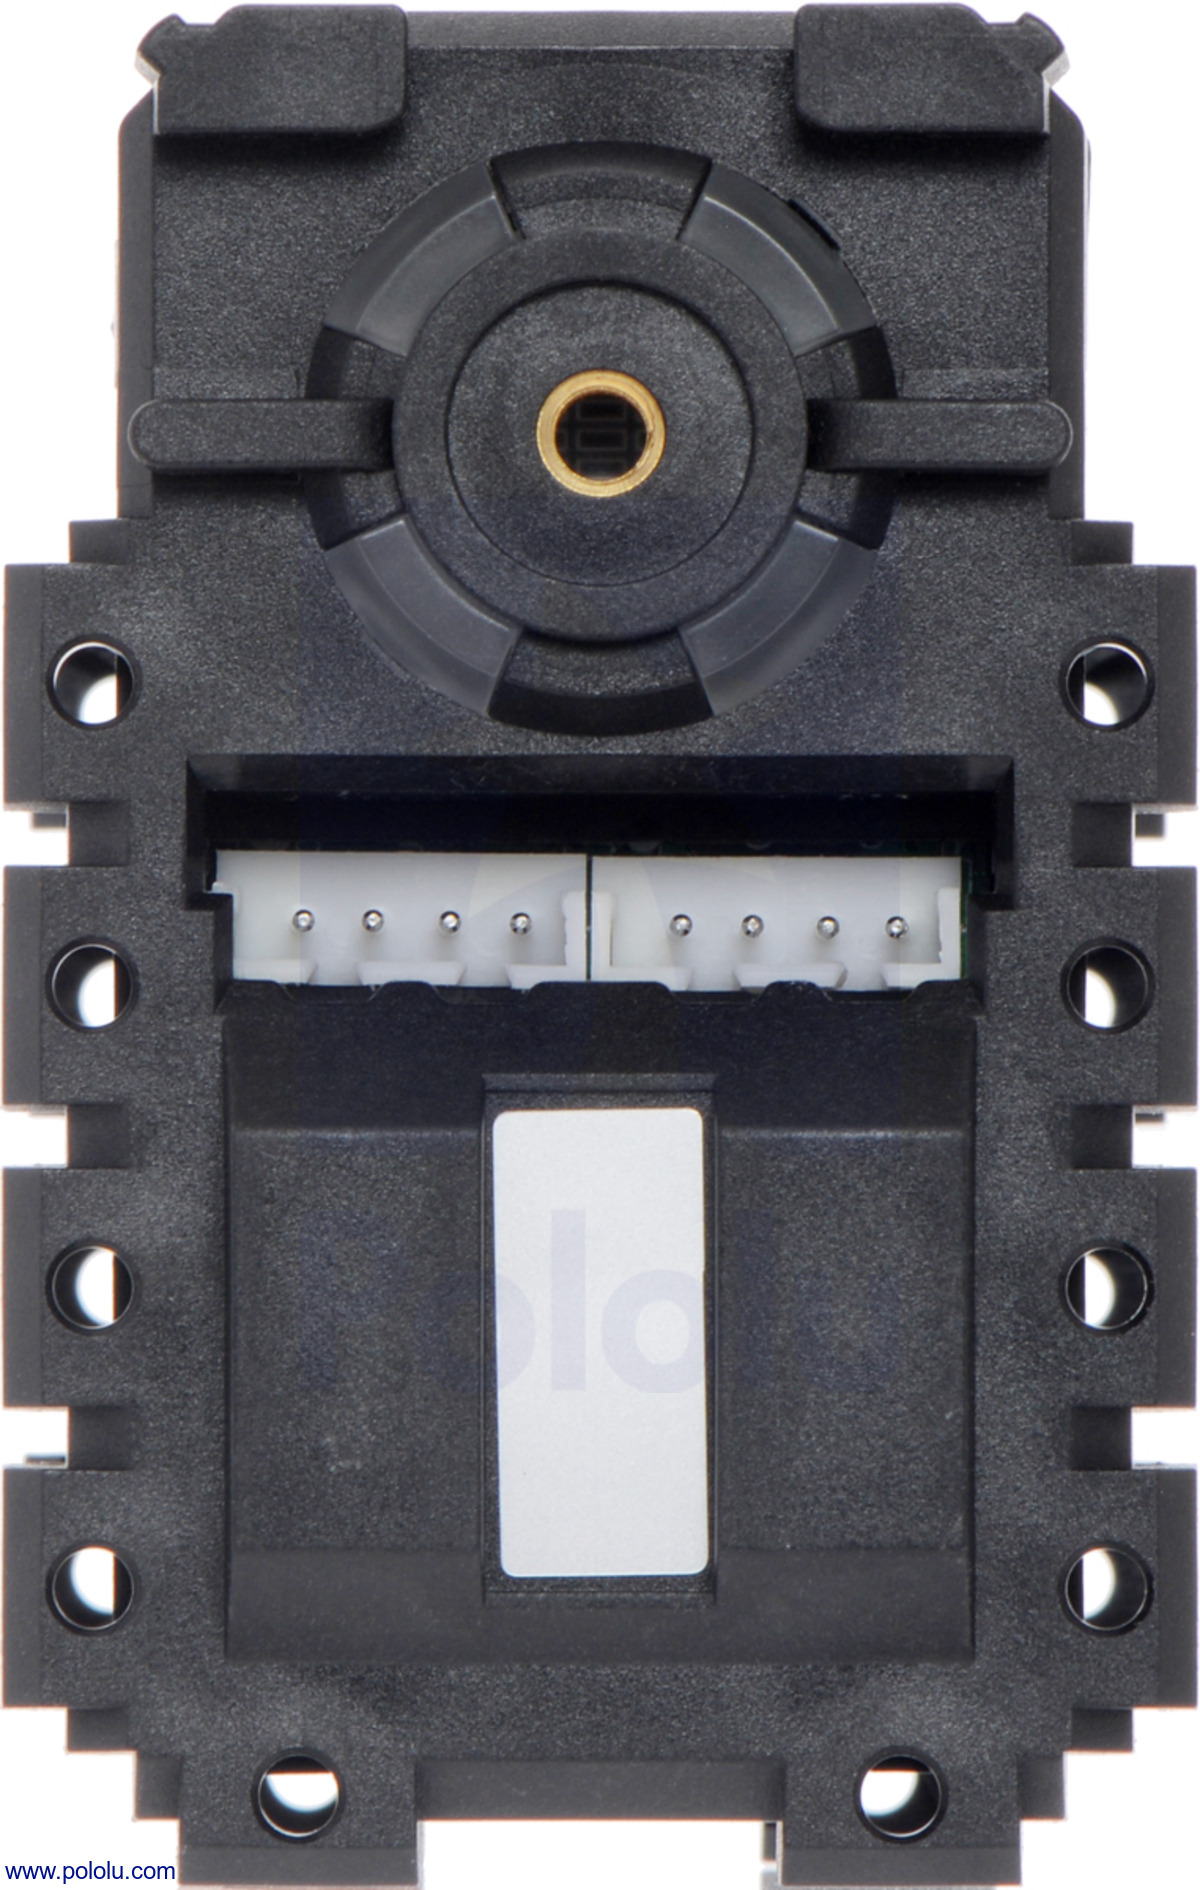
We are perhaps even more excited about carrying the A1-16 smart servos separately. These specialty servos are well suited for applications such as humanoid robots, hexapod robots, and robotic arms that require strong and complex actuation. Unlike the usual RC hobby servos, these servos are not only capable of 360° continuous rotation, but they also offer position control over an effective 330° range. To achieve this kind of motion, they use a TTL serial interface, which also allows them to be daisy chained and controlled from the same serial bus (this is their only method of control, so they will not work with standard RC receivers and servo controllers). In addition, these smart servos provide additional feedback such as position, speed, and temperature! The four-color LED featured on each servo is used as a visual error indicator by default, which is really handy to quickly determine if servos in a chain are experiencing a problem. Alternatively, this LED can be manually controlled through the serial interface. See the A1-16 smart servo product page for more information about this feature-packed servo.


New product: FEETECH FS90 Micro Servo
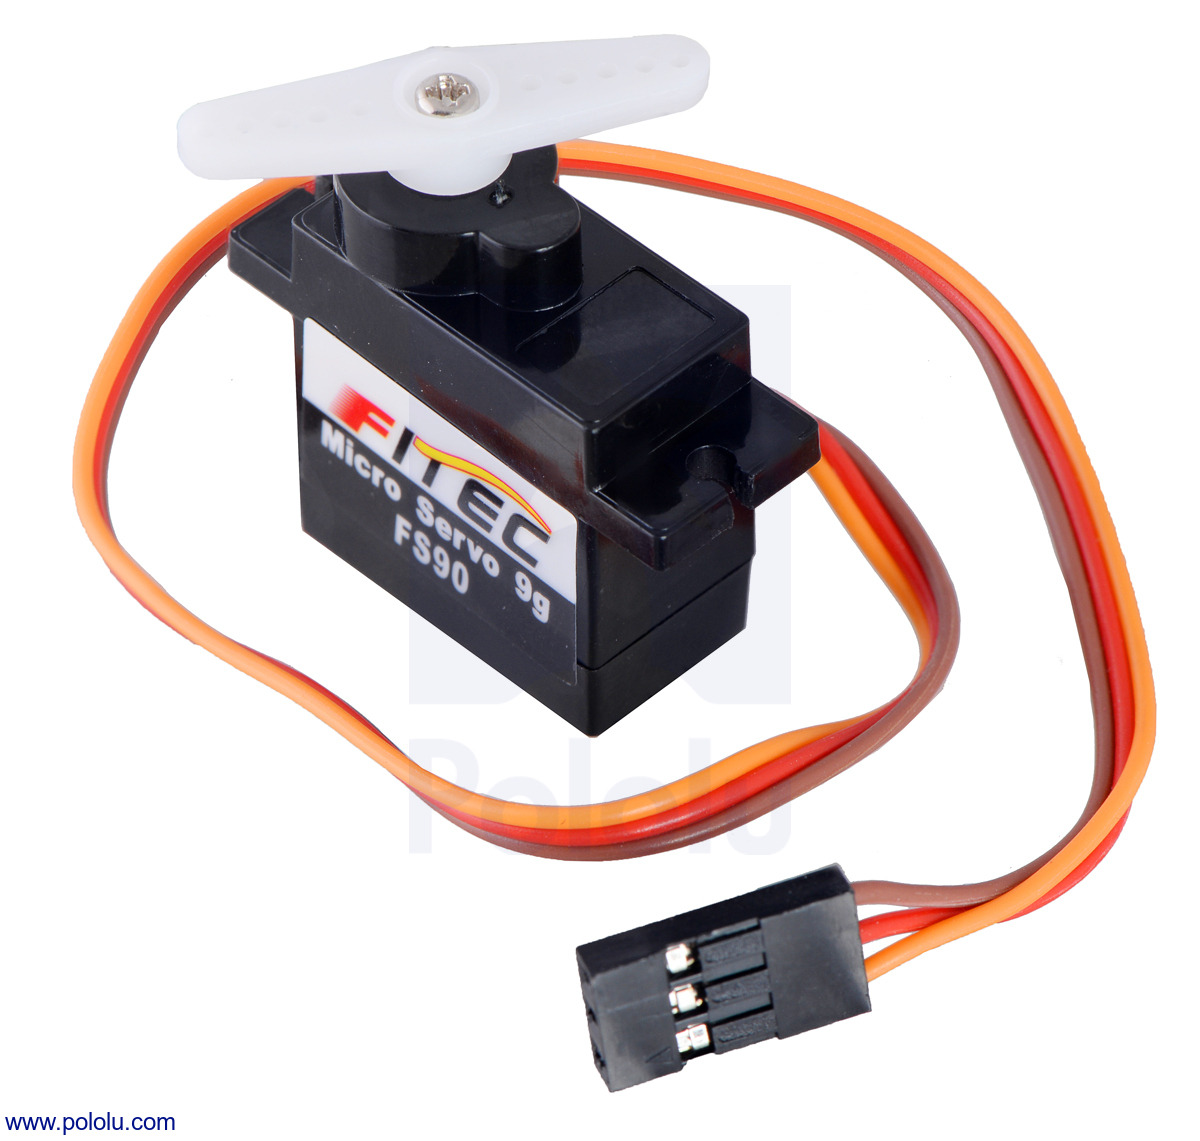 |
We are now carrying the FEETECH FS90 micro servo. At a weight of only 9 g and less than inch long, this servo is great for actuating tiny mechanisms. We also carry the continuous-rotation version of this servo, the FEETECH FS90R.
Related products


Home | Forum | Blog | Support | Ordering Information | Lists | Distributors | BIG Order Form | About | Contact
© 2001–2026 Pololu Corporation


